No edit summary |
m (DarkKing1295 moved page Yoyo glitch to Yo-yo glitch: Hyphenated the yo-yo part.) |
||
| (34 intermediate revisions by 13 users not shown) | |||
| Line 1: | Line 1: | ||
| ⚫ | The '''Yoyo Glitch''' refers to a glitch done using [[Ness (SSBM)|Ness]]' yoyo in ''Melee''. It can be used to attack or grab with near limitless range or attach certain single-[[hitbox]] attacks to Ness' body. The discovery of the glitch was a collaborative effort between [[VilNess]], [[LonelyNess]], and [[Dan smith]], and was spurred on by an innocuous video of an unknown Japanese player accidentally dropping a yoyo hitbox. |
||
| ⚫ | |||
| − | |||
| ⚫ | The '''Yoyo Glitch''' refers to a glitch done using [[Ness]]' yoyo. It can be used to attack or grab with near limitless range or attach certain single-[[hitbox]] attacks to |
||
==Mechanics== |
==Mechanics== |
||
| − | + | Ness' up smash consists of 3 parts each with its own [[hitbox]]: outreaching, spinning, and swinging. The Yoyo Glitch drops the last [[hitbox]] of the [[up smash]] onto the ground and leaves it there until Ness dies or uses a non-projectile attack. |
|
==How to do it== |
==How to do it== |
||
| − | #Use |
+ | #Use Ness' up smash and hit any opponent or destructible part of the stage with the outreaching part of the yoyo. Charge the yoyo very slightly before releasing. |
#Make sure that, after the yoyo is released into its upward swing, it doesn't hit anything else. |
#Make sure that, after the yoyo is released into its upward swing, it doesn't hit anything else. |
||
==Follow-up Techniques== |
==Follow-up Techniques== |
||
| − | ===Thunder Jacket=== |
+ | ===Thunder Jacket=== |
A follow-up technique to the '''Yoyo Glitch''' discovered by [[Simna ibn Sind]]. |
A follow-up technique to the '''Yoyo Glitch''' discovered by [[Simna ibn Sind]]. |
||
| Line 23: | Line 21: | ||
''Effects:'' |
''Effects:'' |
||
| − | *Attaches the hitbox of [[PK |
+ | *Attaches the hitbox of [[PK Thunder]] (Ness' recovery attack) to Ness' body. |
*Blocks most attacks that it collides with and hurts opponents and destructible stages. |
*Blocks most attacks that it collides with and hurts opponents and destructible stages. |
||
| Line 32: | Line 30: | ||
#Perform the '''Yoyo Glitch'''. |
#Perform the '''Yoyo Glitch'''. |
||
| − | #Use D-air and land immediately after the hitbox comes out. This can be done by [[ |
+ | #Use D-air and land immediately after the hitbox comes out. This can be done by [[Short hop fast fall l-cancel]]ing. |
''Effects:'' |
''Effects:'' |
||
| − | *Attaches the hitbox of |
+ | *Attaches the hitbox of Ness' D-air to his lower body. |
*[[Meteor smash]]es opponents and hurts destructible stages. |
*[[Meteor smash]]es opponents and hurts destructible stages. |
||
| Line 45: | Line 43: | ||
#Perform the '''Yoyo Glitch'''. |
#Perform the '''Yoyo Glitch'''. |
||
| − | #Use U-air and land immediately after the hitbox comes out. This can be done by [[ |
+ | #Use U-air and land immediately after the hitbox comes out. This can be done by [[Double jump cancel]]ing. |
''Effects:'' |
''Effects:'' |
||
| − | *Attaches the hitbox of |
+ | *Attaches the hitbox of Ness' U-air to his upper body. |
*Pops up opponents and hurts destructible stages. |
*Pops up opponents and hurts destructible stages. |
||
| Line 62: | Line 60: | ||
''Effects:'' |
''Effects:'' |
||
| − | *Attaches hitbox of |
+ | *Attaches hitbox of Ness' up smash or down smash to his feet. |
*Causes either weak or strong yoyo knockback based on the timing of the setup. |
*Causes either weak or strong yoyo knockback based on the timing of the setup. |
||
| + | |||
| + | === Kirby Jacket === |
||
| + | A follow-up technique to the Yoyo Glitch discovered by Fisac. |
||
| + | |||
| + | ''Instructions:'' |
||
| + | # Perform the Yoyo Glitch. |
||
| + | # Be inhaled and spit out by Kirby |
||
| + | ''Effects:'' |
||
| + | * Attaches the hitbox of Kirby's star launch to Ness' lower body. |
||
| + | |||
| + | === Throw Jacket === |
||
| + | A follow-up technique to the Yoyo Glitch discovered by Kahnu |
||
| + | |||
| + | ''Instructions:'' |
||
| + | # Perform the Yoyo Glitch. |
||
| + | # Have another character use a normal throw on Ness into a wall or ceiling. |
||
| + | ''Effects:'' |
||
| + | * Attaches the hitbox from a throw to Ness' body. |
||
| + | * This is a unique way to get the Dead-Weight KO bonus. |
||
===Deadline=== |
===Deadline=== |
||
| Line 71: | Line 88: | ||
#Perform the '''Yoyo Glitch'''. |
#Perform the '''Yoyo Glitch'''. |
||
| − | #Use any non-projectile attack or a grab and that attack will hit every target in between |
+ | #Use any non-projectile attack or a grab and that attack will hit every target in between Ness and the location the '''Yoyo Glitch''' was performed (if a grab is used then only the target closest to Ness will be affected). |
''Effects:'' |
''Effects:'' |
||
| − | *Adds near-limitless range to |
+ | *Adds near-limitless range to Ness' attacks. |
| + | |||
| + | ===Gallery=== |
||
| + | <gallery captionalign="left"> |
||
| + | yyg.gif|The yoyo glitch being performed. |
||
| + | deadline.gif|Ness performing the Deadline |
||
| + | deadlinesmash.gif|Deadline works with any attack. |
||
| + | deadlineupbs.gif|Deadline works with PK Thunder 2 |
||
| + | thunderjacketshieldrs.gif|Interrupting PK Thunder 2 after performing the yoyo glitch will give Ness a Thunder Jacket. This will block projectiles that hit below Ness' hat |
||
| + | thunderjacketattack.gif|The Thunder Jacket attaches the hitbox from a PK Thunder 2 to Ness. He can then run into people and the PK Thunder 2 will hit them |
||
| + | Kirbyjacket.gif|Kirby can attach a hitbox to Ness. The Kirby Jacket was discovered in April 2015. |
||
| ⚫ | |||
| + | |||
| + | ==Demonstration video== |
||
| + | [[File:Ness Yoyo Glitch Guide v2|425px]] |
||
| − | ==See |
+ | ==See also== |
| − | [[Super Yoyo Glitch]] |
+ | *[[Super Yoyo Glitch]] |
| − | [[SLAPAYO]] |
+ | *[[SLAPAYO]] |
| − | <youtube>http://www.youtube.com/watch?v=DI9KGybiCHo&feature=related</youtube> |
||
[[Category:Techniques (SSBM)]] |
[[Category:Techniques (SSBM)]] |
||
[[Category:Glitches]] |
[[Category:Glitches]] |
||
| + | [[Category:Glitches (SSBM)]] |
||
Latest revision as of 05:43, 15 January 2016
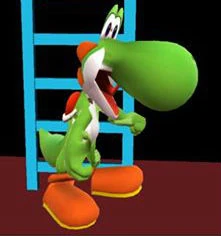
The Yoyo Glitch refers to a glitch done using Ness' yoyo in Melee. It can be used to attack or grab with near limitless range or attach certain single-hitbox attacks to Ness' body. The discovery of the glitch was a collaborative effort between VilNess, LonelyNess, and Dan smith, and was spurred on by an innocuous video of an unknown Japanese player accidentally dropping a yoyo hitbox.
Mechanics
Ness' up smash consists of 3 parts each with its own hitbox: outreaching, spinning, and swinging. The Yoyo Glitch drops the last hitbox of the up smash onto the ground and leaves it there until Ness dies or uses a non-projectile attack.
How to do it
- Use Ness' up smash and hit any opponent or destructible part of the stage with the outreaching part of the yoyo. Charge the yoyo very slightly before releasing.
- Make sure that, after the yoyo is released into its upward swing, it doesn't hit anything else.
Follow-up Techniques
Thunder Jacket
A follow-up technique to the Yoyo Glitch discovered by Simna ibn Sind.
Instructions:
- Perform the Yoyo Glitch.
- Use PK Thunder to floorblast yourself from the air or use PK Thunder to hit yourself into a ledge and grab it.
Effects:
- Attaches the hitbox of PK Thunder (Ness' recovery attack) to Ness' body.
- Blocks most attacks that it collides with and hurts opponents and destructible stages.
Spike Jacket
A follow-up technique to the Yoyo Glitch discovered by MasterofFlames.
Instructions:
- Perform the Yoyo Glitch.
- Use D-air and land immediately after the hitbox comes out. This can be done by Short hop fast fall l-canceling.
Effects:
- Attaches the hitbox of Ness' D-air to his lower body.
- Meteor smashes opponents and hurts destructible stages.
Star Jacket
A follow-up technique to the Yoyo Glitch discovered by MasterofFlames.
Instructions:
- Perform the Yoyo Glitch.
- Use U-air and land immediately after the hitbox comes out. This can be done by Double jump canceling.
Effects:
- Attaches the hitbox of Ness' U-air to his upper body.
- Pops up opponents and hurts destructible stages.
Toy Jacket
A follow-up technique to the Yoyo Glitch discovered by Earthbound360.
Instructions:
- Perform the Yoyo Glitch
- Use up smash or down smash on a disappearing platform timed so the platform disappears right as the yoyo comes out. This can be done on the awnings in Onett.
Effects:
- Attaches hitbox of Ness' up smash or down smash to his feet.
- Causes either weak or strong yoyo knockback based on the timing of the setup.
Kirby Jacket
A follow-up technique to the Yoyo Glitch discovered by Fisac.
Instructions:
- Perform the Yoyo Glitch.
- Be inhaled and spit out by Kirby
Effects:
- Attaches the hitbox of Kirby's star launch to Ness' lower body.
Throw Jacket
A follow-up technique to the Yoyo Glitch discovered by Kahnu
Instructions:
- Perform the Yoyo Glitch.
- Have another character use a normal throw on Ness into a wall or ceiling.
Effects:
- Attaches the hitbox from a throw to Ness' body.
- This is a unique way to get the Dead-Weight KO bonus.
Deadline
A follow-up technique to the Yoyo Glitch discovered by LonelyNess.
Instructions:
- Perform the Yoyo Glitch.
- Use any non-projectile attack or a grab and that attack will hit every target in between Ness and the location the Yoyo Glitch was performed (if a grab is used then only the target closest to Ness will be affected).
Effects:
- Adds near-limitless range to Ness' attacks.
Gallery
")
")
")
")
")
")
")
Demonstration video


See also
- Super Yoyo Glitch
- SLAPAYO