| Line 92: | Line 92: | ||
|- |
|- |
||
| [[Zelda]] || [[Farore's Wind]] || Zelda flashes for a second, then invisibly teleports a long distance in one of the 8 main directions. This move has a long recovery range, but is very limited in its options as to direction, making it possible to overshoot stages or platforms, or get caught under stage lips, like in Battlefield. In SSBB, opponents near where she reappears are damaged. Can be canceled on the edge in Brawl for a surprise KO such as combined with a D-Air or U-Air. |
| [[Zelda]] || [[Farore's Wind]] || Zelda flashes for a second, then invisibly teleports a long distance in one of the 8 main directions. This move has a long recovery range, but is very limited in its options as to direction, making it possible to overshoot stages or platforms, or get caught under stage lips, like in Battlefield. In SSBB, opponents near where she reappears are damaged. Can be canceled on the edge in Brawl for a surprise KO such as combined with a D-Air or U-Air. |
||
| − | :* [[Sheik]]: [[Vanish]]: [[Bouncing Fish]] [[SSBWU/3DS]] Sheik stays in one place (or on the air, a slight jump upward), then disappears with a puff of flame. Any enemy caught in that flame will be dealt damage and shot straight upwards. Sheik will then reappear a short distance in any direction from where she disappeared, but will have a much longer than usual lagtime upon hitting the ground. [[Bouncing Fish]] |
+ | :* [[Sheik]]: [[Vanish]]: [[Bouncing Fish]] [[SSBWU/3DS]] Sheik stays in one place (or on the air, a slight jump upward), then disappears with a puff of flame. Any enemy caught in that flame will be dealt damage and shot straight upwards. Sheik will then reappear a short distance in any direction from where she disappeared, but will have a much longer than usual lagtime upon hitting the ground. [[Bouncing Fish]] is somewhat identical to [[Quick Attack]] but slower. |
|}</div> |
|}</div> |
||
Revision as of 21:05, 16 June 2014
Some Up Special Moves are Tether Recoveries.
The Up Special Move, (commonly referred to as Up B in iterations prior to Super Smash Bros. Brawl) is a Special Move performed by pressing the Special Move button while holding the Control Stick upwards.
Up Special Moves are usually working as a character's third jump or Tether Recovery (only in Brawl) used to recover from off-stage; the Up Special will often put the character into helpless mode. The only exceptions are Yoshi and Jigglypuff, neither of whose Up Specials act as jumps (with the exception of Yoshi's in Brawl). It should be noted that in Brawl, when an Up Special is used on the ground, it provides a greater vertical movement than when used in the air; an example is Samus's Screw Attack. Moreover, for Tether Recoveries used before the midair jump is used, the character will also gain a greater vertical distance to make up for the jump not used.
List of Up Special Moves
| Character | Move | Description |
|---|---|---|
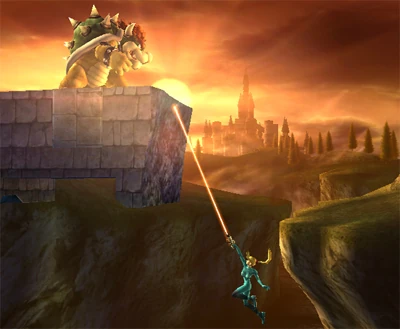
| Bowser | Whirling Fortress | Bowser retracts into his shell and quickly spins horizontally. Has fairly high damage and knockback, and quite a bit of horizontal distance. Very useful Out of Shield move. |
| Captain Falcon | Falcon Dive | Captain Falcon is given a quick boost upwards and forwards, and anything within his target area is pulled to him, given a blast of fiery energy, and launched away. If it connects, it sends Falcon backwards, but also removes the helplessness state, allowing him to perform the move again. This move acts as a grab, so it can hit enemies that are shielding. The range at which the enemy is latched on to Captain Falcon is much greater in SSB than in SSBM or SSBB. Very useful end of combo move in SSB (such as after U-Airs) and moderately useful Out of Shield move. |
| Diddy Kong | Rocketbarrel Boost | This move can be charged, but holding it too long will cause it to come off and land on the stage. If Diddy gets hit while using this move, the barrel can possibly fly off and hit any enemies in the way. He takes 5% damage when using this move under a floor. Spikes opponents. |
| Donkey Kong | Spinning Kong | Donkey Kong extends both of his arms out, hands balled into fists, and spins quickly horizontally. Like Bowser's Whirling Fortress, this attack has very good horizontal recovery, decent damage and knockback, and some poor vertical recovery distance. It is worth noting that the most damaging and highest priority hitboxes are in D.K.'s fists, making his legs vulnerable to projectiles while he is recovering. Has Invincibility frames at the beginning in SSB, useful gimp move in SSB, high power kill move in Melee, approach move in Brawl. |
| Dr. Mario | Super Jump Punch | Functionally identical to Mario's. The only difference is that Dr. Mario's punch hits hard, where as Mario's is more of a spring punch. Can be canceled, though nearly impossible. This is called Coin Canceling or Up B canceling. |
| Falco | Fire Bird | Falco stops in midair with flames gathering around him, then erupts like a rocket, flying quickly in one direction. This direction is chosen by moving the joystick in any direction during the point where flames are gathering. While flying through the air, the Fire Bird deals decent damage and knockback to any who are caught in the trajectory. Is technically a kill move in melee as it can be comboed into by shine |
| Fox | Fire Fox | Behaves similarly to Falco's Fire Bird, except for a few small changes: The Firefox deals slight damage to any enemy who comes into contact with Fox while he is still gathering flames (except in SSB), and the distance traveled is significantly longer. |
| Ganondorf | Dark Dive | Behaves almost identically to the Falcon Dive, except in Melee it charges the enemy full of dark electricity rather than fire, and deals much higher damage and knockback (it is also considerably slower). In Brawl it can grab edge-hoggers and has poorer damage and knockback than Falcon Dive and also does an uppercut if it doesn't hit anyone (The uppercut will hit someone far away, but not grab them). |
| Ice Climbers | Belay | This attack sends one of the Ice Climbers far into the air, with a cord attached to the other one, which pulls it up afterwards. This attack has the highest vertical recovery range of any Up B move in SSBM, but it can only be performed if both Ice Climbers are together. If they are separated or one is defeated, this move will do nothing but enter the Ice Climber into helpless mode. However, in Brawl, if used by a lone Ice Climber it will rise very slightly much like Yoshi's Egg Throw if Yoshi tries to recover with this move. |
| Ike | Aether | Ike throws his sword in the air, then jumps up, catches it, and falls back to earth. The move cannot be interrupted while Ike and his sword are separated, and Ike will be temporarily immune to flinching. |
| Jigglypuff | Sing | Pink waves and musical notes radiate out from Jigglypuff. Any non-airborne enemy caught within these waves will be put to sleep for a short period of time. Like a grab, wiggling the joystick can cause the character to escape the sleep more quickly, but higher damage forces the opponent into sleep for longer. Most of the time, if the character is hit by the start of the attack and the player wiggles their joystick rapidly, the sleep will wear off before Jigglypuff has even finished its Sing attack. Hitting the character or nudging them off the edge will cause them to wake up. This is not a recovery move, does not at all aid in recovery, and does not put Jigglypuff into a state of helplessness. Interestingly, in Melee, although this move deals no damage, it can still break targets in Target Test mode (If used before one does anything else, it will hit the two targets next to Jigglypuff (Melee target test). Considered the 3rd worst move in SSB (the 2 worst are considered to be DK's Dash Attack and Samus's Up Tilt respectably) |
| King Dedede | Super Dedede Jump | One of his major attacks from the series, King Dedede takes a great leap into the air and lands with tremendous force. however, when he lands, he is left vulnerable to attack. In addition, one can cancel the jump by tapping down on the controller. However, if one does this right when he's about to land or hits a ceiling in the middle of the jump, it will leave King Dedede vulnerable for even longer. Direction can be changed by holding the control stick before Dedede jumps. If the Control stick is not touched before the move, Dedede will shoot straight up and plummet down. Cannot grab ledges during the jump unless it's canceled and he can't grab it immediately after cancel it. |
| Kirby | Final Cutter | Kirby extends a blade and launches straight up into the air, then proceeds to fall at a very fast speed (this attack does not normally cause helplessness. If Kirby uses it in midair and does not land on a platform or edge, he will unavoidably fall to his death. Also, when Kirby lands, if the platform he lands on disappears, such as in the Pictochat stage, he will become helpless). While moving up and down, Kirby can catch enemies with the extended blade. When Kirby hits the ground, it shoots a wave forward along the ground, also dealing damage. Is moderately useful for spamming. Spikes in SSB. |
| Link | Spin Attack | Link extends his sword horizontally and spins, shooting slashing energy slightly beyond the length of the blade. Midair it gains vertical distance and a fair amount of horizontal distance. On air, any enemy caught deep inside the spin will be hit several times. Enemies caught at the outside of the spin will be hit with a fairly sizable knockback. In Brawl, when on the ground, he can charge this move. In the air, this move also reflects some projectiles. Is one of the most powerful semi-spikes in melee if the tip of the blade is hit with, low power in SSB, considered to be the worst recovery of any character in SSB and overall possibly the worst recovery move in any game. Moderate power in Brawl. |
| Lucas | PK Thunder | Shoots a bolt out of Lucas's head. This bolt has a round head and a long, wispy tail, and is composed of electricity. While it is in the air, the bolt can be controlled by moving the control stick (Lucas will remain stationary, or fall if he is in midair). Running the head into an opponent will cause damage. Slight damage can also be caused by hitting an opponent with the tail of the attack. The bolt will not disappear after hitting an opponent, regardless of which portion of it makes contact. If the PK Thunder is steered into Lucas himself, it launches him in the opposite direction from the one he was hit at. While being launched, Lucas is invulnerable for a large period of time and can cause significant damage and knockback to anyone hit by his body. Even if this attack is not used to launch Lucas, it will cause helplessness when used in midair. Is a moderately good move to edgeguard with. |
| Lucario | ExtremeSpeed | Pauses very briefly then moves very quickly. While moving, Lucario can change its angle up to 90 degrees. Afterwards, if it touches a wall, it can wall cling. Deals no damage. Can be canceled on the ground to allow Lucario to attack out of it. |
| Luigi | Super Jump Punch | Luigi's Super Jump Punch differs from Mario's and Dr. Mario's in that it does not send Luigi forward at all except in SSB (making it much worse for horizontal recovery). Additionally, if the enemy is far inside the hitbox, rather than racking up multiple coins, it performs a "Fire Jump Punch", with a heavy damage sound (like a fully charged Home Run Bat or Jigglypuff's Rest attack), dealing a much higher percent and knockback. The hit at the outside of the hitbox only deals 1% and makes one coin, and has no knockback at all. Luigi's finishing move in SSB. |
| Mario | Super Jump Punch | Sends Mario upwards and slightly forwards. Any enemy hit while performing this attack will be pulled upwards with Mario, and coins will fly out. If they are very close when it is used, this can hit several times for multiple coins and a higher % damage. If they are at the edge of the hitbox, it will only hit for 1 or 2 percent (and coins). |
| Marth | Dolphin Slash | Marth flies quickly upwards, blade extended vertically. Provides decent vertical recovery, but very little horizontal recovery (a bit more horizontal recovery in Brawl). It's also a good KO move if hit during the beginning. Can be reversed (called simply a Reverse Dolphin Slash) which has interestingly enough higher knockback |
| Meta Knight | Shuttle Loop | Leaps into the air with sword drawn, and then backflips 270 degrees. Meta Knight automatically glides after this move (if he stops the glide he becomes helpless). It can be used as an offensive move if hit just after he starts to use it. One of Meta Knight's best ground killing moves. |
| Mewtwo | Teleport | Mewtwo vanishes and appears a fair distance away in any direction. Does not cause any damage. Overall possibly the best recovery in melee due to its low cool-down time, speed, and distance. |
| Mr. Game & Watch | Fire | Mr. G&W launches quickly upwards, propelled by a temporary team of Game & Watch characters with a fireman's trampoline. High vertical distance but minimal horizontal distance. Can be useful for very quickly hitting an enemy far above Mr. G&W. Adjusted in Brawl to include parachute at the end of the propulsion by the Firemen making it easy to get additional horizontal distance while in Melee he becomes helpless after using it. Causes a powerful gust of wind at the beginning of the move in brawl. |
| Olimar | Pikmin Chain(SSBB)/Winged Pikmin (SSBWU/3DS) | The Pikmin currently following Olimar form into a chain that Olimar uses to latch onto a ledge, performing a Tether Recovery. The number of Pikmin following Olimar at the time drastically effects the distance this move can cover. Can be stopped by a player grabbing the ledge, therefore making Olimar unable to grab the ledge with this move. Moderately useful combo move |
| Ness | PK Thunder | Shoots a bolt out of Ness' head. This bolt has a round head and a long, wispy tail, and is composed of electricity. While it is in the air, the bolt can be controlled by moving the joystick (Ness will remain stationary, or fall if he is in midair). Running the head into an opponent will cause damage, but it will cause the attack to disappear. Slight damage can also be caused by hitting an opponent with the tail of the attack, and this will not cause the attack to disappear. If the PK Thunder is steered into Ness himself, it launches him in the opposite direction from the one he was hit at. While being launched, Ness is invulnerable for a large period of time and can cause significant damage and knockback to anyone hit by his body. Even if this attack is not used to launch Ness, it will cause helplessness when used in midair. |
| Peach | Parasol | Peach pulls out an umbrella and opens it, greatly reducing her fall speed and increasing her horizontal recovery range. As she is pulling it out, she is given a slight vertical boost. The parasol stays extended, reducing fall speed until Peach either hits the ground or presses down on the controller. Pressing down will cause Peach to go into helplessness and fastfall, but uniquely, pressing up in this state will resume the Parasol attack. Additionally, the top of the Parasol deals slight damage and upwards knockback, allowing skilled players to juggle several hits of this, especially against low % and fastfalling characters (much more useful in melee). It is possible to continuously do this vs an edgeguarding opponent with a bad vertical recovery to gimp them (called an umbrella gimp). |
| Pichu | Agility | Pichu performs a quick teleport-like action in any direction. Inputting another direction during this first teleport allows Pichu to immediately perform a second teleport upon finishing the first. Pichu will also be dealt 1% damage for the first teleport then 3% for the second. If the control stick is released during the second teleport, it will get slightly more distance. It moves more smoothly than Pikachu's Quick Attack. This move does no damage. |
| Pikachu | Quick Attack | Behaves like Pichu's Agility, except does not deal damage to Pikachu and any enemy caught at the mid or end point of these teleportations will be dealt slight damage (in SSB, it does no damage). can QAC in brawl. Widely considered to be the best recovery in the original SSB (it remains one of the overall top recoveries of any Smash Bros. game due to its multiple invincibility frames and range). |
| Pit | Wings of Icarus (SSBB) / Power of Flight (SSBWU/3DS) | The Wings of Icarus allows Pit to fly freely for a while. It can be attacked out of. If Pit is hit while using the move, he is unable to use it again until he lands. Can be used in a brawl technique called Wing Dashing which allows Pit to move around the screen quickly. |
| Pokémon Trainer | Varies | As Pokémon Trainer does not actively engage in battle himself, instead relying on his three Pokémon, there are three different moves that can be considered his Up Special attacks:
|
| Roy | Blazer | Similar to Marth's Dolphin Slash, except it sets the enemy character on fire. If the control stick is held left or right during the initiation of the move, it will increase horizontal distance at the expense of vertical distance. There is no equivalent to the Reverse Dolphin Slash due to the hitbox and sweetspot layout of Roy's blade being different than Marth's. Can instantly kill a grounded Jigglypuff in Melee by using a Reverse Blazer while right next to it. |
| R.O.B. | Robo Burner | R.O.B. uses a rocket thruster to boost himself into the air. Offers both vertical and horizontal recovery. It is possible to stop the move, use an attack or other move, and then resume hovering. After landing, R.O..B. must remain on the ground for 1.5 seconds before the move will be fully recharged. |
| Samus | Screw Attack | Samus quickly rolls up into a ball and launches upwards, spinning. Any enemy caught at any point within the attack will be pulled up to the top and hit multiple times for a low percent. This move is notable only in that it has a fairly high priority and low start-up time. Samus's air dodge actually can achieve more distance, especially since her midair grapple can be used immediately after air dodging. Has high priority in all 3 Smash Bros. games, can be used as an Out of Shield move in all 3 games, can be DI'd out of in SSB and Melee. Is a stand alone Shield break combo in SSB.
|
| Snake | Cypher | Grabs his flying reconnaissance camera and flies upward. Can be re-used by hurting himself with his C4. Upon use in the air, Snake will fall for a short distance as he grabs the Cypher. If the Cypher hits a Smart Bomb explosion, the Cypher (and Snake) will stay in one place (Snake will be hurt by the explosion) but continue to rise afterwards. Staying in the explosion does not affect the time in which Snake holds on to his Cypher. |
| Sonic | Spring Jump | A classic spring from the Genesis-era Sonic the Hedgehog games appears below the blue blur, propelling him upward with a powerful bounce. The spring can stay in the ground and if the opponent moves quickly enough, he or she can also utilize this spring, bouncing equally as high. If used in the air, the spring will fall and damage opponents who touch it. Good Out of Shield move to avoid hits. |
| Toon Link | Spin Attack | Identical to Link's, except it gives much longer recovery distance, a bit shorter in range and hits multiple times on the ground. |
| Wario | Corkscrew | Wario spins and moves vertically slightly. Goes much higher when Wario-Man. |
| Wolf | Fire Wolf | Similar to Fox's Fire Fox and Falco's Fire Bird. It sends Wolf into the air horizonally almost immediately after it is used. Can use control stick to determine the direction upon activation. Unlike Fire Fox, the attack deals multiple hits and carries the enemy it catches with it and has no fire effect. Moderately good move for combos if the opponent has bad Smash DI. |
| Yoshi | Egg Toss | Yoshi launches an egg upwards in an arc, which can be angled along a variety of trajectories, hitting anywhere from far horizontally in front of Yoshi to slightly behind and above Yoshi. The egg explodes upon contact or after moving along for a set air-time. Yoshi's Up Special is fairly unique in that it is not a recovery move, does not noticeably aid in recovery, and does not put Yoshi into a state of helplessness. In Super Smash Bros. Brawl, Yoshi can gain some vertical distance with this move and can ledge grab. Can be canceled on the ledge (called Egg Ledge Cancelling). High knockback in SSB. |
| Young Link | Spin Attack | Identical to Toon Link's, except cannot be charged. |
| Zelda | Farore's Wind | Zelda flashes for a second, then invisibly teleports a long distance in one of the 8 main directions. This move has a long recovery range, but is very limited in its options as to direction, making it possible to overshoot stages or platforms, or get caught under stage lips, like in Battlefield. In SSBB, opponents near where she reappears are damaged. Can be canceled on the edge in Brawl for a surprise KO such as combined with a D-Air or U-Air.
|
External Links
Example of Pikachu's invincibility frames
| |||||||||||||||||||||||