No edit summary Tag: Visual edit |
|||
| (44 intermediate revisions by 6 users not shown) | |||
| Line 26: | Line 26: | ||
| style="background-color:#FFFFAF" | Downloadable |
| style="background-color:#FFFFAF" | Downloadable |
||
|} |
|} |
||
| − | {| class="wikitable sortable" style="text-align:center;font-size: |
+ | {| class="wikitable sortable" style="text-align:center;font-size: 90%" |
| − | ! width=" |
+ | ! width="12%" |# |
| − | ! width=" |
+ | ! width="20%" |Stage |
| + | ! width="18%" |Universe |
||
! width="7%" |{{GameIcon|SSB64|25px}} |
! width="7%" |{{GameIcon|SSB64|25px}} |
||
! width="7%" |{{GameIcon|SSBM|25px}} |
! width="7%" |{{GameIcon|SSBM|25px}} |
||
| Line 36: | Line 37: | ||
! width="7%" |{{GameIcon|SSBU|25px}} |
! width="7%" |{{GameIcon|SSBU|25px}} |
||
|- |
|- |
||
| + | | <big><big><big>001 |
||
| − | | align="left" |[[Special Stages: Battlefield|Battlefield]] {{GameIcon|SSBM|16px}} |
||
| + | |'''[[Special Stages: Battlefield|Battlefield]]''' {{GameIcon|SSBM|16px}}<br>[[File:S001.jpg|150px]] |
||
| − | | align="left" |{{symbol|smash|20px}}{{uv|Super Smash Bros.}} |
||
| + | |{{symbol|smash|36px}}<br>{{uv|Super Smash Bros.}} |
||
|{{n}} |
|{{n}} |
||
| style="background-color:#D0D0D0" |{{y}} |
| style="background-color:#D0D0D0" |{{y}} |
||
| Line 45: | Line 47: | ||
|{{n}} |
|{{n}} |
||
|- |
|- |
||
| + | | <big><big><big>002 |
||
| − | | align="left" |[[Battlefield (SSBB)|Battlefield]] {{GameIcon|SSBB|16px}} |
||
| + | |'''[[Battlefield (SSBB)|Battlefield]]''' {{GameIcon|SSBB|16px}}<br>[[File:S002.jpg|150px]] |
||
| − | | align="left" |{{symbol|smash|20px}}{{uv|Super Smash Bros.}} |
||
| + | |{{symbol|smash|36px}}<br>{{uv|Super Smash Bros.}} |
||
|{{n}} |
|{{n}} |
||
|{{n}} |
|{{n}} |
||
| Line 54: | Line 57: | ||
|{{n}} |
|{{n}} |
||
|- |
|- |
||
| + | | <big><big><big>003 |
||
| − | | align="left" |[[Battlefield (SSBWU/3DS)|Battlefield]] {{GameIcon|SSB4-3|16px}} |
||
| + | |'''[[Battlefield (SSBWU/3DS)|Battlefield]]''' {{GameIcon|SSB4-3|16px}}<br>[[File:S003.png|150px]] |
||
| − | | align="left" |{{symbol|smash|20px}}{{uv|Super Smash Bros.}} |
||
| + | |{{symbol|smash|36px}}<br>{{uv|Super Smash Bros.}} |
||
|{{n}} |
|{{n}} |
||
|{{n}} |
|{{n}} |
||
| Line 63: | Line 67: | ||
|{{n}} |
|{{n}} |
||
|- |
|- |
||
| + | | <big><big><big>004 |
||
| − | | align="left" |[[Battlefield (SSBWU/3DS)|Battlefield]] {{GameIcon|SSB4-U|16px}} |
||
| + | |'''[[Battlefield (SSBWU/3DS)|Battlefield]]''' {{GameIcon|SSB4-U|16px}}<br>[[File:S004.jpg|150px]] |
||
| − | | align="left" |{{symbol|smash|20px}}{{uv|Super Smash Bros.}} |
||
| + | |{{symbol|smash|36px}}<br>{{uv|Super Smash Bros.}} |
||
|{{n}} |
|{{n}} |
||
|{{n}} |
|{{n}} |
||
| Line 72: | Line 77: | ||
|{{n}} |
|{{n}} |
||
|- |
|- |
||
| + | | <big><big><big>005 |
||
| − | | align="left" |[[Battlefield (SSBU)|Battlefield]] {{GameIcon|SSBU|16px}} |
||
| + | |'''[[Battlefield (SSBU)|Battlefield]]''' {{GameIcon|SSBU|16px}}<br>[[File:S005.jpg|150px]] |
||
| − | | align="left" |{{symbol|smash|20px}}{{uv|Super Smash Bros.}} |
||
| + | |{{symbol|smash|36px}}<br>{{uv|Super Smash Bros.}} |
||
|{{n}} |
|{{n}} |
||
|{{n}} |
|{{n}} |
||
| Line 81: | Line 87: | ||
|{{y}} |
|{{y}} |
||
|- |
|- |
||
| + | | <big><big><big>006 |
||
| − | | align="left" |[[Big Battlefield]] {{GameIcon|SSB4-U|16px}} |
||
| + | |'''[[Big Battlefield]]''' {{GameIcon|SSB4-U|16px}}<br>[[File:S006.jpg|150px]] |
||
| − | | align="left" |{{symbol|smash|20px}}{{uv|Super Smash Bros.}} |
||
| + | |{{symbol|smash|36px}}<br>{{uv|Super Smash Bros.}} |
||
|{{n}} |
|{{n}} |
||
|{{n}} |
|{{n}} |
||
| Line 90: | Line 97: | ||
|{{n}} |
|{{n}} |
||
|- |
|- |
||
| + | | <big><big><big>007 |
||
| − | | align="left" |[[Big Battlefield (Ultimate)|Big Battlefield]] {{GameIcon|SSBU|16px}} |
||
| + | |'''[[Big Battlefield (SSBU)|Big Battlefield]]''' {{GameIcon|SSBU|16px}}<br>[[File:S007.jpg|150px]] |
||
| − | | align="left" |{{symbol|smash|20px}}{{uv|Super Smash Bros.}} |
||
| + | |{{symbol|smash|36px}}<br>{{uv|Super Smash Bros.}} |
||
|{{n}} |
|{{n}} |
||
|{{n}} |
|{{n}} |
||
| Line 99: | Line 107: | ||
|{{y}} |
|{{y}} |
||
|- |
|- |
||
| + | | <big><big><big>008 |
||
| − | | align="left" |[[Special Stages: Final Destination|Final Destination]] {{GameIcon|SSBM|16px}} |
||
| + | |'''[[Special Stages: Final Destination|Final Destination]]''' {{GameIcon|SSBM|16px}}<br>[[File:S008.jpg|150px]] |
||
| − | | align="left" |{{symbol|smash|20px}}{{uv|Super Smash Bros.}} |
||
| + | |{{symbol|smash|36px}}<br>{{uv|Super Smash Bros.}} |
||
|{{n}} |
|{{n}} |
||
| style="background-color:#D0D0D0" |{{y}} |
| style="background-color:#D0D0D0" |{{y}} |
||
| Line 108: | Line 117: | ||
|{{n}} |
|{{n}} |
||
|- |
|- |
||
| + | | <big><big><big>009 |
||
| − | | align="left" |[[Final Destination (SSBB)|Final Destination]] {{GameIcon|SSBB|16px}} |
||
| + | |'''[[Final Destination (SSBB)|Final Destination]]''' {{GameIcon|SSBB|16px}}<br>[[File:S009.jpg|150px]] |
||
| − | | align="left" |{{symbol|smash|20px}}{{uv|Super Smash Bros.}} |
||
| + | |{{symbol|smash|36px}}<br>{{uv|Super Smash Bros.}} |
||
|{{n}} |
|{{n}} |
||
|{{n}} |
|{{n}} |
||
| Line 117: | Line 127: | ||
|{{n}} |
|{{n}} |
||
|- |
|- |
||
| + | | <big><big><big>010 |
||
| − | | align="left" |[[Final Destination (SSBWU/3DS)|Final Destination]] {{GameIcon|SSB4-3|16px}} |
||
| + | |'''[[Final Destination (SSBWU/3DS)|Final Destination]]''' {{GameIcon|SSB4-3|16px}}<br>[[File:S010.jpg|150px]] |
||
| − | | align="left" |{{symbol|smash|20px}}{{uv|Super Smash Bros.}} |
||
| + | |{{symbol|smash|36px}}<br>{{uv|Super Smash Bros.}} |
||
|{{n}} |
|{{n}} |
||
|{{n}} |
|{{n}} |
||
| Line 126: | Line 137: | ||
|{{n}} |
|{{n}} |
||
|- |
|- |
||
| + | | <big><big><big>011 |
||
| − | | align="left" |[[Final Destination (SSBWU/3DS)|Final Destination]] {{GameIcon|SSB4-U|16px}} |
||
| + | |'''[[Final Destination (SSBWU/3DS)|Final Destination]]''' {{GameIcon|SSB4-U|16px}}<br>[[File:S011.jpg|150px]] |
||
| − | | align="left" |{{symbol|smash|20px}}{{uv|Super Smash Bros.}} |
||
| + | |{{symbol|smash|36px}}<br>{{uv|Super Smash Bros.}} |
||
|{{n}} |
|{{n}} |
||
|{{n}} |
|{{n}} |
||
| Line 135: | Line 147: | ||
|{{n}} |
|{{n}} |
||
|- |
|- |
||
| + | | <big><big><big>012 |
||
| − | | align="left" |[[Final Destination (Ultimate)|Final Destination]] {{GameIcon|SSBU|16px}} |
||
| + | |'''[[Final Destination (SSBU)|Final Destination]]''' {{GameIcon|SSBU|16px}}<br>[[File:S012.jpg|150px]] |
||
| − | | align="left" |{{symbol|smash|20px}}{{uv|Super Smash Bros.}} |
||
| + | |{{symbol|smash|36px}}<br>{{uv|Super Smash Bros.}} |
||
|{{n}} |
|{{n}} |
||
|{{n}} |
|{{n}} |
||
| Line 144: | Line 157: | ||
|{{y}} |
|{{y}} |
||
|- |
|- |
||
| + | | <big><big><big>013 |
||
| − | | align="left" |[[Peach's Castle]] |
||
| + | |'''[[Peach's Castle]]<br>[[File:S013.jpg|150px]] |
||
| − | | align="left" |{{symbol|mario|20px}}{{uv|Mario}} |
||
| + | |{{symbol|mario|36px}}<br>{{uv|Mario}} |
||
|{{y}} |
|{{y}} |
||
|{{n}} |
|{{n}} |
||
| Line 153: | Line 167: | ||
|{{y}} |
|{{y}} |
||
|- |
|- |
||
| + | | <big><big><big>014 |
||
| − | | align="left" |[[Congo Jungle|Kongo Jungle]] |
||
| + | |'''[[Congo Jungle|Kongo Jungle]]<br>[[File:S014.jpg|150px]] |
||
| − | | align="left" |{{symbol|donkeykong|20px}}{{uv|Donkey Kong}} |
||
| + | |{{symbol|donkeykong|36px}}<br>{{uv|Donkey Kong}} |
||
|{{y}} |
|{{y}} |
||
| style="background-color:#D0D0D0" |{{y}} |
| style="background-color:#D0D0D0" |{{y}} |
||
| Line 162: | Line 177: | ||
|{{y}} |
|{{y}} |
||
|- |
|- |
||
| + | | <big><big><big>015 |
||
| − | | align="left" |[[Hyrule Castle]] |
||
| + | |'''[[Hyrule Castle]]<br>[[File:S015.jpg|150px]] |
||
| − | | align="left" |{{symbol|zelda|20px}}{{uv|The Legend of Zelda}} |
||
| + | |{{symbol|zelda|36px}}<br>{{uv|The Legend of Zelda}} |
||
|{{y}} |
|{{y}} |
||
|{{n}} |
|{{n}} |
||
| Line 171: | Line 187: | ||
|{{y}} |
|{{y}} |
||
|- |
|- |
||
| + | | <big><big><big>016 |
||
| − | | align="left" |[[Planet Zebes]] |
||
| + | |'''[[Planet Zebes]]<br>[[File:S016.png|150px]] |
||
| − | | align="left" |{{symbol|metroid|20px}}{{uv|Metroid}} |
||
| + | |{{symbol|metroid|36px}}<br>{{uv|Metroid}} |
||
|{{y}} |
|{{y}} |
||
|{{n}} |
|{{n}} |
||
| Line 180: | Line 197: | ||
|{{n}} |
|{{n}} |
||
|- |
|- |
||
| + | | <big><big><big>017 |
||
| − | | align="left" |[[Yoshi's Island (SSB)|Super Happy Tree]] {{GameIcon|SSB|16px}} |
||
| + | |'''[[Yoshi's Island (SSB)|Super Happy Tree]]''' {{GameIcon|SSB|16px}}<br>[[File:S017.jpg|150px]] |
||
| − | | align="left" |{{symbol|yoshi|20px}}{{uv|Yoshi}} |
||
| + | |{{symbol|yoshi|36px}}<br>{{uv|Yoshi}} |
||
|{{y}} |
|{{y}} |
||
| style="background-color:#D0D0D0" |{{y}} |
| style="background-color:#D0D0D0" |{{y}} |
||
| Line 189: | Line 207: | ||
|{{y}} |
|{{y}} |
||
|- |
|- |
||
| + | | <big><big><big>018 |
||
| − | | align="left" |[[Dream Land (SSB)|Dream Land]] {{GameIcon|SSB|16px}} |
||
| + | |'''[[Dream Land (SSB)|Dream Land]]''' {{GameIcon|SSB|16px}}<br>[[File:S018.jpg|150px]] |
||
| − | | align="left" |{{symbol|kirby|20px}}{{uv|Kirby}} |
||
| + | |{{symbol|kirby|36px}}<br>{{uv|Kirby}} |
||
|{{y}} |
|{{y}} |
||
| style="background-color:#D0D0D0" |{{y}} |
| style="background-color:#D0D0D0" |{{y}} |
||
| Line 198: | Line 217: | ||
|{{y}} |
|{{y}} |
||
|- |
|- |
||
| + | | <big><big><big>019 |
||
| − | | align="left" |[[Sector Z]] |
||
| + | |'''[[Sector Z]]<br>[[File:S019.png|150px]] |
||
| − | | align="left" |{{symbol|sf|20px}}{{uv|Star Fox}} |
||
| + | |{{symbol|sf|36px}}<br>{{uv|Star Fox}} |
||
|{{y}} |
|{{y}} |
||
|{{n}} |
|{{n}} |
||
| Line 207: | Line 227: | ||
|{{n}} |
|{{n}} |
||
|- |
|- |
||
| + | | <big><big><big>020 |
||
| − | | align="left" |[[Saffron City]] |
||
| + | |'''[[Saffron City]]<br>[[File:S020.jpg|150px]] |
||
| − | | align="left" |{{symbol|pokemon|20px}}{{uv|Pokémon}} |
||
| + | |{{symbol|pokemon|36px}}<br>{{uv|Pokémon}} |
||
|{{y}} |
|{{y}} |
||
|{{n}} |
|{{n}} |
||
| Line 216: | Line 237: | ||
|{{y}} |
|{{y}} |
||
|- |
|- |
||
| + | | <big><big><big>021 |
||
| − | | align="left" |[[Mushroom Kingdom (SSB)|Mushroom Kingdom]] {{GameIcon|SSB|16px}} |
||
| + | |'''[[Mushroom Kingdom (SSB)|Mushroom Kingdom]]''' {{GameIcon|SSB|16px}}<br>[[File:S021.jpg|150px]] |
||
| − | | align="left" |{{symbol|mario|20px}}{{uv|Mario}} |
||
| + | |{{symbol|mario|36px}}<br>{{uv|Mario}} |
||
| style="background-color:#D0D0D0" |{{y}} |
| style="background-color:#D0D0D0" |{{y}} |
||
|{{n}} |
|{{n}} |
||
| Line 225: | Line 247: | ||
|{{y}} |
|{{y}} |
||
|- |
|- |
||
| + | | <big><big><big>022 |
||
| − | | align="left" |[[Mushroom Kingdom: Princess Peach's Castle|Princess Peach's Castle]] |
||
| + | |'''[[Mushroom Kingdom: Princess Peach's Castle|Princess Peach's Castle]]<br>[[File:S022.jpg|150px]] |
||
| − | | align="left" |{{symbol|mario|20px}}{{uv|Mario}} |
||
| + | |{{symbol|mario|36px}}<br>{{uv|Mario}} |
||
|{{n}} |
|{{n}} |
||
|{{y}} |
|{{y}} |
||
| Line 234: | Line 257: | ||
|{{y}} |
|{{y}} |
||
|- |
|- |
||
| + | | <big><big><big>023 |
||
| − | | align="left" |[[Mushroom Kingdom: Rainbow Cruise|Rainbow Cruise]] |
||
| + | |'''[[Mushroom Kingdom: Rainbow Cruise|Rainbow Cruise]]<br>[[File:S023.jpg|150px]] |
||
| − | | align="left" |{{symbol|mario|20px}}{{uv|Mario}} |
||
| + | |{{symbol|mario|36px}}<br>{{uv|Mario}} |
||
|{{n}} |
|{{n}} |
||
|{{y}} |
|{{y}} |
||
| Line 243: | Line 267: | ||
|{{y}} |
|{{y}} |
||
|- |
|- |
||
| + | | <big><big><big>024 |
||
| − | | align="left" |[[Mushroom: Kingdom|Mushroom Kingdom]] {{GameIcon|SSBM|16px}} |
||
| + | |'''[[Mushroom: Kingdom|Mushroom Kingdom]]''' {{GameIcon|SSBM|16px}}<br>[[File:S024.png|150px]] |
||
| − | | align="left" |{{symbol|mario|20px}}{{uv|Mario}} |
||
| + | |{{symbol|mario|36px}}<br>{{uv|Mario}} |
||
|{{n}} |
|{{n}} |
||
|{{y}} |
|{{y}} |
||
| Line 252: | Line 277: | ||
|{{n}} |
|{{n}} |
||
|- |
|- |
||
| + | | <big><big><big>025 |
||
| − | | align="left" |[[DK Island: Kongo Jungle|Kongo Falls]] |
||
| + | |'''[[DK Island: Kongo Jungle|Kongo Falls]]<br>[[File:S025.jpg|150px]] |
||
| − | | align="left" |{{symbol|donkeykong|20px}}{{uv|Donkey Kong}} |
||
| + | |{{symbol|donkeykong|36px}}<br>{{uv|Donkey Kong}} |
||
|{{n}} |
|{{n}} |
||
|{{y}} |
|{{y}} |
||
| Line 261: | Line 287: | ||
|{{y}} |
|{{y}} |
||
|- |
|- |
||
| + | | <big><big><big>026 |
||
| − | | align="left" |[[DK Island: Jungle Japes|Jungle Japes]] |
||
| + | |'''[[DK Island: Jungle Japes|Jungle Japes]]<br>[[File:S026.jpg|150px]] |
||
| − | | align="left" |{{symbol|donkeykong|20px}}{{uv|Donkey Kong}} |
||
| + | |{{symbol|donkeykong|36px}}<br>{{uv|Donkey Kong}} |
||
|{{n}} |
|{{n}} |
||
|{{y}} |
|{{y}} |
||
| Line 270: | Line 297: | ||
|{{y}} |
|{{y}} |
||
|- |
|- |
||
| + | | <big><big><big>027 |
||
| − | | align="left" |[[Termina: Great Bay|Great Bay]] |
||
| + | |'''[[Termina: Great Bay|Great Bay]]<br>[[File:S027.jpg|150px]] |
||
| − | | align="left" |{{symbol|zelda|20px}}{{uv|The Legend of Zelda}} |
||
| + | |{{symbol|zelda|36px}}<br>{{uv|The Legend of Zelda}} |
||
|{{n}} |
|{{n}} |
||
|{{y}} |
|{{y}} |
||
| Line 279: | Line 307: | ||
|{{y}} |
|{{y}} |
||
|- |
|- |
||
| + | | <big><big><big>028 |
||
| − | | align="left" |[[Hyrule: Temple|Temple]] |
||
| + | |'''[[Hyrule: Temple|Temple]]<br>[[File:S028.jpg|150px]] |
||
| − | | align="left" |{{symbol|zelda|20px}}{{uv|The Legend of Zelda}} |
||
| + | |{{symbol|zelda|36px}}<br>{{uv|The Legend of Zelda}} |
||
|{{n}} |
|{{n}} |
||
|{{y}} |
|{{y}} |
||
| Line 288: | Line 317: | ||
|{{y}} |
|{{y}} |
||
|- |
|- |
||
| + | | <big><big><big>029 |
||
| − | | align="left" |[[Planet Zebes: Brinstar|Brinstar]] |
||
| + | |'''[[Planet Zebes: Brinstar|Brinstar]]<br>[[File:S029.jpg|150px]] |
||
| − | | align="left" |{{symbol|metroid|20px}}{{uv|Metroid}} |
||
| + | |{{symbol|metroid|36px}}<br>{{uv|Metroid}} |
||
|{{n}} |
|{{n}} |
||
|{{y}} |
|{{y}} |
||
| Line 297: | Line 327: | ||
|{{y}} |
|{{y}} |
||
|- |
|- |
||
| + | | <big><big><big>030 |
||
| − | | align="left" |[[Yoshi's Island: Yoshi's Island|Yoshi's Island (Melee)]] {{GameIcon|SSBM|16px}} |
||
| + | |'''[[Yoshi's Island: Yoshi's Island|Yoshi's Island (Melee)]]''' {{GameIcon|SSBM|16px}}<br>[[File:S030.jpg|150px]] |
||
| − | | align="left" |{{symbol|yoshi|20px}}{{uv|Yoshi}} |
||
| + | |{{symbol|yoshi|36px}}<br>{{uv|Yoshi}} |
||
|{{n}} |
|{{n}} |
||
|{{y}} |
|{{y}} |
||
| Line 306: | Line 337: | ||
|{{y}} |
|{{y}} |
||
|- |
|- |
||
| + | | <big><big><big>031 |
||
| − | | align="left" |[[Yoshi's Island: Yoshi's Story|Yoshi's Story]] |
||
| + | |'''[[Yoshi's Island: Yoshi's Story|Yoshi's Story]]<br>[[File:S031.jpg|150px]] |
||
| − | | align="left" |{{symbol|yoshi|20px}}{{uv|Yoshi}} |
||
| + | |{{symbol|yoshi|36px}}<br>{{uv|Yoshi}} |
||
|{{n}} |
|{{n}} |
||
|{{y}} |
|{{y}} |
||
| Line 315: | Line 347: | ||
|{{y}} |
|{{y}} |
||
|- |
|- |
||
| + | | <big><big><big>032 |
||
| − | | align="left" |[[Dream Land: Fountain of Dreams|Fountain of Dreams]] |
||
| + | |'''[[Dream Land: Fountain of Dreams|Fountain of Dreams]]<br>[[File:S032.jpg|150px]] |
||
| − | | align="left" |{{symbol|kirby|20px}}{{uv|Kirby}} |
||
| + | |{{symbol|kirby|36px}}<br>{{uv|Kirby}} |
||
|{{n}} |
|{{n}} |
||
|{{y}} |
|{{y}} |
||
| Line 324: | Line 357: | ||
|{{y}} |
|{{y}} |
||
|- |
|- |
||
| + | | <big><big><big>033 |
||
| − | | align="left" |[[Dream Land: Green Greens|Green Greens]] |
||
| + | |'''[[Dream Land: Green Greens|Green Greens]]<br>[[File:S033.jpg|150px]] |
||
| − | | align="left" |{{symbol|kirby|20px}}{{uv|Kirby}} |
||
| + | |{{symbol|kirby|36px}}<br>{{uv|Kirby}} |
||
|{{n}} |
|{{n}} |
||
|{{y}} |
|{{y}} |
||
| Line 333: | Line 367: | ||
|{{y}} |
|{{y}} |
||
|- |
|- |
||
| + | | <big><big><big>034 |
||
| − | | align="left" |[[Lylat System: Corneria|Corneria]] |
||
| + | |'''[[Lylat System: Corneria|Corneria]]<br>[[File:S034.jpg|150px]] |
||
| − | | align="left" |{{symbol|sf|20px}}{{uv|Star Fox}} |
||
| + | |{{symbol|sf|36px}}<br>{{uv|Star Fox}} |
||
|{{n}} |
|{{n}} |
||
|{{y}} |
|{{y}} |
||
| Line 342: | Line 377: | ||
|{{y}} |
|{{y}} |
||
|- |
|- |
||
| + | | <big><big><big>035 |
||
| − | | align="left" |[[Lylat System: Venom|Venom]] |
||
| + | |'''[[Lylat System: Venom|Venom]]<br>[[File:S035.jpg|150px]] |
||
| − | | align="left" |{{symbol|sf|20px}}{{uv|Star Fox}} |
||
| + | |{{symbol|sf|36px}}<br>{{uv|Star Fox}} |
||
|{{n}} |
|{{n}} |
||
|{{y}} |
|{{y}} |
||
| Line 351: | Line 387: | ||
|{{y}} |
|{{y}} |
||
|- |
|- |
||
| + | | <big><big><big>036 |
||
| − | | align="left" |[[Kanto: Pokémon Stadium|Pokémon Stadium]] |
||
| + | |'''[[Kanto: Pokémon Stadium|Pokémon Stadium]]<br>[[File:S036.jpg|150px]] |
||
| − | | align="left" |{{symbol|pokemon|20px}}{{uv|Pokémon}} |
||
| + | |{{symbol|pokemon|36px}}<br>{{uv|Pokémon}} |
||
|{{n}} |
|{{n}} |
||
|{{y}} |
|{{y}} |
||
| Line 360: | Line 397: | ||
|{{y}} |
|{{y}} |
||
|- |
|- |
||
| + | | <big><big><big>037 |
||
| − | | align="left" |[[Eagleland: Onett|Onett]] |
||
| + | |'''[[Eagleland: Onett|Onett]]<br>[[File:S037.jpg|150px]] |
||
| − | | align="left" |{{symbol|mother|20px}}{{uv|EarthBound}} |
||
| + | |{{symbol|mother|36px}}<br>{{uv|EarthBound}} |
||
|{{n}} |
|{{n}} |
||
|{{y}} |
|{{y}} |
||
| Line 369: | Line 407: | ||
|{{y}} |
|{{y}} |
||
|- |
|- |
||
| + | | <big><big><big>038 |
||
| − | | align="left" |[[F-Zero Grand Prix: Mute City|Mute City]] {{GameIcon|SSBM|16px}} |
||
| + | |'''[[F-Zero Grand Prix: Mute City|Mute City]]''' {{GameIcon|SSBM|16px}}<br>[[File:S038.jpg|150px]] |
||
| − | | align="left" |{{symbol|fzero|20px}}{{uv|F-Zero}} |
||
| + | |{{symbol|fzero|36px}}<br>{{uv|F-Zero}} |
||
|{{n}} |
|{{n}} |
||
|{{y}} |
|{{y}} |
||
| Line 378: | Line 417: | ||
|{{n}} |
|{{n}} |
||
|- |
|- |
||
| + | | <big><big><big>039 |
||
| − | | align="left" |[[Infinite Glacier: Icicle Mountain|Icicle Mountain]] |
||
| + | |'''[[Infinite Glacier: Icicle Mountain|Icicle Mountain]]<br>[[File:S039.jpg|150px]] |
||
| − | | align="left" |{{symbol|iceclimber|20px}}{{uv|Ice Climber}} |
||
| + | |{{symbol|iceclimber|36px}}<br>{{uv|Ice Climber}} |
||
|{{n}} |
|{{n}} |
||
|{{y}} |
|{{y}} |
||
| Line 387: | Line 427: | ||
|{{n}} |
|{{n}} |
||
|- |
|- |
||
| + | | <big><big><big>040 |
||
| − | | align="left" |[[Mushroom: Kingdom II|Mushroom Kingdom II]] |
||
| + | |'''[[Mushroom: Kingdom II|Mushroom Kingdom II]]<br>[[File:S040.jpg|150px]] |
||
| − | | align="left" |{{symbol|mario|20px}}{{uv|Mario}} |
||
| + | |{{symbol|mario|36px}}<br>{{uv|Mario}} |
||
|{{n}} |
|{{n}} |
||
| style="background-color:#D0D0D0" |{{y}} |
| style="background-color:#D0D0D0" |{{y}} |
||
| Line 396: | Line 437: | ||
|{{y}} |
|{{y}} |
||
|- |
|- |
||
| + | | <big><big><big>041 |
||
| − | | align="left" |[[Planet Zebes: Brinstar Depths|Brinstar Depths]] |
||
| + | |'''[[Planet Zebes: Brinstar Depths|Brinstar Depths]]<br>[[File:S041.jpg|150px]] |
||
| − | | align="left" |{{symbol|metroid|20px}}{{uv|Metroid}} |
||
| + | |{{symbol|metroid|36px}}<br>{{uv|Metroid}} |
||
|{{n}} |
|{{n}} |
||
| style="background-color:#D0D0D0" |{{y}} |
| style="background-color:#D0D0D0" |{{y}} |
||
| Line 405: | Line 447: | ||
|{{y}} |
|{{y}} |
||
|- |
|- |
||
| + | | <big><big><big>042 |
||
| − | | align="left" |[[Kanto Skies: Poké Floats|Poké Floats]] |
||
| + | |'''[[Kanto Skies: Poké Floats|Poké Floats]]<br>[[File:S042.jpg|150px]] |
||
| − | | align="left" |{{symbol|pokemon|20px}}{{uv|Pokémon}} |
||
| + | |{{symbol|pokemon|36px}}<br>{{uv|Pokémon}} |
||
|{{n}} |
|{{n}} |
||
| style="background-color:#D0D0D0" |{{y}} |
| style="background-color:#D0D0D0" |{{y}} |
||
| Line 414: | Line 457: | ||
|{{n}} |
|{{n}} |
||
|- |
|- |
||
| + | | <big><big><big>043 |
||
| − | | align="left" |[[F-Zero Grand Prix: Big Blue|Big Blue]] |
||
| + | |'''[[F-Zero Grand Prix: Big Blue|Big Blue]]<br>[[File:S043.jpg|150px]] |
||
| − | | align="left" |{{symbol|fzero|20px}}{{uv|F-Zero}} |
||
| + | |{{symbol|fzero|36px}}<br>{{uv|F-Zero}} |
||
|{{n}} |
|{{n}} |
||
| style="background-color:#D0D0D0" |{{y}} |
| style="background-color:#D0D0D0" |{{y}} |
||
| Line 423: | Line 467: | ||
|{{y}} |
|{{y}} |
||
|- |
|- |
||
| + | | <big><big><big>044 |
||
| − | | align="left" |[[Eagleland: Fourside|Fourside]] |
||
| + | |'''[[Eagleland: Fourside|Fourside]]<br>[[File:S044.jpg|150px]] |
||
| − | | align="left" |{{symbol|mother|20px}}{{uv|EarthBound}} |
||
| + | |{{symbol|mother|36px}}<br>{{uv|EarthBound}} |
||
|{{n}} |
|{{n}} |
||
| style="background-color:#D0D0D0" |{{y}} |
| style="background-color:#D0D0D0" |{{y}} |
||
| Line 432: | Line 477: | ||
|{{y}} |
|{{y}} |
||
|- |
|- |
||
| + | | <big><big><big>045 |
||
| − | | align="left" |[[Superflat World: Flat Zone|Flat Zone]] |
||
| + | |'''[[Superflat World: Flat Zone|Flat Zone]]<br>[[File:S045.jpg|150px]] |
||
| − | | align="left" |{{symbol|gw|20px}}{{uv|Game & Watch}} |
||
| + | |{{symbol|gw|36px}}<br>{{uv|Game & Watch}} |
||
|{{n}} |
|{{n}} |
||
| style="background-color:#D0D0D0" |{{y}} |
| style="background-color:#D0D0D0" |{{y}} |
||
| Line 441: | Line 487: | ||
|{{n}} |
|{{n}} |
||
|- |
|- |
||
| + | | <big><big><big>046 |
||
| − | | align="left" |[[Delfino Plaza]] |
||
| + | |'''[[Delfino Plaza]]<br>[[File:S046.jpg|150px]] |
||
| − | | align="left" |{{symbol|mario|20px}}{{uv|Mario}} |
||
| + | |{{symbol|mario|36px}}<br>{{uv|Mario}} |
||
|{{n}} |
|{{n}} |
||
|{{n}} |
|{{n}} |
||
| Line 450: | Line 497: | ||
|{{y}} |
|{{y}} |
||
|- |
|- |
||
| + | | <big><big><big>047 |
||
| − | | align="left" |[[Mushroomy Kingdom]] |
||
| + | |'''[[Mushroomy Kingdom]]<br>[[File:S047.jpg|150px]] |
||
| − | | align="left" |{{symbol|mario|20px}}{{uv|Mario}} |
||
| + | |{{symbol|mario|36px}}<br>{{uv|Mario}} |
||
|{{n}} |
|{{n}} |
||
|{{n}} |
|{{n}} |
||
| Line 459: | Line 507: | ||
|{{y}} |
|{{y}} |
||
|- |
|- |
||
| + | | <big><big><big>047</big></big> (Alt.) |
||
| − | | align="left" |[[Mario Circuit (Brawl)|Figure-8 Circuit]] {{GameIcon|SSBB|16px}} |
||
| + | |'''[[Mushroomy Kingdom]] 1-2<br>[[File:047B.jpeg|150px]] |
||
| − | | align="left" |{{symbol|mario|20px}}{{uv|Mario}} |
||
| + | |{{symbol|mario|36px}}<br>{{uv|Mario}} |
||
| + | |{{n}} |
||
| + | |{{n}} |
||
| + | |{{y}} |
||
| + | |{{n}} |
||
| + | |{{n}} |
||
| + | |{{n}} |
||
| + | |- |
||
| + | | <big><big><big>048 |
||
| + | |'''[[Mario Circuit (Brawl)|Figure-8 Circuit]]''' {{GameIcon|SSBB|16px}}<br>[[File:S048.jpg|150px]] |
||
| + | |{{symbol|mario|36px}}<br>{{uv|Mario}} |
||
|{{n}} |
|{{n}} |
||
|{{n}} |
|{{n}} |
||
| Line 468: | Line 527: | ||
|{{y}} |
|{{y}} |
||
|- |
|- |
||
| + | | <big><big><big>049 |
||
| − | | align="left" |[[Rumble Falls]] |
||
| + | |'''[[Rumble Falls]]<br>[[File:S049.jpg|150px]] |
||
| − | | align="left" |{{symbol|donkeykong|20px}}{{uv|Donkey Kong}} |
||
| + | |{{symbol|donkeykong|36px}}<br>{{uv|Donkey Kong}} |
||
|{{n}} |
|{{n}} |
||
|{{n}} |
|{{n}} |
||
| Line 477: | Line 537: | ||
|{{n}} |
|{{n}} |
||
|- |
|- |
||
| + | | <big><big><big>050 |
||
| − | | align="left" |[[WarioWare, Inc.]] |
||
| + | |'''[[WarioWare, Inc.]]<br>[[File:S050.jpg|150px]] |
||
| − | | align="left" |{{symbol|wario|20px}}{{uv|Wario}} |
||
| + | |{{symbol|wario|36px}}<br>{{uv|Wario}} |
||
|{{n}} |
|{{n}} |
||
|{{n}} |
|{{n}} |
||
| Line 486: | Line 547: | ||
|{{y}} |
|{{y}} |
||
|- |
|- |
||
| + | | <big><big><big>051 |
||
| − | | align="left" |[[Bridge of Eldin]] |
||
| + | |'''[[Bridge of Eldin]]<br>[[File:S051.jpg|150px]] |
||
| − | | align="left" |{{symbol|zelda|20px}}{{uv|The Legend of Zelda}} |
||
| + | |{{symbol|zelda|36px}}<br>{{uv|The Legend of Zelda}} |
||
|{{n}} |
|{{n}} |
||
|{{n}} |
|{{n}} |
||
| Line 495: | Line 557: | ||
|{{y}} |
|{{y}} |
||
|- |
|- |
||
| + | | <big><big><big>052 |
||
| − | | align="left" |[[Norfair]] |
||
| + | |'''[[Norfair]]<br>[[File:S052.jpg|150px]] |
||
| − | | align="left" |{{symbol|metroid|20px}}{{uv|Metroid}} |
||
| + | |{{symbol|metroid|36px}}<br>{{uv|Metroid}} |
||
|{{n}} |
|{{n}} |
||
|{{n}} |
|{{n}} |
||
| Line 504: | Line 567: | ||
|{{y}} |
|{{y}} |
||
|- |
|- |
||
| + | | <big><big><big>053 |
||
| − | | align="left" |[[Frigate Orpheon]] |
||
| + | |'''[[Frigate Orpheon]]<br>[[File:S053.jpg|150px]] |
||
| − | | align="left" |{{symbol|metroid|20px}}{{uv|Metroid}} |
||
| + | |{{symbol|metroid|36px}}<br>{{uv|Metroid}} |
||
|{{n}} |
|{{n}} |
||
|{{n}} |
|{{n}} |
||
| Line 513: | Line 577: | ||
|{{y}} |
|{{y}} |
||
|- |
|- |
||
| + | | <big><big><big>054 |
||
| − | | align="left" |[[Yoshi's Island (SSBB)|Yoshi's Island (Brawl)]] {{GameIcon|SSBB|16px}} |
||
| + | |'''[[Yoshi's Island (SSBB)|Yoshi's Island (Brawl)]]''' {{GameIcon|SSBB|16px}}<br>[[File:S054.jpg|150px]] |
||
| − | | align="left" |{{symbol|yoshi|20px}}{{uv|Yoshi}} |
||
| + | |{{symbol|yoshi|36px}}<br>{{uv|Yoshi}} |
||
|{{n}} |
|{{n}} |
||
|{{n}} |
|{{n}} |
||
| Line 522: | Line 587: | ||
|{{y}} |
|{{y}} |
||
|- |
|- |
||
| + | | <big><big><big>055 |
||
| − | | align="left" |[[Halberd]] |
||
| + | |'''[[Halberd]]<br>[[File:S055.jpg|150px]] |
||
| − | | align="left" |{{symbol|kirby|20px}}{{uv|Kirby}} |
||
| + | |{{symbol|kirby|36px}}<br>{{uv|Kirby}} |
||
|{{n}} |
|{{n}} |
||
|{{n}} |
|{{n}} |
||
| Line 531: | Line 597: | ||
|{{y}} |
|{{y}} |
||
|- |
|- |
||
| + | | <big><big><big>056 |
||
| − | | align="left" |[[Lylat Cruise]] |
||
| + | |'''[[Lylat Cruise]]<br>[[File:S056.jpg|150px]] |
||
| − | | align="left" |{{symbol|sf|20px}}{{uv|Star Fox}} |
||
| + | |{{symbol|sf|36px}}<br>{{uv|Star Fox}} |
||
|{{n}} |
|{{n}} |
||
|{{n}} |
|{{n}} |
||
| Line 540: | Line 607: | ||
|{{y}} |
|{{y}} |
||
|- |
|- |
||
| + | | <big><big><big>057 |
||
| − | | align="left" |[[Pokémon Stadium 2]] |
||
| + | |'''[[Pokémon Stadium 2]]<br>[[File:S057.jpg|150px]] |
||
| − | | align="left" |{{symbol|pokemon|20px}}{{uv|Pokémon}} |
||
| + | |{{symbol|pokemon|36px}}<br>{{uv|Pokémon}} |
||
|{{n}} |
|{{n}} |
||
|{{n}} |
|{{n}} |
||
| Line 549: | Line 617: | ||
|{{y}} |
|{{y}} |
||
|- |
|- |
||
| + | | <big><big><big>058 |
||
| − | | align="left" |[[Port Town Aero Dive]] |
||
| + | |'''[[Port Town Aero Dive]]<br>[[File:S058.jpg|150px]] |
||
| − | | align="left" |{{symbol|fzero|20px}}{{uv|F-Zero}} |
||
| + | |{{symbol|fzero|36px}}<br>{{uv|F-Zero}} |
||
|{{n}} |
|{{n}} |
||
|{{n}} |
|{{n}} |
||
| Line 558: | Line 627: | ||
|{{y}} |
|{{y}} |
||
|- |
|- |
||
| + | | <big><big><big>059 |
||
| − | | align="left" |[[Castle Siege]] |
||
| + | |'''[[Castle Siege]]<br>[[File:S059.jpg|150px]] |
||
| − | | align="left" |{{symbol|fe|20px}}{{uv|Fire Emblem}} |
||
| + | |{{symbol|fe|36px}}<br>{{uv|Fire Emblem}} |
||
|{{n}} |
|{{n}} |
||
|{{n}} |
|{{n}} |
||
| Line 567: | Line 637: | ||
|{{y}} |
|{{y}} |
||
|- |
|- |
||
| + | | <big><big><big>060 |
||
| − | | align="left" |[[Distant Planet]] |
||
| + | |'''[[Distant Planet]]<br>[[File:S060.jpg|150px]] |
||
| − | | align="left" |{{symbol|pikmin|20px}}{{uv|Pikmin}} |
||
| + | |{{symbol|pikmin|36px}}<br>{{uv|Pikmin}} |
||
|{{n}} |
|{{n}} |
||
|{{n}} |
|{{n}} |
||
| Line 576: | Line 647: | ||
|{{y}} |
|{{y}} |
||
|- |
|- |
||
| + | | <big><big><big>061 |
||
| − | | align="left" |[[Smashville]] |
||
| + | |'''[[Smashville]]<br>[[File:S061.jpg|150px]] |
||
| − | | align="left" |{{symbol|animalcrossing|20px}}{{uv|Animal Crossing}} |
||
| + | |{{symbol|animalcrossing|36px}}<br>{{uv|Animal Crossing}} |
||
|{{n}} |
|{{n}} |
||
|{{n}} |
|{{n}} |
||
| Line 585: | Line 657: | ||
|{{y}} |
|{{y}} |
||
|- |
|- |
||
| + | | <big><big><big>062 |
||
| − | | align="left" |[[New Pork City]] |
||
| + | |'''[[New Pork City]]<br>[[File:S062.jpg|150px]] |
||
| − | | align="left" |{{symbol|mother|20px}}{{uv|EarthBound}} |
||
| + | |{{symbol|mother|36px}}<br>{{uv|EarthBound}} |
||
|{{n}} |
|{{n}} |
||
|{{n}} |
|{{n}} |
||
| Line 594: | Line 667: | ||
|{{y}} |
|{{y}} |
||
|- |
|- |
||
| + | | <big><big><big>063 |
||
| − | | align="left" |[[Summit]] |
||
| + | |'''[[Summit]]<br>[[File:S063.jpg|150px]] |
||
| − | | align="left" |{{symbol|iceclimber|20px}}{{uv|Ice Climber}} |
||
| + | |{{symbol|iceclimber|36px}}<br>{{uv|Ice Climber}} |
||
|{{n}} |
|{{n}} |
||
|{{n}} |
|{{n}} |
||
| Line 603: | Line 677: | ||
|{{y}} |
|{{y}} |
||
|- |
|- |
||
| + | | <big><big><big>064 |
||
| − | | align="left" |[[Skyworld]] |
||
| + | |'''[[Skyworld]]<br>[[File:S064.jpg|150px]] |
||
| − | | align="left" |{{symbol|kidicarus|20px}}{{uv|Kid Icarus}} |
||
| + | |{{symbol|kidicarus|36px}}<br>{{uv|Kid Icarus}} |
||
|{{n}} |
|{{n}} |
||
|{{n}} |
|{{n}} |
||
| Line 612: | Line 687: | ||
|{{y}} |
|{{y}} |
||
|- |
|- |
||
| + | | <big><big><big>065 |
||
| − | | align="left" |[[Shadow Moses Island]] |
||
| + | |'''[[Shadow Moses Island]]<br>[[File:S065.jpg|150px]] |
||
| − | | align="left" |{{symbol|metalgear|20px}}{{uv|Metal Gear}} |
||
| + | |{{symbol|metalgear|36px}}<br>{{uv|Metal Gear}} |
||
|{{n}} |
|{{n}} |
||
|{{n}} |
|{{n}} |
||
| Line 621: | Line 697: | ||
|{{y}} |
|{{y}} |
||
|- |
|- |
||
| + | | <big><big><big>066 |
||
| − | | align="left" |[[PictoChat]] |
||
| + | |'''[[PictoChat]]<br>[[File:S066.jpg|150px]] |
||
| − | | align="left" |{{symbol|ds|20px}}{{uv|Nintendo DS}} |
||
| + | |{{symbol|ds|36px}}<br>{{uv|Nintendo DS}} |
||
|{{n}} |
|{{n}} |
||
|{{n}} |
|{{n}} |
||
| Line 630: | Line 707: | ||
|{{n}} |
|{{n}} |
||
|- |
|- |
||
| + | | <big><big><big>067 |
||
| − | | align="left" |[[Luigi's Mansion]] |
||
| + | |'''[[Luigi's Mansion]]<br>[[File:S067.jpg|150px]] |
||
| − | | align="left" |{{symbol|mario|20px}}{{uv|Mario}} |
||
| + | |{{symbol|mario|36px}}<br>{{uv|Mario}} |
||
|{{n}} |
|{{n}} |
||
|{{n}} |
|{{n}} |
||
| Line 639: | Line 717: | ||
|{{y}} |
|{{y}} |
||
|- |
|- |
||
| + | | <big><big><big>068 |
||
| − | | align="left" |[[Pirate Ship]] |
||
| + | |'''[[Pirate Ship]]<br>[[File:S068.jpg|150px]] |
||
| − | | align="left" |{{symbol|zelda|20px}}{{uv|The Legend of Zelda}} |
||
| + | |{{symbol|zelda|36px}}<br>{{uv|The Legend of Zelda}} |
||
|{{n}} |
|{{n}} |
||
|{{n}} |
|{{n}} |
||
| Line 648: | Line 727: | ||
|{{y}} |
|{{y}} |
||
|- |
|- |
||
| + | | <big><big><big>069 |
||
| − | | align="left" |[[Spear Pillar]] |
||
| + | |'''[[Spear Pillar]]<br>[[File:S069.jpg|150px]] |
||
| − | | align="left" |{{symbol|pokemon|20px}}{{uv|Pokémon}} |
||
| + | |{{symbol|pokemon|36px}}<br>{{uv|Pokémon}} |
||
|{{n}} |
|{{n}} |
||
|{{n}} |
|{{n}} |
||
| Line 657: | Line 737: | ||
|{{y}} |
|{{y}} |
||
|- |
|- |
||
| + | | <big><big><big>070 |
||
| − | | align="left" |[[75m|75 m]] |
||
| + | |'''[[75m|75 m]]<br>[[File:S070.jpg|150px]] |
||
| − | | align="left" |{{symbol|donkeykong|20px}}{{uv|Donkey Kong}} |
||
| + | |{{symbol|donkeykong|36px}}<br>{{uv|Donkey Kong}} |
||
|{{n}} |
|{{n}} |
||
|{{n}} |
|{{n}} |
||
| Line 666: | Line 747: | ||
|{{y}} |
|{{y}} |
||
|- |
|- |
||
| + | | <big><big><big>071 |
||
| − | | align="left" |[[Flat Zone 2]] |
||
| + | |'''[[Flat Zone 2]]<br>[[File:S071.png|150px]] |
||
| − | | align="left" |{{symbol|gw|20px}}{{uv|Game & Watch}} |
||
| + | |{{symbol|gw|36px}}<br>{{uv|Game & Watch}} |
||
|{{n}} |
|{{n}} |
||
|{{n}} |
|{{n}} |
||
| Line 675: | Line 757: | ||
|{{n}} |
|{{n}} |
||
|- |
|- |
||
| + | | <big><big><big>072 |
||
| − | | align="left" |[[Mario Bros. (stage)|Mario Bros.]] |
||
| + | |'''[[Mario Bros. (stage)|Mario Bros.]]<br>[[File:S072.jpg|150px]] |
||
| − | | align="left" |{{symbol|mario|20px}}{{uv|Mario}} |
||
| + | |{{symbol|mario|36px}}<br>{{uv|Mario}} |
||
|{{n}} |
|{{n}} |
||
|{{n}} |
|{{n}} |
||
| Line 684: | Line 767: | ||
|{{y}} |
|{{y}} |
||
|- |
|- |
||
| + | | <big><big><big>073 |
||
| − | | align="left" |[[Hanenbow]] |
||
| + | |'''[[Hanenbow]]<br>[[File:S073.jpg|150px]] |
||
| − | | align="left" |{{symbol|electroplankton|20px}}{{uv|Electroplankton}} |
||
| + | |{{symbol|electroplankton|36px}}<br>{{uv|Electroplankton}} |
||
|{{n}} |
|{{n}} |
||
|{{n}} |
|{{n}} |
||
| Line 693: | Line 777: | ||
|{{y}} |
|{{y}} |
||
|- |
|- |
||
| + | | <big><big><big>074 |
||
| − | | align="left" |[[Green Hill Zone]] |
||
| + | |'''[[Green Hill Zone]]<br>[[File:S074.jpg|150px]] |
||
| − | | align="left" |{{symbol|sonic|20px}}{{uv|Sonic}} |
||
| + | |{{symbol|sonic|36px}}<br>{{uv|Sonic}} |
||
|{{n}} |
|{{n}} |
||
|{{n}} |
|{{n}} |
||
| Line 702: | Line 787: | ||
|{{y}} |
|{{y}} |
||
|- |
|- |
||
| + | | <big><big><big>075 |
||
| − | | align="left" |[[3D Land]] |
||
| + | |'''[[3D Land]]<br>[[File:S075.jpg|150px]] |
||
| − | | align="left" |{{symbol|mario|20px}}{{uv|Mario}} |
||
| + | |{{symbol|mario|36px}}<br>{{uv|Mario}} |
||
|{{n}} |
|{{n}} |
||
|{{n}} |
|{{n}} |
||
| Line 711: | Line 797: | ||
|{{y}} |
|{{y}} |
||
|- |
|- |
||
| + | | <big><big><big>076 |
||
| − | | align="left" |[[Golden Plains]] |
||
| + | |'''[[Golden Plains]]<br>[[File:S076.jpg|150px]] |
||
| − | | align="left" |{{symbol|mario|20px}}{{uv|Mario}} |
||
| + | |{{symbol|mario|36px}}<br>{{uv|Mario}} |
||
|{{n}} |
|{{n}} |
||
|{{n}} |
|{{n}} |
||
| Line 720: | Line 807: | ||
|{{y}} |
|{{y}} |
||
|- |
|- |
||
| + | | <big><big><big>077 |
||
| − | | align="left" |[[Paper Mario]] |
||
| + | |'''[[Paper Mario]]<br>[[File:S077.jpg|150px]] |
||
| − | | align="left" |{{symbol|mario|20px}}{{uv|Mario}} |
||
| + | |{{symbol|mario|36px}}<br>{{uv|Mario}} |
||
|{{n}} |
|{{n}} |
||
|{{n}} |
|{{n}} |
||
| Line 729: | Line 817: | ||
|{{y}} |
|{{y}} |
||
|- |
|- |
||
| + | | <big><big><big>078 |
||
| − | | align="left" |[[Rainbow Road]] |
||
| + | |'''[[Rainbow Road]]<br>[[File:S078.jpg|150px]] |
||
| − | | align="left" |{{symbol|mario|20px}}{{uv|Mario}} |
||
| + | |{{symbol|mario|36px}}<br>{{uv|Mario}} |
||
|{{n}} |
|{{n}} |
||
|{{n}} |
|{{n}} |
||
| Line 738: | Line 827: | ||
|{{n}} |
|{{n}} |
||
|- |
|- |
||
| + | | <big><big><big>079 |
||
| − | | align="left" |[[Gerudo Valley]] |
||
| + | |'''[[Gerudo Valley]]<br>[[File:S079.jpg|150px]] |
||
| − | | align="left" |{{symbol|zelda|20px}}{{uv|The Legend of Zelda}} |
||
| + | |{{symbol|zelda|36px}}<br>{{uv|The Legend of Zelda}} |
||
|{{n}} |
|{{n}} |
||
|{{n}} |
|{{n}} |
||
| Line 747: | Line 837: | ||
|{{y}} |
|{{y}} |
||
|- |
|- |
||
| + | | <big><big><big>080 |
||
| − | | align="left" |[[Spirit Train]] |
||
| + | |'''[[Spirit Train]]<br>[[File:S080.jpg|150px]] |
||
| − | | align="left" |{{symbol|zelda|20px}}{{uv|The Legend of Zelda}} |
||
| + | |{{symbol|zelda|36px}}<br>{{uv|The Legend of Zelda}} |
||
|{{n}} |
|{{n}} |
||
|{{n}} |
|{{n}} |
||
| Line 756: | Line 847: | ||
|{{y}} |
|{{y}} |
||
|- |
|- |
||
| + | | <big><big><big>081 |
||
| − | | align="left" |[[Dream Land (SSB3DS)|Dream Land GB]] {{GameIcon|SSB4-3|16px}} |
||
| + | |'''[[Dream Land (SSB3DS)|Dream Land GB]]''' {{GameIcon|SSB4-3|16px}}<br>[[File:S081.jpg|150px]] |
||
| − | | align="left" |{{symbol|kirby|20px}}{{uv|Kirby}} |
||
| + | |{{symbol|kirby|36px}}<br>{{uv|Kirby}} |
||
|{{n}} |
|{{n}} |
||
|{{n}} |
|{{n}} |
||
| Line 765: | Line 857: | ||
|{{y}} |
|{{y}} |
||
|- |
|- |
||
| + | | <big><big><big>082 |
||
| − | | align="left" |[[Unova Pokémon League]] |
||
| + | |'''[[Unova Pokémon League]]<br>[[File:S082.jpg|150px]] |
||
| − | | align="left" |{{symbol|pokemon|20px}}{{uv|Pokémon}} |
||
| + | |{{symbol|pokemon|36px}}<br>{{uv|Pokémon}} |
||
|{{n}} |
|{{n}} |
||
|{{n}} |
|{{n}} |
||
| Line 774: | Line 867: | ||
|{{y}} |
|{{y}} |
||
|- |
|- |
||
| + | | <big><big><big>083 |
||
| − | | align="left" |[[Prism Tower]] |
||
| + | |'''[[Prism Tower]]<br>[[File:S083.jpg|150px]] |
||
| − | | align="left" |{{symbol|pokemon|20px}}{{uv|Pokémon}} |
||
| + | |{{symbol|pokemon|36px}}<br>{{uv|Pokémon}} |
||
|{{n}} |
|{{n}} |
||
|{{n}} |
|{{n}} |
||
| Line 783: | Line 877: | ||
|{{y}} |
|{{y}} |
||
|- |
|- |
||
| + | | <big><big><big>084 |
||
| − | | align="left" |[[Mute City (SSB3DS)|Mute City SNES]] {{GameIcon|SSB4-3|16px}} |
||
| + | |'''[[Mute City (SSB3DS)|Mute City SNES]]''' {{GameIcon|SSB4-3|16px}}<br>[[File:S084.jpg|150px]] |
||
| − | | align="left" |{{symbol|fzero|20px}}{{uv|F-Zero}} |
||
| + | |{{symbol|fzero|36px}}<br>{{uv|F-Zero}} |
||
|{{n}} |
|{{n}} |
||
|{{n}} |
|{{n}} |
||
| Line 792: | Line 887: | ||
|{{y}} |
|{{y}} |
||
|- |
|- |
||
| + | | <big><big><big>085 |
||
| − | | align="left" |[[Magicant]] |
||
| + | |'''[[Magicant]]<br>[[File:S085.jpg|150px]] |
||
| − | | align="left" |{{symbol|mother|20px}}{{uv|EarthBound}} |
||
| + | |{{symbol|mother|36px}}<br>{{uv|EarthBound}} |
||
|{{n}} |
|{{n}} |
||
|{{n}} |
|{{n}} |
||
| Line 801: | Line 897: | ||
|{{y}} |
|{{y}} |
||
|- |
|- |
||
| + | | <big><big><big>086 |
||
| − | | align="left" |[[Arena Ferox]] |
||
| + | |'''[[Arena Ferox]]<br>[[File:S086.jpg|150px]] |
||
| − | | align="left" |{{symbol|fe|20px}}{{uv|Fire Emblem}} |
||
| + | |{{symbol|fe|36px}}<br>{{uv|Fire Emblem}} |
||
|{{n}} |
|{{n}} |
||
|{{n}} |
|{{n}} |
||
| Line 810: | Line 907: | ||
|{{y}} |
|{{y}} |
||
|- |
|- |
||
| + | | <big><big><big>087 |
||
| − | | align="left" |[[Reset Bomb Forest]] |
||
| + | |'''[[Reset Bomb Forest]]<br>[[File:S087.jpg|150px]] |
||
| − | | align="left" |{{symbol|kidicarus|20px}}{{uv|Kid Icarus}} |
||
| + | |{{symbol|kidicarus|36px}}<br>{{uv|Kid Icarus}} |
||
|{{n}} |
|{{n}} |
||
|{{n}} |
|{{n}} |
||
| Line 819: | Line 917: | ||
|{{y}} |
|{{y}} |
||
|- |
|- |
||
| + | | <big><big><big>088 |
||
| − | | align="left" |[[Tortimer Island]] |
||
| + | |'''[[Tortimer Island]]<br>[[File:S088.jpg|150px]] |
||
| − | | align="left" |{{symbol|animalcrossing|20px}}{{uv|Animal Crossing}} |
||
| + | |{{symbol|animalcrossing|36px}}<br>{{uv|Animal Crossing}} |
||
|{{n}} |
|{{n}} |
||
|{{n}} |
|{{n}} |
||
| Line 828: | Line 927: | ||
|{{y}} |
|{{y}} |
||
|- |
|- |
||
| + | | <big><big><big>089 |
||
| − | | align="left" |[[Balloon Fight (stage)|Balloon Fight]] |
||
| + | |'''[[Balloon Fight (stage)|Balloon Fight]]<br>[[File:S089.jpg|150px]] |
||
| − | | align="left" |{{symbol|balloonfight|20px}}{{uv|Balloon Fight}} |
||
| + | |{{symbol|balloonfight|36px}}<br>{{uv|Balloon Fight}} |
||
|{{n}} |
|{{n}} |
||
|{{n}} |
|{{n}} |
||
| Line 837: | Line 937: | ||
|{{y}} |
|{{y}} |
||
|- |
|- |
||
| + | | <big><big><big>090 |
||
| − | | align="left" |[[Living Room]] |
||
| + | |'''[[Living Room]]<br>[[File:S090.jpg|150px]] |
||
| − | | align="left" |{{symbol|nintendogs|20px}}{{uv|Nintendogs}} |
||
| + | |{{symbol|nintendogs|36px}}<br>{{uv|Nintendogs}} |
||
|{{n}} |
|{{n}} |
||
|{{n}} |
|{{n}} |
||
| Line 846: | Line 947: | ||
|{{y}} |
|{{y}} |
||
|- |
|- |
||
| + | | <big><big><big>091 |
||
| − | | align="left" |[[Find Mii (stage)|Find Mii]] |
||
| + | |'''[[Find Mii (stage)|Find Mii]]<br>[[File:S091.jpg|150px]] |
||
| − | | align="left" |{{symbol|findmii|20px}}{{uv|Find Mii}} |
||
| + | |{{symbol|findmii|36px}}<br>{{uv|Find Mii}} |
||
|{{n}} |
|{{n}} |
||
|{{n}} |
|{{n}} |
||
| Line 855: | Line 957: | ||
|{{y}} |
|{{y}} |
||
|- |
|- |
||
| + | | <big><big><big>092 |
||
| − | | align="left" |[[Tomodachi Life]] |
||
| + | |'''[[Tomodachi Life]]<br>[[File:S092.jpg|150px]] |
||
| − | | align="left" |{{symbol|tomodachi|20px}}{{uv|Tomodachi}} |
||
| + | |{{symbol|tomodachi|36px}}<br>{{uv|Tomodachi}} |
||
|{{n}} |
|{{n}} |
||
|{{n}} |
|{{n}} |
||
| Line 864: | Line 967: | ||
|{{y}} |
|{{y}} |
||
|- |
|- |
||
| + | | <big><big><big>093 |
||
| − | | align="left" |[[PictoChat 2]] |
||
| + | |'''[[PictoChat 2]]<br>[[File:S093.jpg|150px]] |
||
| − | | align="left" |{{symbol|ds|20px}}{{uv|Nintendo DS}} |
||
| + | |{{symbol|ds|36px}}<br>{{uv|Nintendo DS}} |
||
|{{n}} |
|{{n}} |
||
|{{n}} |
|{{n}} |
||
| Line 873: | Line 977: | ||
|{{y}} |
|{{y}} |
||
|- |
|- |
||
| + | | <big><big><big>094 |
||
| − | | align="left" |[[Pac-Maze]] |
||
| + | |'''[[Pac-Maze]]<br>[[File:S094.jpg|150px]] |
||
| − | | align="left" |{{symbol|pacman|20px}}{{uv|Pac-Man}} |
||
| + | |{{symbol|pacman|36px}}<br>{{uv|Pac-Man}} |
||
|{{n}} |
|{{n}} |
||
|{{n}} |
|{{n}} |
||
| Line 882: | Line 987: | ||
|{{n}} |
|{{n}} |
||
|- |
|- |
||
| + | | <big><big><big>095 |
||
| − | | align="left" |[[Mushroom Kingdom U]] |
||
| + | |'''[[Mushroom Kingdom U]]<br>[[File:S095.jpg|150px]] |
||
| − | | align="left" |{{symbol|mario|20px}}{{uv|Mario}} |
||
| + | |{{symbol|mario|36px}}<br>{{uv|Mario}} |
||
|{{n}} |
|{{n}} |
||
|{{n}} |
|{{n}} |
||
| Line 891: | Line 997: | ||
|{{y}} |
|{{y}} |
||
|- |
|- |
||
| + | | <big><big><big>096 |
||
| − | | align="left" |[[Mario Galaxy]] |
||
| + | |'''[[Mario Galaxy]]<br>[[File:S096.jpg|150px]] |
||
| − | | align="left" |{{symbol|mario|20px}}{{uv|Mario}} |
||
| + | |{{symbol|mario|36px}}<br>{{uv|Mario}} |
||
|{{n}} |
|{{n}} |
||
|{{n}} |
|{{n}} |
||
| Line 900: | Line 1,007: | ||
|{{y}} |
|{{y}} |
||
|- |
|- |
||
| + | | <big><big><big>097 |
||
| − | | align="left" |[[Mario Circuit (SSBWU)|Mario Circuit]] {{GameIcon|SSB4-U|16px}} |
||
| + | |'''[[Mario Circuit (SSBWU)|Mario Circuit]]''' {{GameIcon|SSB4-U|16px}}<br>[[File:S097.jpg|150px]] |
||
| − | | align="left" |{{symbol|mario|20px}}{{uv|Mario}} |
||
| + | |{{symbol|mario|36px}}<br>{{uv|Mario}} |
||
|{{n}} |
|{{n}} |
||
|{{n}} |
|{{n}} |
||
| Line 909: | Line 1,017: | ||
|{{y}} |
|{{y}} |
||
|- |
|- |
||
| + | | <big><big><big>098 |
||
| − | | align="left" |[[Jungle Hijinxs]] |
||
| + | |'''[[Jungle Hijinxs]]<br>[[File:S098.jpg|150px]] |
||
| − | | align="left" |{{symbol|donkeykong|20px}}{{uv|Donkey Kong}} |
||
| + | |{{symbol|donkeykong|36px}}<br>{{uv|Donkey Kong}} |
||
|{{n}} |
|{{n}} |
||
|{{n}} |
|{{n}} |
||
| Line 918: | Line 1,027: | ||
|{{n}} |
|{{n}} |
||
|- |
|- |
||
| + | | <big><big><big>099 |
||
| − | | align="left" |[[Skyloft]] |
||
| + | |'''[[Skyloft]]<br>[[File:S099.jpg|150px]] |
||
| − | | align="left" |{{symbol|zelda|20px}}{{uv|The Legend of Zelda}} |
||
| + | |{{symbol|zelda|36px}}<br>{{uv|The Legend of Zelda}} |
||
|{{n}} |
|{{n}} |
||
|{{n}} |
|{{n}} |
||
| Line 927: | Line 1,037: | ||
|{{y}} |
|{{y}} |
||
|- |
|- |
||
| + | | <big><big><big>100 |
||
| − | | align="left" |[[Pyrosphere]] |
||
| + | |'''[[Pyrosphere]]<br>[[File:S100.jpg|150px]] |
||
| − | | align="left" |{{symbol|metroid|20px}}{{uv|Metroid}} |
||
| + | |{{symbol|metroid|36px}}<br>{{uv|Metroid}} |
||
|{{n}} |
|{{n}} |
||
|{{n}} |
|{{n}} |
||
| Line 936: | Line 1,047: | ||
|{{n}} |
|{{n}} |
||
|- |
|- |
||
| + | | <big><big><big>101 |
||
| − | | align="left" |[[Woolly World]] |
||
| + | |'''[[Woolly World]]<br>[[File:S101.jpg|150px]] |
||
| − | | align="left" |{{symbol|yoshi|20px}}{{uv|Yoshi}} |
||
| + | |{{symbol|yoshi|36px}}<br>{{uv|Yoshi}} |
||
|{{n}} |
|{{n}} |
||
|{{n}} |
|{{n}} |
||
| Line 945: | Line 1,057: | ||
|{{n}} |
|{{n}} |
||
|- |
|- |
||
| + | | <big><big><big>102 |
||
| − | | align="left" |[[The Great Cave Offensive]] |
||
| + | |'''[[The Great Cave Offensive]]<br>[[File:S102.jpg|150px]] |
||
| − | | align="left" |{{symbol|kirby|20px}}{{uv|Kirby}} |
||
| + | |{{symbol|kirby|36px}}<br>{{uv|Kirby}} |
||
|{{n}} |
|{{n}} |
||
|{{n}} |
|{{n}} |
||
| Line 954: | Line 1,067: | ||
|{{y}} |
|{{y}} |
||
|- |
|- |
||
| + | | <big><big><big>103 |
||
| − | | align="left" |[[Kalos Pokémon League]] |
||
| + | |'''[[Kalos Pokémon League]]<br>[[File:S103.jpg|150px]] |
||
| − | | align="left" |{{symbol|pokemon|20px}}{{uv|Pokémon}} |
||
| + | |{{symbol|pokemon|36px}}<br>{{uv|Pokémon}} |
||
|{{n}} |
|{{n}} |
||
|{{n}} |
|{{n}} |
||
| Line 963: | Line 1,077: | ||
|{{y}} |
|{{y}} |
||
|- |
|- |
||
| + | | <big><big><big>104 |
||
| − | | align="left" |[[Orbital Gate Assault]] |
||
| + | |'''[[Orbital Gate Assault]]<br>[[File:S104.jpg|150px]] |
||
| − | | align="left" |{{symbol|sf|20px}}{{uv|Star Fox}} |
||
| + | |{{symbol|sf|36px}}<br>{{uv|Star Fox}} |
||
|{{n}} |
|{{n}} |
||
|{{n}} |
|{{n}} |
||
| Line 972: | Line 1,087: | ||
|{{n}} |
|{{n}} |
||
|- |
|- |
||
| + | | <big><big><big>105 |
||
| − | | align="left" |[[Coliseum]] |
||
| + | |'''[[Coliseum]]<br>[[File:S105.jpg|150px]] |
||
| − | | align="left" |{{symbol|fe|20px}}{{uv|Fire Emblem}} |
||
| + | |{{symbol|fe|36px}}<br>{{uv|Fire Emblem}} |
||
|{{n}} |
|{{n}} |
||
|{{n}} |
|{{n}} |
||
| Line 981: | Line 1,097: | ||
|{{y}} |
|{{y}} |
||
|- |
|- |
||
| + | | <big><big><big>106 |
||
| − | | align="left" |[[Flat Zone X]] |
||
| + | |'''[[Flat Zone X]]<br>[[File:S106.jpg|150px]] |
||
| − | | align="left" |{{symbol|gw|20px}}{{uv|Game & Watch}} |
||
| + | |{{symbol|gw|36px}}<br>{{uv|Game & Watch}} |
||
|{{n}} |
|{{n}} |
||
|{{n}} |
|{{n}} |
||
| Line 990: | Line 1,107: | ||
|{{y}} |
|{{y}} |
||
|- |
|- |
||
| + | | <big><big><big>107 |
||
| − | | align="left" |[[Palutena's Temple]] |
||
| + | |'''[[Palutena's Temple]]<br>[[File:S107.jpg|150px]] |
||
| − | | align="left" |{{symbol|kidicarus|20px}}{{uv|Kid Icarus}} |
||
| + | |{{symbol|kidicarus|36px}}<br>{{uv|Kid Icarus}} |
||
|{{n}} |
|{{n}} |
||
|{{n}} |
|{{n}} |
||
| Line 999: | Line 1,117: | ||
|{{y}} |
|{{y}} |
||
|- |
|- |
||
| + | | <big><big><big>108 |
||
| − | | align="left" |[[Gamer]] |
||
| + | |'''[[Gamer]]<br>[[File:S108.jpg|150px]] |
||
| − | | align="left" |{{symbol|wario|20px}}{{uv|Wario}} |
||
| + | |{{symbol|wario|36px}}<br>{{uv|Wario}} |
||
|{{n}} |
|{{n}} |
||
|{{n}} |
|{{n}} |
||
| Line 1,008: | Line 1,127: | ||
|{{y}} |
|{{y}} |
||
|- |
|- |
||
| + | | <big><big><big>109 |
||
| − | | align="left" |[[Garden of Hope]] |
||
| + | |'''[[Garden of Hope]]<br>[[File:S109.jpg|150px]] |
||
| − | | align="left" |{{symbol|pikmin|20px}}{{uv|Pikmin}} |
||
| + | |{{symbol|pikmin|36px}}<br>{{uv|Pikmin}} |
||
|{{n}} |
|{{n}} |
||
|{{n}} |
|{{n}} |
||
| Line 1,017: | Line 1,137: | ||
|{{y}} |
|{{y}} |
||
|- |
|- |
||
| + | | <big><big><big>110 |
||
| − | | align="left" |[[Town and City]] |
||
| + | |'''[[Town and City]]<br>[[File:S110.jpg|150px]] |
||
| − | | align="left" |{{symbol|animalcrossing|20px}}{{uv|Animal Crossing}} |
||
| + | |{{symbol|animalcrossing|36px}}<br>{{uv|Animal Crossing}} |
||
|{{n}} |
|{{n}} |
||
|{{n}} |
|{{n}} |
||
| Line 1,026: | Line 1,147: | ||
|{{y}} |
|{{y}} |
||
|- |
|- |
||
| + | | <big><big><big>111 |
||
| − | | align="left" |[[Wii Fit Studio]] |
||
| + | |'''[[Wii Fit Studio]]<br>[[File:S111.jpg|150px]] |
||
| − | | align="left" |{{symbol|wiifit|20px}}{{uv|Wii Fit}} |
||
| + | |{{symbol|wiifit|36px}}<br>{{uv|Wii Fit}} |
||
|{{n}} |
|{{n}} |
||
|{{n}} |
|{{n}} |
||
| Line 1,035: | Line 1,157: | ||
|{{y}} |
|{{y}} |
||
|- |
|- |
||
| + | | <big><big><big>112 |
||
| − | | align="left" |[[Boxing Ring]] |
||
| + | |'''[[Boxing Ring]]<br>[[File:S112.jpg|150px]] |
||
| − | | align="left" |{{symbol|punchout|20px}}{{uv|Punch-Out!!}} |
||
| + | |{{symbol|punchout|36px}}<br>{{uv|Punch-Out!!}} |
||
|{{n}} |
|{{n}} |
||
|{{n}} |
|{{n}} |
||
| Line 1,044: | Line 1,167: | ||
|{{y}} |
|{{y}} |
||
|- |
|- |
||
| + | | <big><big><big>112</big></big> (Alt.) |
||
| − | | align="left" |[[Gaur Plain]] |
||
| + | |'''[[Boxing Ring]]<br>[[File:SSBU-Boxing Ring 2.png|150px]] |
||
| − | | align="left" |{{symbol|xenoblade|20px}}{{uv|Xenoblade}} |
||
| + | |{{symbol|punchout|36px}}<br>{{uv|Punch-Out!!}} |
||
|{{n}} |
|{{n}} |
||
|{{n}} |
|{{n}} |
||
| Line 1,053: | Line 1,177: | ||
|{{y}} |
|{{y}} |
||
|- |
|- |
||
| + | | <big><big><big>113 |
||
| − | | align="left" |[[Duck Hunt (stage)|Duck Hunt]] |
||
| + | |'''[[Gaur Plain]]<br>[[File:S113.jpg|150px]] |
||
| − | | align="left" |{{symbol|duckhunt|20px}}{{uv|Duck Hunt}} |
||
| + | |{{symbol|xenoblade|36px}}<br>{{uv|Xenoblade}} |
||
| + | |{{n}} |
||
| + | |{{n}} |
||
| + | |{{n}} |
||
| + | |{{y}} |
||
| + | |{{y}} |
||
| + | |{{y}} |
||
| + | |- |
||
| + | | <big><big><big>114 |
||
| + | |'''[[Duck Hunt (stage)|Duck Hunt]]<br>[[File:S114.jpg|150px]] |
||
| + | |{{symbol|duckhunt|36px}}<br>{{uv|Duck Hunt}} |
||
|{{n}} |
|{{n}} |
||
|{{n}} |
|{{n}} |
||
|{{n}} |
|{{n}} |
||
| − | |{{y}} <ref name="duck hunt"> |
+ | |{{y}} <ref name="duck hunt">Available in the game in version 1.1.1 onwards. It's considered a primary WiiU stage officially, as it came first for the WiiU version, then only afterwards ported to 3DS, as can be see in Ultimate Stage selection order.</ref> |
| style="background-color:#D0D0D0" |{{y}} |
| style="background-color:#D0D0D0" |{{y}} |
||
|{{y}} |
|{{y}} |
||
|- |
|- |
||
| + | | <big><big><big>115 |
||
| − | | align="left" |[[Wrecking Crew]] |
||
| + | |'''[[Wrecking Crew]]<br>[[File:S115.jpg|150px]] |
||
| − | | align="left" |{{symbol|wreckingcrew|20px}}{{uv|Wrecking Crew}} |
||
| + | |{{symbol|wreckingcrew|36px}}<br>{{uv|Wrecking Crew}} |
||
|{{n}} |
|{{n}} |
||
|{{n}} |
|{{n}} |
||
| Line 1,071: | Line 1,207: | ||
|{{y}} |
|{{y}} |
||
|- |
|- |
||
| + | | <big><big><big>116 |
||
| − | | align="left" |[[Pilotwings]] |
||
| + | |'''[[Pilotwings]]<br>[[File:S116.jpg|150px]] |
||
| − | | align="left" |{{symbol|pilotwings|20px}}{{uv|Pilotwings}} |
||
| + | |{{symbol|pilotwings|36px}}<br>{{uv|Pilotwings}} |
||
|{{n}} |
|{{n}} |
||
|{{n}} |
|{{n}} |
||
| Line 1,080: | Line 1,217: | ||
|{{y}} |
|{{y}} |
||
|- |
|- |
||
| + | | <big><big><big>117 |
||
| − | | align="left" |[[Wuhu Island]] |
||
| + | |'''[[Wuhu Island]]<br>[[File:S117.jpg|150px]] |
||
| − | | align="left" |{{symbol|wiisports|20px}}{{uv|Wii Sports}} |
||
| + | |{{symbol|wiisports|36px}}<br>{{uv|Wii Sports}} |
||
|{{n}} |
|{{n}} |
||
|{{n}} |
|{{n}} |
||
| Line 1,089: | Line 1,227: | ||
|{{y}} |
|{{y}} |
||
|- |
|- |
||
| + | | <big><big><big>118 |
||
| − | | align="left" |[[Windy Hill Zone]] |
||
| + | |'''[[Windy Hill Zone]]<br>[[File:S118.jpg|150px]] |
||
| − | | align="left" |{{symbol|sonic|20px}}{{uv|Sonic}} |
||
| + | |{{symbol|sonic|36px}}<br>{{uv|Sonic}} |
||
|{{n}} |
|{{n}} |
||
|{{n}} |
|{{n}} |
||
| Line 1,098: | Line 1,237: | ||
|{{y}} |
|{{y}} |
||
|- |
|- |
||
| + | | <big><big><big>119 |
||
| − | | align="left" |[[Wily Castle]] |
||
| + | |'''[[Wily Castle]]<br>[[File:S119.jpg|150px]] |
||
| − | | align="left" |{{symbol|megaman|20px}}{{uv|Mega Man}} |
||
| + | |{{symbol|megaman|36px}}<br>{{uv|Mega Man}} |
||
|{{n}} |
|{{n}} |
||
|{{n}} |
|{{n}} |
||
| Line 1,107: | Line 1,247: | ||
|{{y}} |
|{{y}} |
||
|- |
|- |
||
| + | | <big><big><big>120 |
||
| − | | align="left" |[[Pac-Land]] |
||
| + | |'''[[Pac-Land]]<br>[[File:S120.jpg|150px]] |
||
| − | | align="left" |{{symbol|pacman|20px}}{{uv|Pac-Man}} |
||
| + | |{{symbol|pacman|36px}}<br>{{uv|Pac-Man}} |
||
|{{n}} |
|{{n}} |
||
|{{n}} |
|{{n}} |
||
| Line 1,116: | Line 1,257: | ||
|{{y}} |
|{{y}} |
||
|- |
|- |
||
| + | | <big><big><big>121 |
||
| − | | align="left" |[[Super Mario Maker]] |
||
| + | |'''[[Super Mario Maker]]<br>[[File:S121.jpg|150px]] |
||
| − | | align="left" |{{symbol|mario|20px}}{{uv|Mario}} |
||
| + | |{{symbol|mario|36px}}<br>{{uv|Mario}} |
||
|{{n}} |
|{{n}} |
||
|{{n}} |
|{{n}} |
||
| Line 1,125: | Line 1,267: | ||
|{{y}} |
|{{y}} |
||
|- |
|- |
||
| + | | <big><big><big>122 |
||
| − | | align="left" |[[Miiverse (stage)|Miiverse]] |
||
| + | |'''[[Miiverse (stage)|Miiverse]]<br>[[File:S122.jpg|150px]] |
||
| − | | align="left" |{{symbol|miiverse|20px}}{{uv|Miiverse}} |
||
| + | |{{symbol|miiverse|36px}}<br>{{uv|Miiverse}} |
||
|{{n}} |
|{{n}} |
||
|{{n}} |
|{{n}} |
||
|{{n}} |
|{{n}} |
||
|{{n}} |
|{{n}} |
||
| − | |{{y}} <ref name="miiverse"> |
+ | |{{y}} <ref name="miiverse">Available in the game in version 1.0.8 onwards</ref> |
|{{n}} |
|{{n}} |
||
|- |
|- |
||
| + | | <big><big><big>123 |
||
| − | | align="left" |[[Suzaku Castle]] |
||
| + | |'''[[Suzaku Castle]]<br>[[File:S123.jpg|150px]] |
||
| − | | align="left" |{{symbol|sf|20px}}{{uv|Street Fighter}} |
||
| + | |{{symbol|sf|36px}}<br>{{uv|Street Fighter}} |
||
|{{n}} |
|{{n}} |
||
|{{n}} |
|{{n}} |
||
| Line 1,143: | Line 1,287: | ||
|{{y}} |
|{{y}} |
||
|- |
|- |
||
| + | | <big><big><big>124 |
||
| − | | align="left" |[[Midgar]] |
||
| + | |'''[[Midgar]]<br>[[File:S124.jpg|150px]] |
||
| − | | align="left" |{{symbol|ff|20px}}{{uv|Final Fantasy}} |
||
| + | |{{symbol|finalfantasy|36px}}<br>{{uv|Final Fantasy}} |
||
|{{n}} |
|{{n}} |
||
|{{n}} |
|{{n}} |
||
| Line 1,152: | Line 1,297: | ||
|{{y}} |
|{{y}} |
||
|- |
|- |
||
| + | | <big><big><big>125 |
||
| − | | align="left" |[[Umbra Clock Tower]] |
||
| + | |'''[[Umbra Clock Tower]]<br>[[File:S125.jpg|150px]] |
||
| − | | align="left" |{{symbol|bayonetta|20px}}{{uv|Bayonetta}} |
||
| + | |{{symbol|bayonetta|36px}}<br>{{uv|Bayonetta}} |
||
|{{n}} |
|{{n}} |
||
|{{n}} |
|{{n}} |
||
| Line 1,161: | Line 1,307: | ||
|{{y}} |
|{{y}} |
||
|- |
|- |
||
| + | | <big><big><big>126 |
||
| − | | align="left" |[[New Donk City Hall]] |
||
| + | |'''[[New Donk City Hall]]<br>[[File:S126.jpg|150px]] |
||
| − | | align="left" |{{symbol|mario|20px}}{{uv|Mario}} |
||
| + | |{{symbol|mario|36px}}<br>{{uv|Mario}} |
||
|{{n}} |
|{{n}} |
||
|{{n}} |
|{{n}} |
||
| Line 1,170: | Line 1,317: | ||
|{{y}} |
|{{y}} |
||
|- |
|- |
||
| + | | <big><big><big>127 |
||
| − | | align="left" |[[Great Plateau Tower]] |
||
| + | |'''[[Great Plateau Tower]]<br>[[File:S127.jpg|150px]] |
||
| − | | align="left" |{{symbol|zelda|20px}}{{uv|The Legend of Zelda}} |
||
| + | |{{symbol|zelda|36px}}<br>{{uv|The Legend of Zelda}} |
||
|{{n}} |
|{{n}} |
||
|{{n}} |
|{{n}} |
||
| Line 1,179: | Line 1,327: | ||
|{{y}} |
|{{y}} |
||
|- |
|- |
||
| + | | <big><big><big>128 |
||
| − | | align="left" |[[Moray Towers]] |
||
| + | |'''[[Moray Towers]]<br>[[File:S128.jpg|150px]] |
||
| − | | align="left" |{{symbol|splatoon|20px}}{{uv|Splatoon}} |
||
| + | |{{symbol|splatoon|36px}}<br>{{uv|Splatoon}} |
||
|{{n}} |
|{{n}} |
||
|{{n}} |
|{{n}} |
||
| Line 1,188: | Line 1,337: | ||
|{{y}} |
|{{y}} |
||
|- |
|- |
||
| + | | <big><big><big>129 |
||
| − | | align="left" |[[Dracula's Castle]] |
||
| + | |'''[[Dracula's Castle]]<br>[[File:S129.jpg|150px]] |
||
| − | | align="left" |{{symbol|Castlevania|20px}}{{uv|Castlevania}} |
||
| + | |{{symbol|Castlevania|36px}}<br>{{uv|Castlevania}} |
||
|{{n}} |
|{{n}} |
||
|{{n}} |
|{{n}} |
||
| Line 1,197: | Line 1,347: | ||
|{{y}} |
|{{y}} |
||
|- |
|- |
||
| + | | <big><big><big>130 |
||
| + | |'''[[Mementos]]'''<br>[[File:SSBU-Mementos (Persona 5).jpg|150px]] |
||
| + | |{{symbol|Persona|36px}}<br>{{uv|Persona}} |
||
| + | |{{n}} |
||
| + | |{{n}} |
||
| + | |{{n}} |
||
| + | |{{n}} |
||
| + | |{{n}} |
||
| + | | style="background-color:#FFFFAF" |{{y}} |
||
| + | |- |
||
| + | | <big><big><big>131 |
||
| + | |'''[[Yggdrasil's Altar]]'''<br>[[File:SSBU-Yggdrasil's_Altar.jpg|150px]] |
||
| + | |{{symbol|dragonquest|36px}}<br>{{uv|Dragon Quest}} |
||
| + | |{{n}} |
||
| + | |{{n}} |
||
| + | |{{n}} |
||
| + | |{{n}} |
||
| + | |{{n}} |
||
| + | | style="background-color:#FFFFAF" |{{y}} |
||
| + | |- |
||
| + | | <big><big><big>132 |
||
| + | |'''[[Spiral Mountain]]'''<br>[[File:SSBU-Spiral_Mountain.jpg|150px]] |
||
| + | |{{symbol|banjokazooie|36px}}<br>{{uv|Banjo-Kazooie}} |
||
| + | |{{n}} |
||
| + | |{{n}} |
||
| + | |{{n}} |
||
| + | |{{n}} |
||
| + | |{{n}} |
||
| + | | style="background-color:#FFFFAF" |{{y}} |
||
| + | |- |
||
| + | | <big><big><big>133 |
||
| + | |'''Unknown Fatal Fury Stage'''<br>[[File:1200px-SSBU-Fatal Fury Stage.jpg|150px]] |
||
| + | |{{symbol|fatalfury|36px}}<br>{{uv|Art of Fighting and Fatal Fury}} |
||
| + | |{{n}} |
||
| + | |{{n}} |
||
| + | |{{n}} |
||
| + | |{{n}} |
||
| + | |{{n}} |
||
| + | | style="background-color:#FFFFAF" |{{y}} |
||
| + | |- |
||
| + | | <big><big><big>134 |
||
| + | |Unrevealed<br><small>5th DLC Stage</small> |
||
| + | | |
||
| + | |{{n}} |
||
| + | |{{n}} |
||
| + | |{{n}} |
||
| + | |{{n}} |
||
| + | |{{n}} |
||
| + | | style="background-color:#FFFFAF" |{{y}} |
||
| + | |- |
||
| + | !<small>'''Debuting Stages'''<ref>Battlefield, Big Battlefield and Final Destination are taking in account, as every game debuted his own version of these stages.</ref> |
||
| + | ! |
||
| + | !| |
||
| + | !|9 |
||
| + | !|26 |
||
| + | !|31 |
||
| + | !|25 + 4 ([[DLC]])<ref>Of these new stages, 4 are in both versions. Duck Hunt came first at Wii U, then isn't considered a debuting stage on 3DS.</ref> |
||
| + | !|27 + 4 ([[DLC]])<ref>Discounting all the stages that came first on 3DS, except for Duck Hunt which came in the Wii U version first. Also, each version has their own exclusive Battlefield and Final Destination.</ref> |
||
| + | !|7<ref name="known">At 2018-08-08.</ref> + 5 ([[DLC]]) |
||
|- class="sortbottom" |
|- class="sortbottom" |
||
| − | !'''Vs. Stages Total''' |
+ | !<small>'''Vs. Stages Total''' |
| + | ! |
||
| − | ! align="center" | |
||
| + | !| |
||
| − | ! align="center" |9 |
||
| + | !|9 |
||
| − | ! align="center" |29 |
||
| + | !|29 |
||
| − | ! align="center" |41 |
||
| + | !|41 |
||
| − | ! align="center" |35 + 7 ([[DLC]]) |
||
| − | ! |
+ | !|35 + 7 ([[DLC]]) |
| + | !|48 + 8 ([[DLC]]) |
||
| − | ! align="center" |103 |
||
| + | !|103<ref name="known" /> + 5 ([[DLC]]) |
||
|} |
|} |
||
| Line 1,216: | Line 1,426: | ||
*{{symbol|mario|20px|suffix=preBrawl}} [[Peach's Castle]] |
*{{symbol|mario|20px|suffix=preBrawl}} [[Peach's Castle]] |
||
| − | *{{symbol|mario|20px|suffix=preBrawl}} [[Mushroom Kingdom ( |
+ | *{{symbol|mario|20px|suffix=preBrawl}} '''[[Mushroom Kingdom (Super Smash Bros.)|Mushroom Kingdom]]''' |
| − | *{{symbol|yoshi|20px|suffix=preBrawl}} [[Yoshi's Island ( |
+ | *{{symbol|yoshi|20px|suffix=preBrawl}} [[Yoshi's Island (Super Smash Bros.)|Yoshi's Island]] |
*{{symbol|dk|20px|suffix=preBrawl}} [[Congo Jungle]] |
*{{symbol|dk|20px|suffix=preBrawl}} [[Congo Jungle]] |
||
*{{symbol|zelda|20px}} [[Hyrule Castle]] |
*{{symbol|zelda|20px}} [[Hyrule Castle]] |
||
*{{symbol|metroid|20px|suffix=preBrawl}} [[Planet Zebes]] |
*{{symbol|metroid|20px|suffix=preBrawl}} [[Planet Zebes]] |
||
| − | *{{symbol|kirby|20px}} [[Dream Land]] |
+ | *{{symbol|kirby|20px}} [[Dream Land (Super Smash Bros.)|Dream Land]] |
*{{symbol|starfox|20px|suffix=preBrawl}} [[Sector Z]] |
*{{symbol|starfox|20px|suffix=preBrawl}} [[Sector Z]] |
||
*{{symbol|pokemon|20px|suffix=preBrawl}} [[Saffron City]] |
*{{symbol|pokemon|20px|suffix=preBrawl}} [[Saffron City]] |
||
===In ''Melee''=== |
===In ''Melee''=== |
||
| − | [[File: |
+ | [[File:Stage_Select_Melee.png|thumb|The stage select screen in ''Melee''.]] |
There are 29 versus stages in ''[[Super Smash Bros. Melee]]'', 18 [[Starter stage|starters]] and 11 [[Unlockable stage|unlockable]] stages, shown below in '''bold'''. All three past stages are unlockable. |
There are 29 versus stages in ''[[Super Smash Bros. Melee]]'', 18 [[Starter stage|starters]] and 11 [[Unlockable stage|unlockable]] stages, shown below in '''bold'''. All three past stages are unlockable. |
||
====New stages==== |
====New stages==== |
||
| − | *{{symbol||20px|l=Super Smash Bros. (universe)}} [[Special Stages: Battlefield|Battlefield]] |
+ | *{{symbol||20px|l=Super Smash Bros. (universe)}} [[Special Stages: Battlefield|'''Battlefield''']] |
| − | *{{symbol|smash|20px}} [[Special Stages: Final Destination|Final Destination]] |
+ | *{{symbol|smash|20px}} [[Special Stages: Final Destination|'''Final Destination''']] |
*{{symbol|mario|20px|suffix=preBrawl}} [[Mushroom Kingdom: Princess Peach's Castle|Princess Peach's Castle]] |
*{{symbol|mario|20px|suffix=preBrawl}} [[Mushroom Kingdom: Princess Peach's Castle|Princess Peach's Castle]] |
||
*{{symbol|mario|20px|suffix=preBrawl}} [[Mushroom Kingdom: Rainbow Cruise|Rainbow Cruise]] |
*{{symbol|mario|20px|suffix=preBrawl}} [[Mushroom Kingdom: Rainbow Cruise|Rainbow Cruise]] |
||
*{{symbol|mario|20px|suffix=preBrawl}} [[Mushroom: Kingdom|Mushroom Kingdom]] |
*{{symbol|mario|20px|suffix=preBrawl}} [[Mushroom: Kingdom|Mushroom Kingdom]] |
||
| − | *{{symbol|mario|20px|suffix=preBrawl}} [[Mushroom: Kingdom II|Mushroom Kingdom II]] |
+ | *{{symbol|mario|20px|suffix=preBrawl}} [[Mushroom: Kingdom II|'''Mushroom Kingdom II''']] |
*{{symbol|yoshi|20px|suffix=preBrawl}} [[Yoshi's Island: Yoshi's Island|Yoshi's Island]] |
*{{symbol|yoshi|20px|suffix=preBrawl}} [[Yoshi's Island: Yoshi's Island|Yoshi's Island]] |
||
*{{symbol|yoshi|20px|suffix=preBrawl}} [[Yoshi's Island: Yoshi's Story|Yoshi's Story]] |
*{{symbol|yoshi|20px|suffix=preBrawl}} [[Yoshi's Island: Yoshi's Story|Yoshi's Story]] |
||
| Line 1,243: | Line 1,453: | ||
*{{symbol|zelda|20px}} [[Hyrule: Temple|Temple]] |
*{{symbol|zelda|20px}} [[Hyrule: Temple|Temple]] |
||
*{{symbol|metroid|20px|suffix=preBrawl}} [[Planet Zebes: Brinstar|Brinstar]] |
*{{symbol|metroid|20px|suffix=preBrawl}} [[Planet Zebes: Brinstar|Brinstar]] |
||
| − | *{{symbol|metroid|20px|suffix=preBrawl}} [[Planet Zebes: Brinstar Depths|Brinstar Depths]] |
+ | *{{symbol|metroid|20px|suffix=preBrawl}} [[Planet Zebes: Brinstar Depths|'''Brinstar Depths''']] |
*{{symbol|kirby|20px}} [[Dream Land: Fountain of Dreams|Fountain of Dreams]] |
*{{symbol|kirby|20px}} [[Dream Land: Fountain of Dreams|Fountain of Dreams]] |
||
*{{symbol|kirby|20px}} [[Dream Land: Green Greens|Green Greens]] |
*{{symbol|kirby|20px}} [[Dream Land: Green Greens|Green Greens]] |
||
| Line 1,249: | Line 1,459: | ||
*{{symbol|starfox|20px|suffix=preBrawl}} [[Lylat System: Venom|Venom]] |
*{{symbol|starfox|20px|suffix=preBrawl}} [[Lylat System: Venom|Venom]] |
||
*{{symbol|pokemon|20px|suffix=preBrawl}} [[Kanto: Pokémon Stadium|Pokémon Stadium]] |
*{{symbol|pokemon|20px|suffix=preBrawl}} [[Kanto: Pokémon Stadium|Pokémon Stadium]] |
||
| − | *{{symbol|pokemon|20px|suffix=preBrawl}} [[Kanto Skies: Poké Floats|Poké Floats]] |
+ | *{{symbol|pokemon|20px|suffix=preBrawl}} [[Kanto Skies: Poké Floats|'''Poké Floats''']] |
*{{symbol|fzero|20px}} [[F-Zero Grand Prix: Mute City|Mute City]] |
*{{symbol|fzero|20px}} [[F-Zero Grand Prix: Mute City|Mute City]] |
||
| − | *{{symbol|fzero|20px}} [[F-Zero Grand Prix: Big Blue|Big Blue]] |
+ | *{{symbol|fzero|20px}} [[F-Zero Grand Prix: Big Blue|'''Big Blue''']] |
*{{symbol|earthbound|20px|suffix=preBrawl}} [[Eagleland: Onett|Onett]] |
*{{symbol|earthbound|20px|suffix=preBrawl}} [[Eagleland: Onett|Onett]] |
||
| − | *{{symbol|earthbound|20px|suffix=preBrawl}} [[Eagleland: Fourside|Fourside]] |
+ | *{{symbol|earthbound|20px|suffix=preBrawl}} [[Eagleland: Fourside|'''Fourside''']] |
*{{symbol|iceclimber|20px}} [[Infinite Glacier: Icicle Mountain|Icicle Mountain]] |
*{{symbol|iceclimber|20px}} [[Infinite Glacier: Icicle Mountain|Icicle Mountain]] |
||
| − | *{{symbol|gameandwatch|20px|prefix=preBrawl}} [[Superflat World: Flat Zone|Flat Zone]] |
+ | *{{symbol|gameandwatch|20px|prefix=preBrawl}} [[Superflat World: Flat Zone|'''Flat Zone''']] |
====Past stages==== |
====Past stages==== |
||
| − | *{{symbol|yoshi|20px|suffix=preBrawl}} [[Yoshi's Island (SSB)|Yoshi's Island N64]] |
+ | *{{symbol|yoshi|20px|suffix=preBrawl}} [[Yoshi's Island (SSB)|'''Yoshi's Island N64''']] |
| − | *{{symbol|dk|20px|suffix=preBrawl}} [[Congo Jungle|Kongo Jungle N64]] |
+ | *{{symbol|dk|20px|suffix=preBrawl}} [[Congo Jungle|'''Kongo Jungle N64''']] |
| − | *{{symbol|kirby|20px}} [[Dream Land|Dream Land N64]] |
+ | *{{symbol|kirby|20px}} [[Dream Land|'''Dream Land N64''']] |
===In ''Brawl''=== |
===In ''Brawl''=== |
||
| Line 1,273: | Line 1,483: | ||
*{{symbol|mario|20px}} [[Mushroomy Kingdom]] |
*{{symbol|mario|20px}} [[Mushroomy Kingdom]] |
||
*{{symbol|mario|20px}} [[Mario Circuit]] |
*{{symbol|mario|20px}} [[Mario Circuit]] |
||
| − | *{{symbol|mario|20px}} [[Luigi's Mansion]] |
+ | *{{symbol|mario|20px}} [[Luigi's Mansion|'''Luigi's Mansion''']] |
| − | *{{symbol|mario|20px}} [[Mario Bros. (stage)|Mario Bros.]] |
+ | *{{symbol|mario|20px}} [[Mario Bros. (stage)|'''Mario Bros.''']] |
*{{symbol|yoshi|20px}} [[Yoshi's Island (SSBB)|Yoshi's Island]] |
*{{symbol|yoshi|20px}} [[Yoshi's Island (SSBB)|Yoshi's Island]] |
||
*{{symbol|dk|20px}} [[Rumble Falls]] |
*{{symbol|dk|20px}} [[Rumble Falls]] |
||
| − | * {{symbol|dk|20px}}[[75m]] |
+ | * {{symbol|dk|20px}} [[75m|'''75m''']] |
*{{symbol|zelda|20px}} [[Bridge of Eldin]] |
*{{symbol|zelda|20px}} [[Bridge of Eldin]] |
||
| − | *{{symbol|zelda|20px}} [[Pirate Ship]] |
+ | *{{symbol|zelda|20px}} [[Pirate Ship|'''Pirate Ship''']] |
*{{symbol|metroid|20px}} [[Norfair]] |
*{{symbol|metroid|20px}} [[Norfair]] |
||
*{{symbol|metroid|20px}} [[Frigate Orpheon]] |
*{{symbol|metroid|20px}} [[Frigate Orpheon]] |
||
| Line 1,285: | Line 1,495: | ||
*{{symbol|starfox|20px}} [[Lylat Cruise]] |
*{{symbol|starfox|20px}} [[Lylat Cruise]] |
||
*{{symbol|pokemon|20px}} [[Pokémon Stadium 2]] |
*{{symbol|pokemon|20px}} [[Pokémon Stadium 2]] |
||
| − | *{{symbol|pokemon|20px}} [[Spear Pillar]] |
+ | *{{symbol|pokemon|20px}} [[Spear Pillar|'''Spear Pillar''']] |
*{{symbol|fzero|20px}} [[Port Town Aero Dive]] |
*{{symbol|fzero|20px}} [[Port Town Aero Dive]] |
||
*{{symbol|earthbound|20px}} [[New Pork City]] |
*{{symbol|earthbound|20px}} [[New Pork City]] |
||
*{{symbol|iceclimber|20px}} [[Summit]] |
*{{symbol|iceclimber|20px}} [[Summit]] |
||
*{{symbol|fireemblem|20px}} [[Castle Siege]] |
*{{symbol|fireemblem|20px}} [[Castle Siege]] |
||
| − | *{{symbol|gameandwatch|20px}} [[Flat Zone 2]] |
+ | *{{symbol|gameandwatch|20px}} [[Flat Zone 2|'''Flat Zone 2''']] |
*{{symbol|kidicarus|20px}} [[Skyworld]] |
*{{symbol|kidicarus|20px}} [[Skyworld]] |
||
*{{symbol|wario|20px}} [[WarioWare, Inc.]] |
*{{symbol|wario|20px}} [[WarioWare, Inc.]] |
||
| Line 1,296: | Line 1,506: | ||
*{{symbol|animalcrossing|20px}} [[Smashville]] |
*{{symbol|animalcrossing|20px}} [[Smashville]] |
||
*{{symbol|ds|20px}} [[PictoChat]] |
*{{symbol|ds|20px}} [[PictoChat]] |
||
| − | *{{symbol|electroplankton|20px}} [[Hanenbow]] |
+ | *{{symbol|electroplankton|20px}} [[Hanenbow|'''Hanenbow''']] |
*{{symbol|metalgear|20px}} [[Shadow Moses Island]] |
*{{symbol|metalgear|20px}} [[Shadow Moses Island]] |
||
| − | *{{symbol|sonic|20px}} [[Green Hill Zone]] |
+ | *{{symbol|sonic|20px}} [[Green Hill Zone|'''Green Hill Zone''']] |
====Returning Stages==== |
====Returning Stages==== |
||
*{{symbol|mario|20px}} [[Rainbow Cruise]] |
*{{symbol|mario|20px}} [[Rainbow Cruise]] |
||
*{{symbol|yoshi|20px}} [[Yoshi's Island: Yoshi's Island|Yoshi's Island]] |
*{{symbol|yoshi|20px}} [[Yoshi's Island: Yoshi's Island|Yoshi's Island]] |
||
| − | *{{symbol|dk|20px}} [[Jungle Japes]] |
+ | *{{symbol|dk|20px}} [[Jungle Japes|'''Jungle Japes''']] |
*{{symbol|zelda|20px}} [[Temple]] |
*{{symbol|zelda|20px}} [[Temple]] |
||
*{{symbol|metroid|20px}} [[Brinstar (stage)|Brinstar]] |
*{{symbol|metroid|20px}} [[Brinstar (stage)|Brinstar]] |
||
| − | *{{symbol|kirby|20px}} [[Green Greens]] |
+ | *{{symbol|kirby|20px}} [[Green Greens|'''Green Greens''']] |
*{{symbol|starfox|20px}} [[Corneria]] |
*{{symbol|starfox|20px}} [[Corneria]] |
||
| − | *{{symbol|pokemon|20px}} [[Kanto: Pokémon Stadium|Pokémon Stadium]] |
+ | *{{symbol|pokemon|20px}} [[Kanto: Pokémon Stadium|'''Pokémon Stadium''']] |
| − | *{{symbol|fzero|20px}} [[Big Blue]] |
+ | *{{symbol|fzero|20px}} [[Big Blue|'''Big Blue''']] |
*{{symbol|earthbound|20px}} [[Onett]] |
*{{symbol|earthbound|20px}} [[Onett]] |
||
| Line 1,358: | Line 1,568: | ||
|<nowiki>-</nowiki> |
|<nowiki>-</nowiki> |
||
|- |
|- |
||
| − | | align="left" |[[Battlefield ( |
+ | | align="left" |[[Battlefield (Super Smash Bros. for Nintendo 3DS and Wii U)|Battlefield]] {{GameIcon|SSB4|16px}} |
| align="left" |{{symbol|smash|20px}}{{uv|Super Smash Bros.}} |
| align="left" |{{symbol|smash|20px}}{{uv|Super Smash Bros.}} |
||
|{{y}} |
|{{y}} |
||
| Line 1,365: | Line 1,575: | ||
|8 |
|8 |
||
|- |
|- |
||
| − | | align="left" |[[Big Battlefield ( |
+ | | align="left" |[[Big Battlefield (Super Smash Bros. for Wii U)|Big Battlefield]] {{GameIcon|SSB4-U|16px}} |
| align="left" |{{symbol|smash|20px}}{{uv|Super Smash Bros.}} |
| align="left" |{{symbol|smash|20px}}{{uv|Super Smash Bros.}} |
||
|{{n}} |
|{{n}} |
||
| Line 1,386: | Line 1,596: | ||
|8 |
|8 |
||
|- |
|- |
||
| − | | align="left" |[[Brinstar]] |
+ | | align="left" |[[Planet Zebes: Brinstar|Brinstar]] |
| align="left" |{{symbol|metroid|20px}}{{uv|Metroid}} |
| align="left" |{{symbol|metroid|20px}}{{uv|Metroid}} |
||
|{{y}} |
|{{y}} |
||
| Line 1,407: | Line 1,617: | ||
|4 |
|4 |
||
|- |
|- |
||
| − | | align="left" |[[Corneria]] |
+ | | align="left" |[[Lylat System: Corneria|Corneria]] |
| align="left" |{{symbol|sf|20px}}{{uv|Star Fox}} |
| align="left" |{{symbol|sf|20px}}{{uv|Star Fox}} |
||
|{{y}} |
|{{y}} |
||
| Line 1,428: | Line 1,638: | ||
|<nowiki>-</nowiki> |
|<nowiki>-</nowiki> |
||
|- |
|- |
||
| − | | align="left" |[[Dream Land ( |
+ | | align="left" |[[Dream Land (Super Smash Bros.)|Dream Land]] {{GameIcon|SSB|16px}} |
| align="left" |{{symbol|kirby|20px}}{{uv|Kirby}} |
| align="left" |{{symbol|kirby|20px}}{{uv|Kirby}} |
||
| style="background-color:#FFFFAF" |{{y}} |
| style="background-color:#FFFFAF" |{{y}} |
||
| Line 1,435: | Line 1,645: | ||
|8 |
|8 |
||
|- |
|- |
||
| − | | align="left" |[[Dream Land ( |
+ | | align="left" |[[Dream Land (Super Smash Bros. for Nintendo 3DS)|Dream Land]] {{GameIcon|SSB4-3|16px}} |
| align="left" |{{symbol|kirby|20px}}{{uv|Kirby}} |
| align="left" |{{symbol|kirby|20px}}{{uv|Kirby}} |
||
| style="background-color:#D0D0D0" |{{y}} |
| style="background-color:#D0D0D0" |{{y}} |
||
| Line 1,449: | Line 1,659: | ||
|8 |
|8 |
||
|- |
|- |
||
| − | | align="left" |[[Final Destination ( |
+ | | align="left" |[[Final Destination (Super Smash Bros. for Nintendo 3DS and Wii U)|Final Destination]] {{GameIcon|SSB4|16px}} |
| align="left" |{{symbol|smash|20px}}{{uv|Super Smash Bros.}} |
| align="left" |{{symbol|smash|20px}}{{uv|Super Smash Bros.}} |
||
|{{y}} |
|{{y}} |
||
| Line 1,547: | Line 1,757: | ||
|8 |
|8 |
||
|- |
|- |
||
| − | | align="left" |[[Jungle Japes]] |
+ | | align="left" |[[DK Island: Jungle Japes|Jungle Japes]] |
| align="left" |{{symbol|donkeykong|20px}}{{uv|Donkey Kong}} |
| align="left" |{{symbol|donkeykong|20px}}{{uv|Donkey Kong}} |
||
|{{y}} |
|{{y}} |
||
| Line 1,561: | Line 1,771: | ||
|8 |
|8 |
||
|- |
|- |
||
| − | | align="left" |[[ |
+ | | align="left" |[[Congo Jungle|Kongo Jungle]] {{GameIcon|SSB|16px}} |
| align="left" |{{symbol|donkeykong|20px}}{{uv|Donkey Kong}} |
| align="left" |{{symbol|donkeykong|20px}}{{uv|Donkey Kong}} |
||
|{{n}} |
|{{n}} |
||
| Line 1,596: | Line 1,806: | ||
|<nowiki>-</nowiki> |
|<nowiki>-</nowiki> |
||
|- |
|- |
||
| − | | align="left" |[[Mario Circuit ( |
+ | | align="left" |[[Mario Circuit (Super Smash Bros. Brawl)|Mario Circuit]] {{GameIcon|SSBB|16px}} |
| align="left" |{{symbol|mario|20px}}{{uv|Mario}} |
| align="left" |{{symbol|mario|20px}}{{uv|Mario}} |
||
|{{n}} |
|{{n}} |
||
| Line 1,603: | Line 1,813: | ||
|8 |
|8 |
||
|- |
|- |
||
| − | | align="left" |[[Mario Circuit ( |
+ | | align="left" |[[Mario Circuit (Super Smash Bros. for Wii U)|Mario Circuit]] {{GameIcon|SSB4-U|16px}} |
| align="left" |{{symbol|mario|20px}}{{uv|Mario}} |
| align="left" |{{symbol|mario|20px}}{{uv|Mario}} |
||
|{{n}} |
|{{n}} |
||
| Line 1,645: | Line 1,855: | ||
|8 |
|8 |
||
|- |
|- |
||
| − | | align="left" |[[Mute City ( |
+ | | align="left" |[[Mute City (Super Smash Bros. for Nintendo 3DS)|Mute City]] {{GameIcon|SSB4-3|16px}} |
| align="left" |{{symbol|fzero|20px}}{{uv|F-Zero}} |
| align="left" |{{symbol|fzero|20px}}{{uv|F-Zero}} |
||
| style="background-color:#D0D0D0" |{{y}} |
| style="background-color:#D0D0D0" |{{y}} |
||
| Line 1,659: | Line 1,869: | ||
|8 |
|8 |
||
|- |
|- |
||
| − | | align="left" |[[Onett]] |
+ | | align="left" |[[Eagleland: Onett|Onett]] |
| align="left" |{{symbol|mother|20px}}{{uv|EarthBound}} |
| align="left" |{{symbol|mother|20px}}{{uv|EarthBound}} |
||
|{{n}} |
|{{n}} |
||
| Line 1,813: | Line 2,023: | ||
|8 |
|8 |
||
|- |
|- |
||
| − | | align="left" |[[Temple]] |
+ | | align="left" |[[Hyrule: Temple|Temple]] |
| align="left" |{{symbol|zelda|20px}}{{uv|The Legend of Zelda}} |
| align="left" |{{symbol|zelda|20px}}{{uv|The Legend of Zelda}} |
||
|{{n}} |
|{{n}} |
||
| Line 1,904: | Line 2,114: | ||
|4 |
|4 |
||
|- |
|- |
||
| − | | align="left" |[[Yoshi's Island]] {{GameIcon|SSBM|16px}} |
+ | | align="left" |[[Yoshi's Island: Yoshi's Island|Yoshi's Island]] {{GameIcon|SSBM|16px}} |
| align="left" |{{symbol|yoshi|20px}}{{uv|Yoshi}} |
| align="left" |{{symbol|yoshi|20px}}{{uv|Yoshi}} |
||
|{{n}} |
|{{n}} |
||
| Line 1,911: | Line 2,121: | ||
|8 |
|8 |
||
|- |
|- |
||
| − | | align="left" |[[Yoshi's Island ( |
+ | | align="left" |[[Yoshi's Island (Super Smash Bros. Brawl)|Yoshi's Island]] {{GameIcon|SSBB|16px}} |
| align="left" |{{symbol|yoshi|20px}}{{uv|Yoshi}} |
| align="left" |{{symbol|yoshi|20px}}{{uv|Yoshi}} |
||
|{{y}} |
|{{y}} |
||
| Line 1,918: | Line 2,128: | ||
|<nowiki>-</nowiki> |
|<nowiki>-</nowiki> |
||
|- class="sortbottom" |
|- class="sortbottom" |
||
| − | !'''8-player Smash |
+ | !'''8-player Smash Availability''' |
! align="center" | |
! align="center" | |
||
! align="center" | |
! align="center" | |
||
! align="center" | |
! align="center" | |
||
! align="center" |25+7 ([[DLC]])<br><small><small>(+3 in 6-Player Smash)</small></small> |
! align="center" |25+7 ([[DLC]])<br><small><small>(+3 in 6-Player Smash)</small></small> |
||
| − | ! align="center" | |
+ | ! align="center" |42+8 ([[DLC]]) |
|} |
|} |
||
| Line 1,936: | Line 2,146: | ||
*{{symbol|zelda|20px}} [[Gerudo Valley]] |
*{{symbol|zelda|20px}} [[Gerudo Valley]] |
||
*{{symbol|zelda|20px}} [[Spirit Train]] |
*{{symbol|zelda|20px}} [[Spirit Train]] |
||
| − | *{{symbol|kirby|20px}} [[Dream Land (SSBWU/3DS)|Dream Land]] |
+ | *{{symbol|kirby|20px}} [[Dream Land (SSBWU/3DS)|'''Dream Land''']] |
*{{symbol|pokemon|20px}} [[Unova Pokémon League]] |
*{{symbol|pokemon|20px}} [[Unova Pokémon League]] |
||
*{{symbol|pokemon|20px}} [[Prism Tower]] |
*{{symbol|pokemon|20px}} [[Prism Tower]] |
||
| − | *{{symbol|fzero|20px}} [[Mute City (SSBWU/3DS)|Mute City]] |
+ | *{{symbol|fzero|20px}} [[Mute City (SSBWU/3DS)|'''Mute City''']] |
| − | *{{symbol|earthbound|20px}} [[Magicant]]'''<nowiki/>''' |
+ | *{{symbol|earthbound|20px}} [[Magicant|'''Magicant''']]'''<nowiki/>''' |
*{{symbol|fireemblem|20px}} [[Arena Ferox]] |
*{{symbol|fireemblem|20px}} [[Arena Ferox]] |
||
*{{symbol|kidicarus|20px}} [[Reset Bomb Forest]] |
*{{symbol|kidicarus|20px}} [[Reset Bomb Forest]] |
||
*{{symbol|animalcrossing|20px}} [[Tortimer Island]] |
*{{symbol|animalcrossing|20px}} [[Tortimer Island]] |
||
| − | *{{symbol|balloonfight|20px}} [[Balloon Fight (stage)|Balloon Fight]] |
+ | *{{symbol|balloonfight|20px}} [[Balloon Fight (stage)|'''Balloon Fight''']] |
*{{symbol|nintendogs|20px}} [[Living Room]] |
*{{symbol|nintendogs|20px}} [[Living Room]] |
||
*{{symbol|findmii|20px}} [[Find Mii]] |
*{{symbol|findmii|20px}} [[Find Mii]] |
||
*{{symbol|tomodachi|20px}} [[Tomodachi Life (stage)|Tomodachi Life]] |
*{{symbol|tomodachi|20px}} [[Tomodachi Life (stage)|Tomodachi Life]] |
||
*{{symbol|ds|20px}} [[PictoChat 2]] |
*{{symbol|ds|20px}} [[PictoChat 2]] |
||
| − | *{{symbol|pacman|20px}} [[Pac-Maze]] |
+ | *{{symbol|pacman|20px}} [[Pac-Maze|'''Pac-Maze''']] |
=====Returning Stages===== |
=====Returning Stages===== |
||
| Line 1,957: | Line 2,167: | ||
*{{symbol|metroid|20px}} [[Brinstar]] |
*{{symbol|metroid|20px}} [[Brinstar]] |
||
*{{symbol|starfox|20px}} [[Corneria]] |
*{{symbol|starfox|20px}} [[Corneria]] |
||
| − | *{{symbol|gameandwatch|20px}} [[Flat Zone 2]] |
+ | *{{symbol|gameandwatch|20px}} [[Flat Zone 2|'''Flat Zone 2''']] |
| − | *{{symbol|wario|20px}} [[WarioWare, Inc.]] |
+ | *{{symbol|wario|20px}} [[WarioWare, Inc.|'''WarioWare, Inc.''']] |
*{{symbol|pikmin|20px}} [[Distant Planet]] |
*{{symbol|pikmin|20px}} [[Distant Planet]] |
||
*{{symbol|sonic|20px}} [[Green Hill Zone]] |
*{{symbol|sonic|20px}} [[Green Hill Zone]] |
||
| Line 1,978: | Line 2,188: | ||
*{{symbol|pokemon|20px}} [[Kalos Pokémon League]] |
*{{symbol|pokemon|20px}} [[Kalos Pokémon League]] |
||
*{{symbol|fireemblem|20px}} [[Coliseum]] |
*{{symbol|fireemblem|20px}} [[Coliseum]] |
||
| − | *{{symbol|gameandwatch|20px}} [[Flat Zone X]] |
+ | *{{symbol|gameandwatch|20px}} [[Flat Zone X|'''Flat Zone X''']] |
*{{symbol|kidicarus|20px}} [[Palutena's Temple]] |
*{{symbol|kidicarus|20px}} [[Palutena's Temple]] |
||
*{{symbol|wario|20px}} [[Gamer]] |
*{{symbol|wario|20px}} [[Gamer]] |
||
| Line 1,988: | Line 2,198: | ||
*{{symbol|wiisports|20px}} [[Wuhu Island]] |
*{{symbol|wiisports|20px}} [[Wuhu Island]] |
||
*{{symbol|sonic|20px}} [[Windy Hill]] |
*{{symbol|sonic|20px}} [[Windy Hill]] |
||
| − | *{{symbol|pacman|20px}} [[Pac-Land]] |
+ | *{{symbol|pacman|20px}} [[Pac-Land|'''Pac-Land''']] |
*{{symbol|miiverse|20px}} [[Miiverse (stage)|Miiverse]] (DLC) |
*{{symbol|miiverse|20px}} [[Miiverse (stage)|Miiverse]] (DLC) |
||
| Line 2,009: | Line 2,219: | ||
*{{symbol|fireemblem|20px}} [[Castle Siege]] |
*{{symbol|fireemblem|20px}} [[Castle Siege]] |
||
*{{symbol|kidicarus|20px}} [[Skyworld]] |
*{{symbol|kidicarus|20px}} [[Skyworld]] |
||
| − | *{{symbol|animalcrossing|20px}} [[Smashville]] |
+ | *{{symbol|animalcrossing|20px}} [[Smashville|'''Smashville''']] |
====Both Versions==== |
====Both Versions==== |
||
| Line 2,106: | Line 2,316: | ||
{{SSB3DS Stages}} |
{{SSB3DS Stages}} |
||
{{SSBWU Stages}} |
{{SSBWU Stages}} |
||
| − | |} |
||
[[Category:Stages]] |
[[Category:Stages]] |
||
| − | [[Category:Stages ( |
+ | [[Category:Stages (SSBU)]] |
Revision as of 00:52, 19 September 2019

The Battlefield stage in Super Smash Bros. for Wii U is an example of a typical Smash Bros. stage.
A stage (sometimes called a map or board) is a location in which characters fight or complete objectives. The word "stage" usually refers to a versus mode stage, but can also refer to the ground or large central platform within this location. As well as versus mode stages, single player mode stages, such as the Target Smash maps, exist for purposes other than fighting.
Versus stages
Within all the games of the Super Smash Bros. series, most versus mode stages are available from the start, while a small number must be unlocked by completing certain objectives. Most stages, like Princess Peach's Castle, are derived from places in playable characters' universes. Super Smash Bros. Melee introduced two Smash Bros universe stages - Battlefield and Final Destination. In Super Smash Bros. Brawl, stages derived from games without associated playable characters were introduced, namely Smashville and Hanenbow, while PictoChat represents a Nintendo DS utility interface. Additionally, not every playable character has a stage from their own universe. Included in all games other than the first are a small number of past stages - stages from a previous Smash game with no major alterations.
Stages range in size from the large Temple and New Pork City to the small Onett and Brinstar. Typically, stages involve a large central platform with ledges and one or more smaller platforms, as well as blast lines above, below and to the left and right of the visible area. Some stages, such as Mushroom Kingdom and Coliseum have floors that continue past the edge of the visible area and pass through a side blast line, these edges are known as "walk off edges" or "walk offs", because characters can walk offscreen without the need to become airborne. Stages with walk off edges on both the left and right, like Bridge of Eldin, are sometimes called "walk off stages". Some walk off stages, such as Onett, have no lower blast line, while others, such as Bridge of Eldin, only infrequently have the lower blast lines introduced.
In Super Smash Bros. Melee, moving and transforming stages were introduced. Big Blue and Rainbow Cruise consist entirely of platforms that move or appear on and offscreen, while stages like Infinite Glacier and Rumble Falls scroll continuously up or down. Other stages, such as Pokémon Stadium, undergo partial transformations at certain intervals, while others, like Brawl's Frigate Orpheon and Castle Siege cycle through complete transformations. Similarly, stages like Delfino Plaza and Skyloft will take players to various areas via moving platforms. Mushroomy Kingdom may be one of two stages depending on either luck or player's input prior to the match. Tortimer Island's layout is randomized each battle as well.
Other stage elements include breakable barriers and platforms, such as the pillars of Luigi's Mansion and the stone floors of Skyworld; stage hazards and enemies, such as lasers, cars and Klap Traps; local items such as apples; and interactive objects such as Barrel Cannons. While water has no effect on movement in Melee, Brawl introduced swimming, and many of its stages involve water that can be swum in.
In Brawl and Smash for 3DS/Wii U, the appearance of some items, namely crates and barrels, differs depending on the aesthetic style of the stage they appear on. The following is quoted from the DOJO!! website.
| “ | Previously, wooden crates and barrels were pretty much garden-variety. This time around, these items change visually to match the mood of the stage. On sci-fi type stages they take on a futuristic tone. On more fantastic stages, they look more like presents.[1] | ” |
List of Stages
This is a list of the stages in the Super Smash Bros. series. A stage that returns from a previous installment is often called a Past Stage.
| Starter | Unlockable | Downloadable |

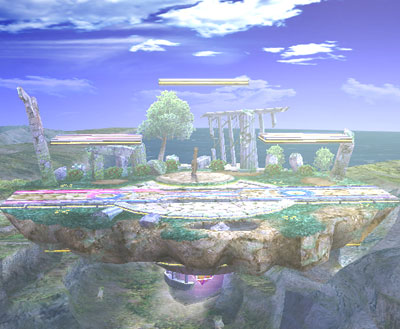

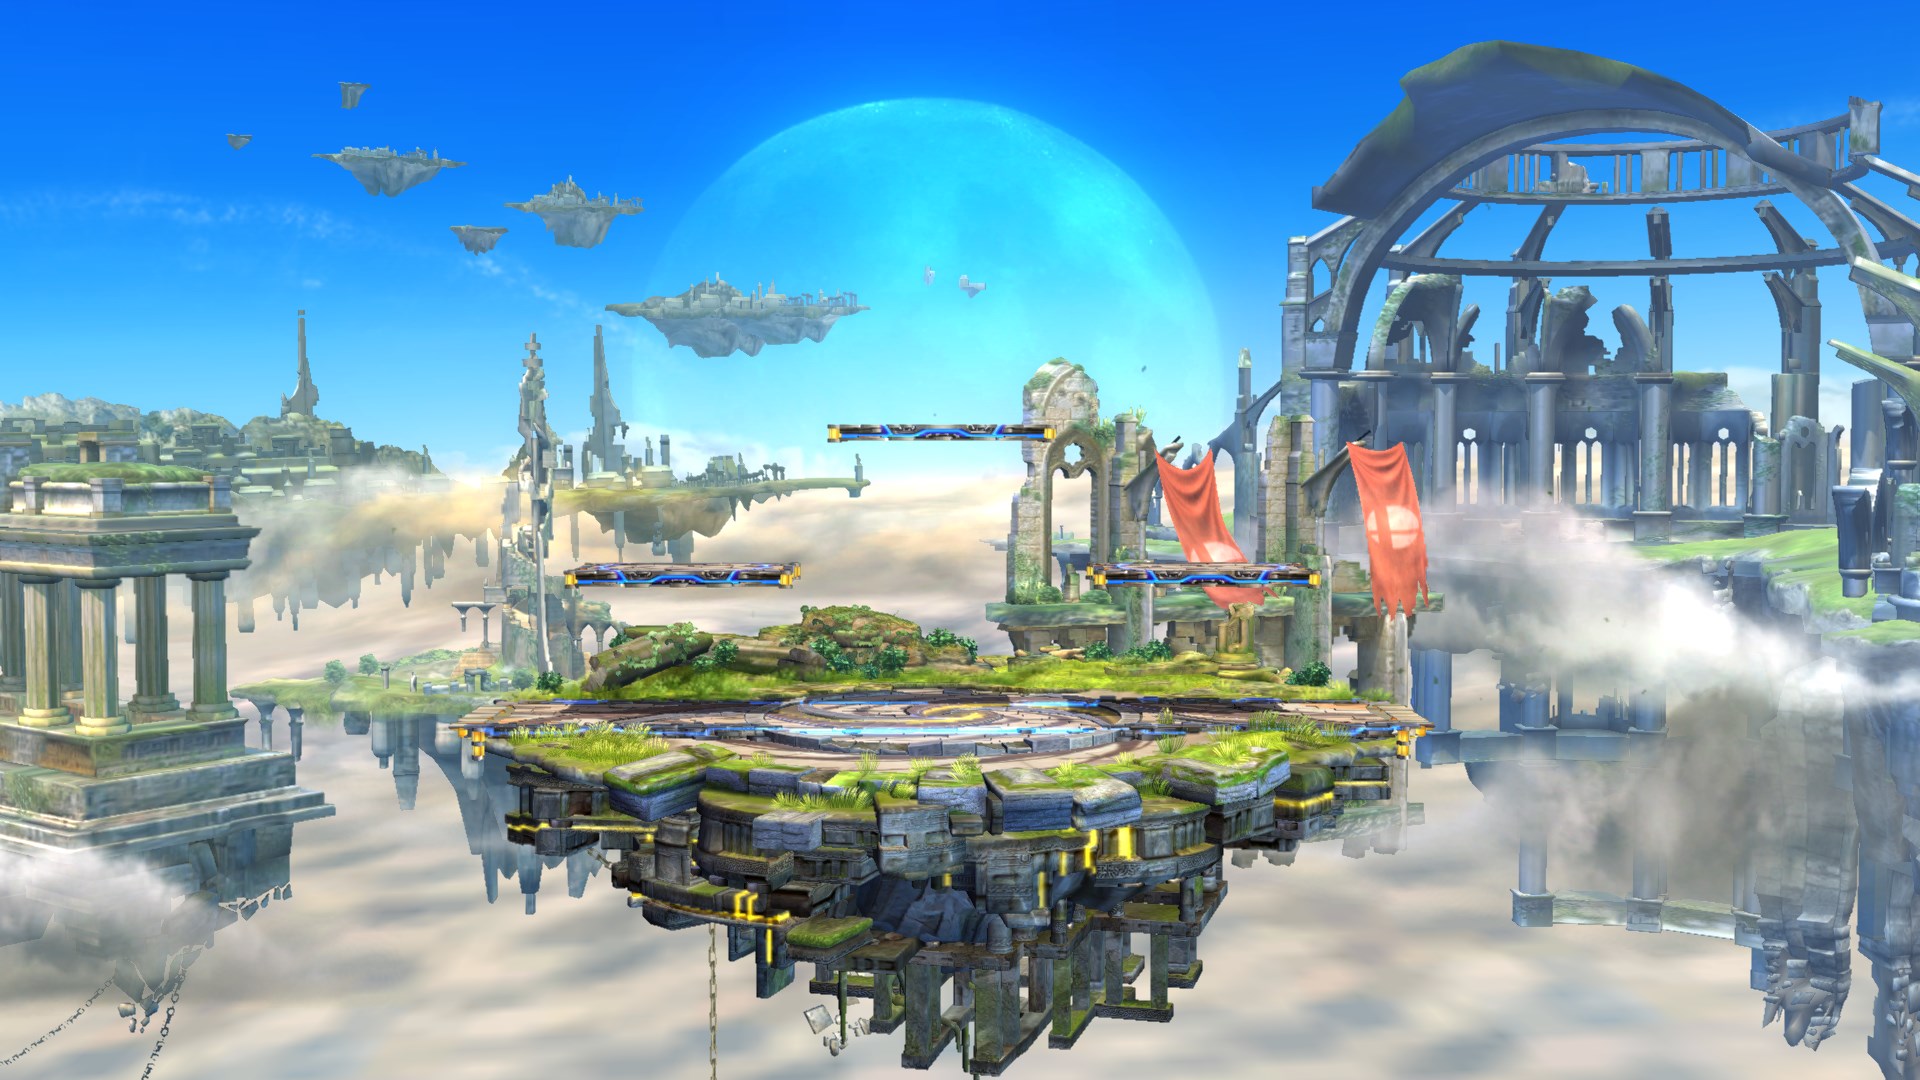
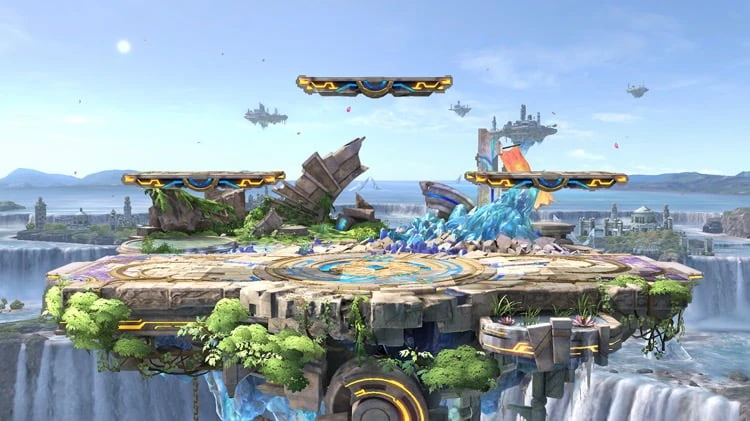
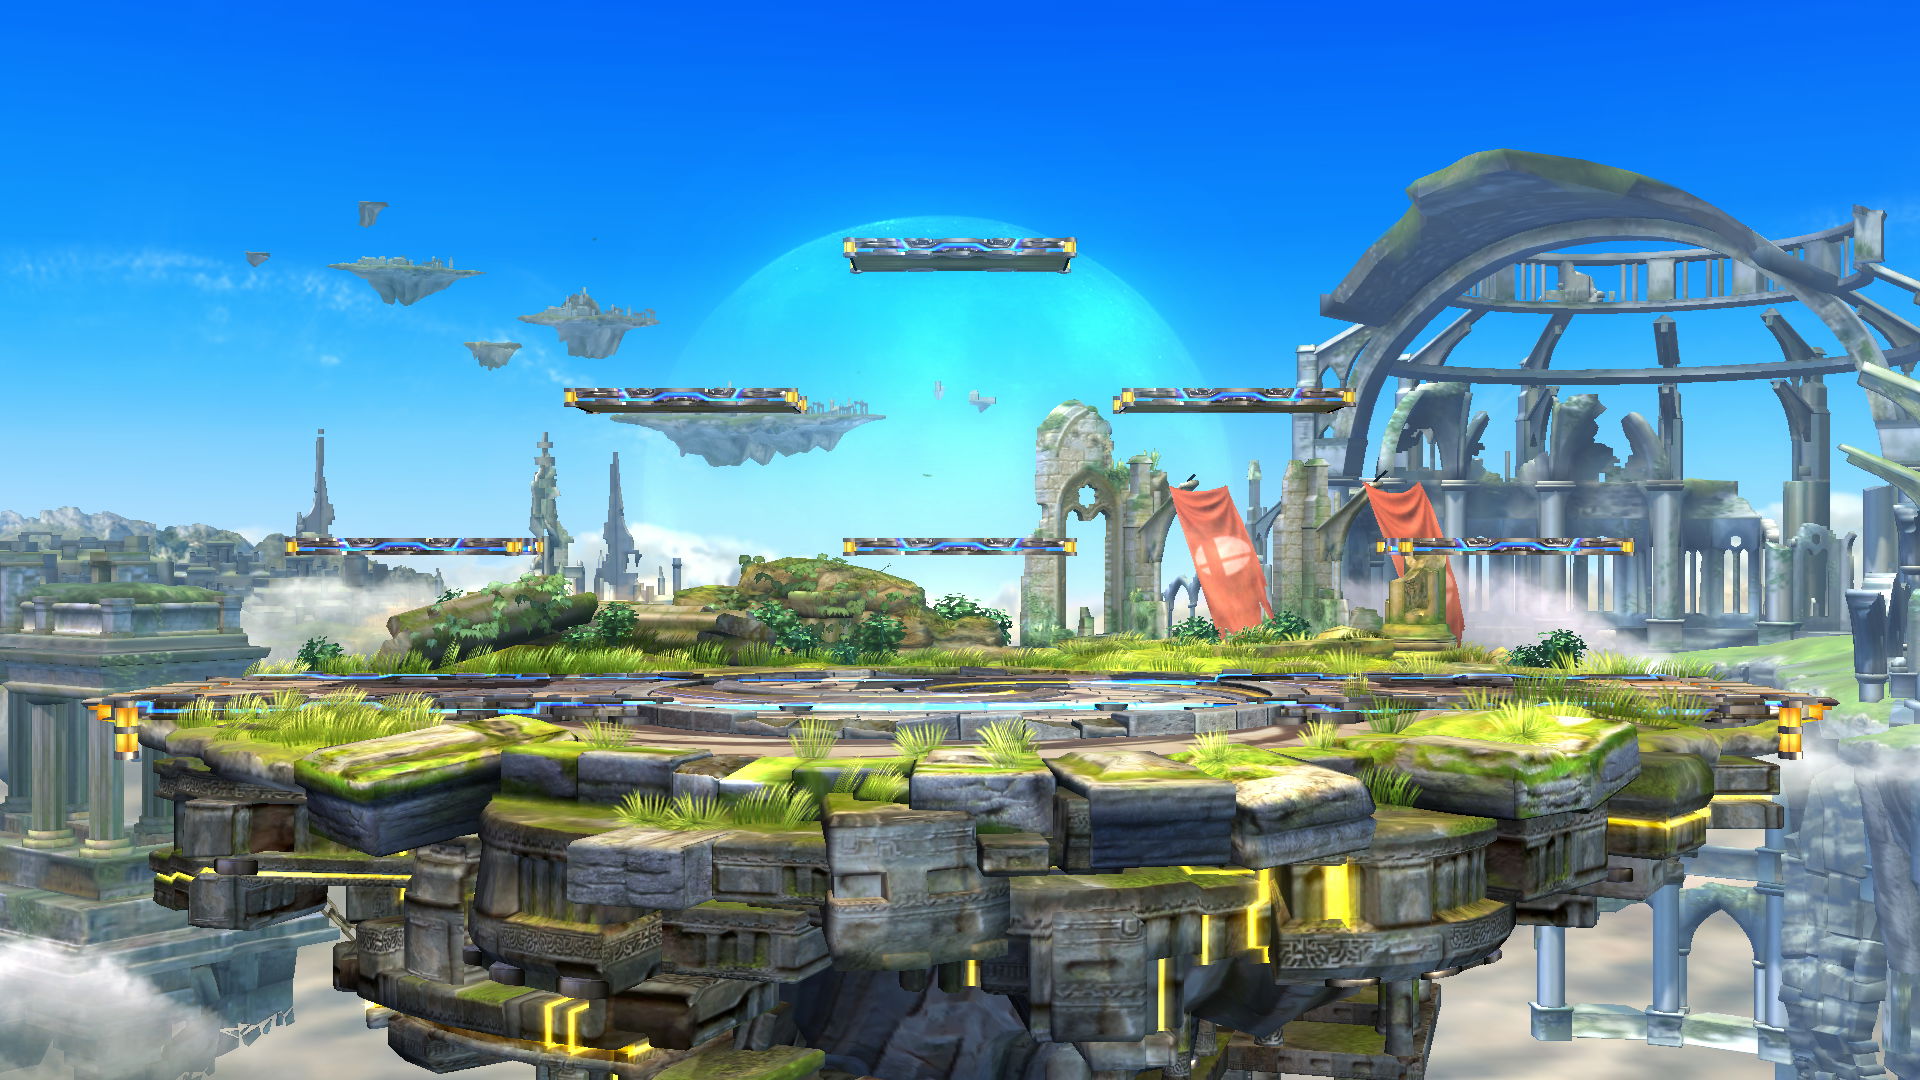
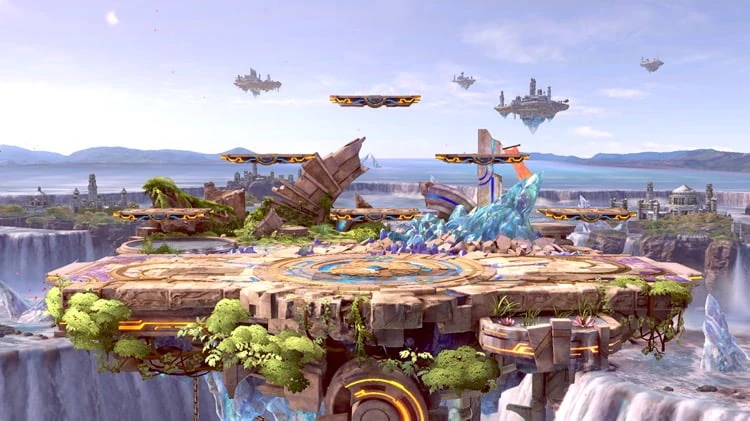


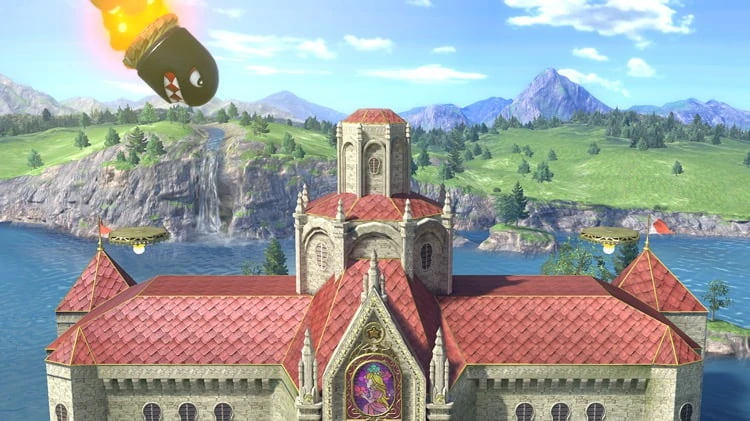

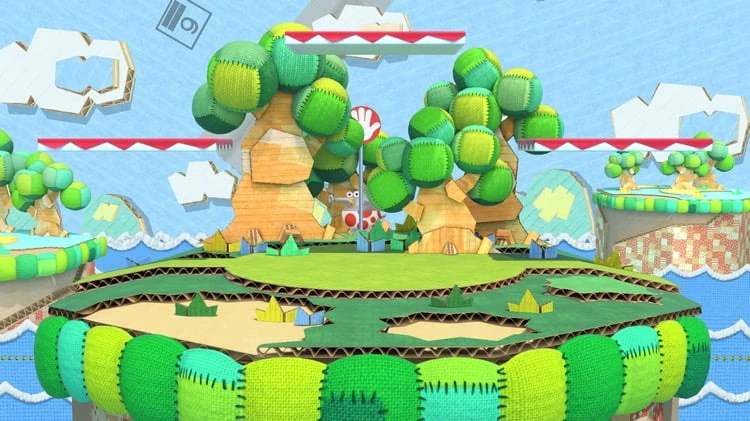
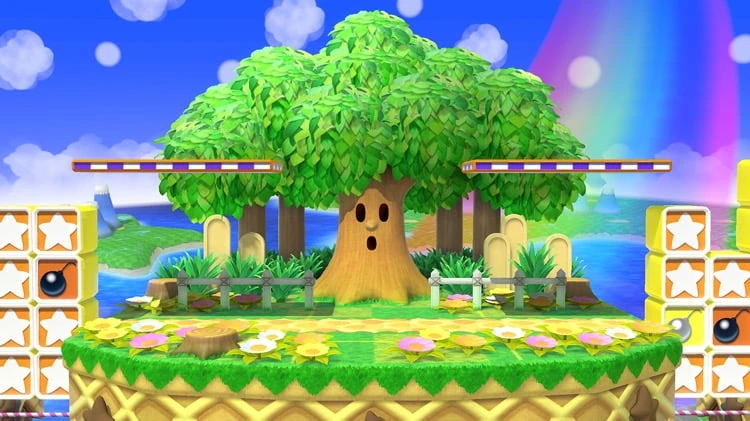
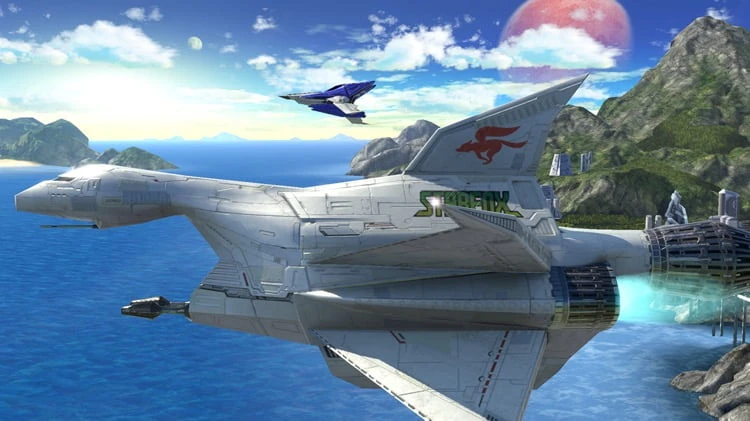
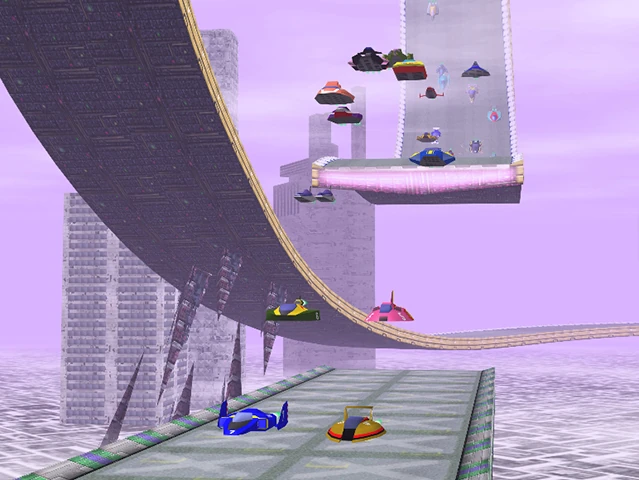

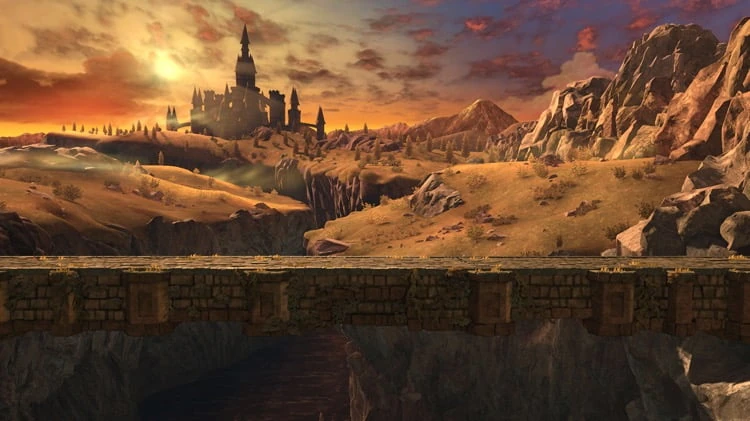


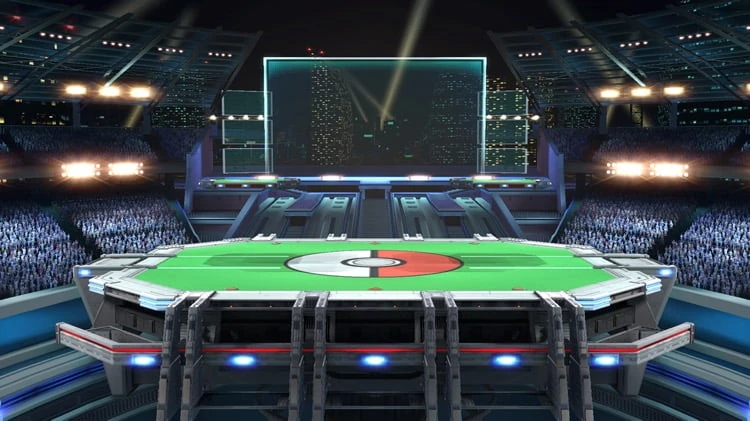
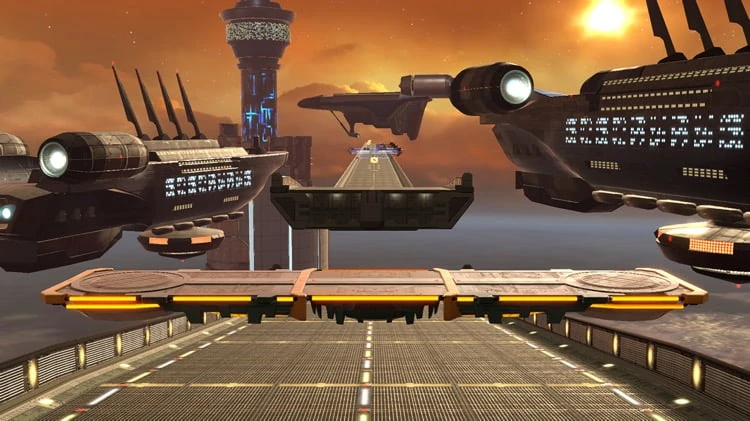
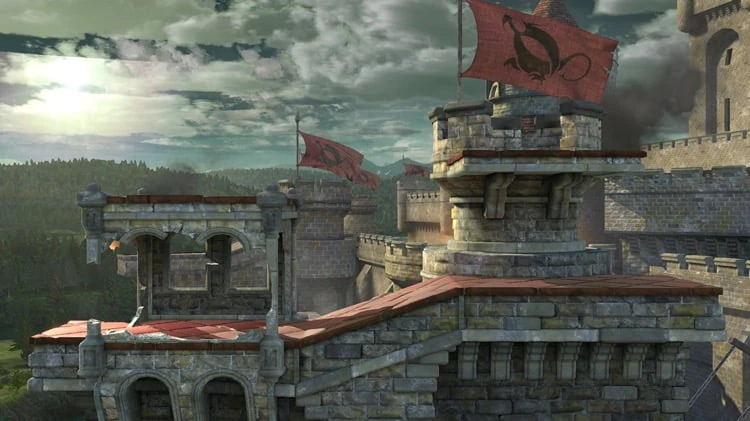
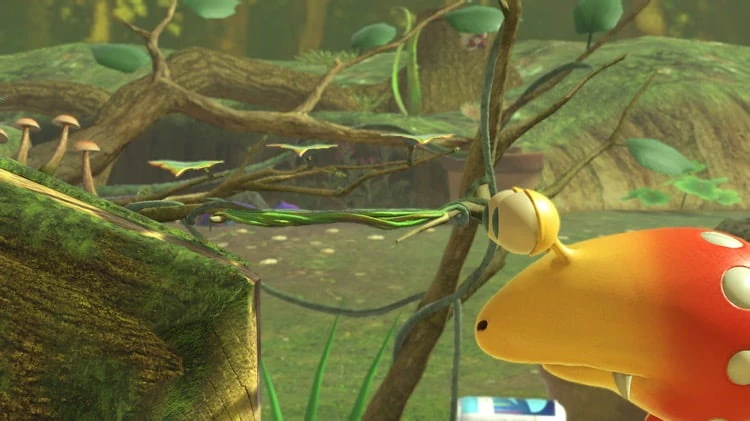


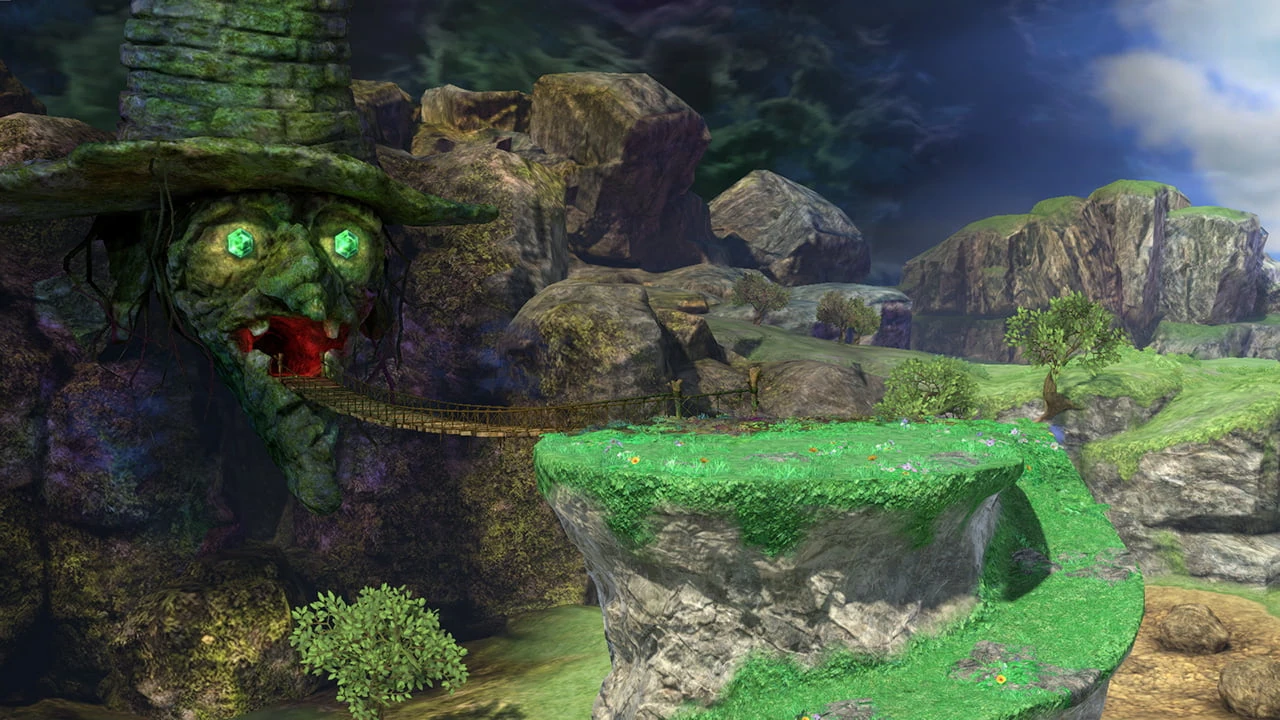

Custom Stages
Brawl introduced the Stage Builder, a tool that allows players to build their own stages, for use in multiplayer matches, using sets of provided objects, some unlockable. Brawl includes a set of Sample Stages that were built using the Stage Builder. The stage builder can also be used to build No KO stages and "CD Factories" - exploitative stages used for quickly obtaining CDs.
In Super Smash Bros.

The stage select screen in Smash 64.
There are nine versus stages in the original Super Smash Bros., eight starters and one unlockable, Mushroom Kingdom, which is shown in bold.
 Peach's Castle
- Mushroom Kingdom
- Yoshi's Island
- Congo Jungle
- Hyrule Castle
- Planet Zebes
- Dream Land
- Sector Z
- Saffron City
In Melee

The stage select screen in Melee.
There are 29 versus stages in Super Smash Bros. Melee, 18 starters and 11 unlockable stages, shown below in bold. All three past stages are unlockable.
New stages
- Battlefield
- Final Destination
- Princess Peach's Castle
- Rainbow Cruise
- Mushroom Kingdom
- Mushroom Kingdom II
- Yoshi's Island
- Yoshi's Story
- Kongo Jungle
- Jungle Japes
- Great Bay
- Temple
- Brinstar
- Brinstar Depths
- Fountain of Dreams
- Green Greens
- Corneria
- Venom
- Pokémon Stadium
- Poké Floats
- Mute City
- Big Blue
- Onett
- Fourside
- Icicle Mountain
- Flat Zone
Past stages
In Brawl
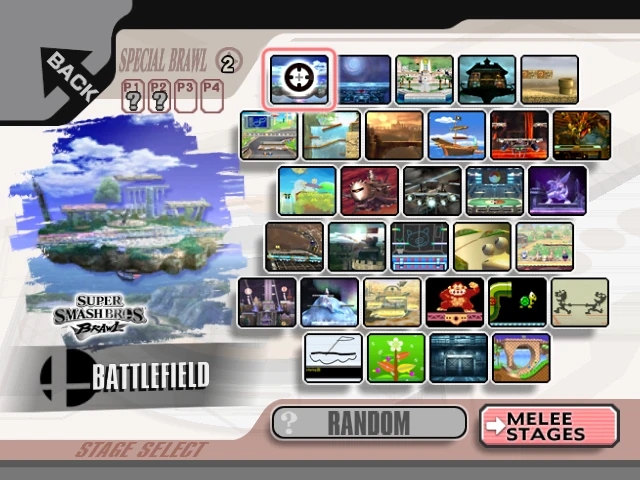

The stage select screen in Brawl, showing the new stages.

The stage select screen in Brawl, showing the Melee stages.
There are 41 versus stages in Super Smash Bros. Brawl, 29 starters and 12 unlockable stages, shown below in bold. None of the original Super Smash Bros. stages return, but there are 10 Melee stages, one from each universe involved in the original Super Smash Bros.
New Stages
- Battlefield
- Final Destination
- Delfino Plaza
- Mushroomy Kingdom
- Mario Circuit
- Luigi's Mansion
- Mario Bros.
- Yoshi's Island
- Rumble Falls
- 75m
- Bridge of Eldin
- Pirate Ship
- Norfair
- Frigate Orpheon
- Halberd
- Lylat Cruise
- Pokémon Stadium 2
- Spear Pillar
- Port Town Aero Dive
- New Pork City
- Summit
- Castle Siege
- Flat Zone 2
- Skyworld
- WarioWare, Inc.
- Distant Planet
- Smashville
- PictoChat
- Hanenbow
- Shadow Moses Island
- Green Hill Zone
Returning Stages
- Rainbow Cruise
- Yoshi's Island
- Jungle Japes
- Temple
- Brinstar
- Green Greens
- Corneria
- Pokémon Stadium
- Big Blue
- Onett
In Smash for 3DS/Wii U
There are 82 stages across the two games; some are shared between versions. Some stages, such as Gaur Plain and Final Destination, are slightly different between the two versions. In addition, all stages can also be played as Ω Stages, which transforms them into flat platforms similar to Final Destination. Not ever stage is available for 8-Player Smash in WiiU. In fact, even some omega stages aren't available for 8-player Smash. The following list shows the maximum players either for normal version then for omega version of each stage available in WiiU.
| Starter | Unlockable | Downloadable |
3DS Version

The stage select for Super Smash Bros. for Nintendo 3DS, showing the normal stages.

The stage select for Super Smash Bros. for Nintendo 3DS, showing the extra stages.
New Stages
- 3D Land
- Golden Plains
- Paper Mario
- Rainbow Road
- Gerudo Valley
- Spirit Train
- Dream Land
- Unova Pokémon League
- Prism Tower
- Mute City
- Magicant
- Arena Ferox
- Reset Bomb Forest
- Tortimer Island
- Balloon Fight
- Living Room
- Find Mii
- Tomodachi Life
- PictoChat 2
- Pac-Maze
Returning Stages
- Mushroomy Kingdom
- Yoshi's Island
- Jungle Japes
- Brinstar
- Corneria
- Flat Zone 2
- WarioWare, Inc.
- Distant Planet
- Green Hill Zone
Wii U Version

The stage select for Super Smash Bros. for Wii U, showing the normal stages.


The stage select for Super Smash Bros. for Wii U, showing the extra stages.
New Stages
- Big Battlefield
- Mushroom Kingdom U
- Mario Galaxy
- Mario Circuit
- Woolly World
- Jungle Hijinxs
- Skyloft
- Pyrosphere
- The Great Cave Offensive
- Orbital Gate Assault
- Kalos Pokémon League
- Coliseum
- Flat Zone X
- Palutena's Temple
- Gamer
- Garden of Hope
- Town and City
- Wii Fit Studio
- Wrecking Crew
- Pilot Wings
- Wuhu Island
- Windy Hill
- Pac-Land
- Miiverse (DLC)
Returning Stages
- Delfino Plaza
- Mario Circuit (Brawl)
- Luigi's Mansion
- Yoshi's Island
- Kongo Jungle 64
- 75m
- Bridge of Eldin
- Temple
- Pirate Ship (DLC)
- Norfair
- Halberd
- Lylat Cruise
- Pokémon Stadium 2
- Port Town Aero Dive
- Onett
- Castle Siege
- Skyworld
- Smashville
Both Versions
New Stages
- Battlefield
- Final Destination
- Super Mario Maker (DLC)
- Boxing Ring
- Gaur Plains
- Duck Hunt (DLC in SSB3DS)
- Wily Castle
- Suzaku Castle (DLC)
- Midgar (DLC)
- Umbra Clock Tower (DLC)
Returning Stages
- Peach's Castle (64) (DLC)
- Hyrule Castle (64) (DLC)
- Dream Land (64) (DLC)
Tournament legality
Some stages are banned in competitive play because they are considered disruptive or unfair. For more information, see Banned stages.
Single player stages
In the single player modes and challenges, a number of stages appear that are not available in versus mode.
- Brawl and Melee's Home-Run Contest stages involve a central platform from which Sandbag is hit, and a very long stretch of ground to the right of the platform, for it to land upon.
- In Melee's "trophy tussle" event matches, the player fights CPUs upon a stage that takes the form of a giant object, the trophy for which he or she wins after completing the event.
- The original Super Smash Bros. Board the Platforms stages function as agility tests, and there are twelve in total - each one is designed to challenge the player's character.
- Like Board the Platforms, Break the Targets and Target Test stages of the original Smash Bros. and Melee respectively are tailored to challenge each character - twelve exist in the original and twenty five in Melee. Some of Melee's Target Test stages are decorated in reference to their character's universe; Pikachu's, for example, has decorative Poké Balls in its walls, while the Ice Climbers' look like a level from the game Ice Climber. Brawl, however, simply has five Target Smash stages for all characters, each representing a different difficulty level.
- Areas in Adventure Mode and the Subspace Emissary are technically defined as stages.
- Brawl's Online Practice Stage is playable only while waiting for an online match to load.
- Brawl's Configure Test stage is playable only for the purpose of testing custom controls, and only as Mario. In Smash for 3DS/Wii U, the stage is also playable to test the character's Custom Moves, Equipment, and Mii Fighters.
In Super Smash Bros.
- Board the Platforms stages
- Fighting Polygon Stage
- Master Hand's Stage
- Metal Mario's Stage
- Target Test stages
In Melee
- Adventure mode stages
- All-Star Teleporter - the stage the players are teleported to and from between All-Star mode matches.
- Entei - the stage on which Event 26: Trophy Tussle 2 is played.
- Goomba - the stage on which Event 14: Trophy Tussle 1 is played.
- Home-Run Stadium
- Majora's Mask - the stage on which Event 47: Trophy Tussle 3 is played.
- Race to the Finish - a Classic Mode bonus game stage.
- Snag the Trophies stage - a Classic mode bonus game stage.
- Target Test stage - a set of single player mode stages that also appear in Classic mode as bonus games.
In Brawl
- All-Star Teleporter - the stage the players are teleported to and from between All-Star Mode matches.
- Home-Run Stadium
*Target Smash!! stages - a set of single player mode stages that also appear in Classic Mode as bonus games.
- The Subspace Emissary stages
- Configure Test - the stage on which custom controls are tested.
- Online Practice Stage.
In Smash for 3DS/Wii U
- All-Star Teleporter - the stage the players are teleported to and from between All-Star Mode matches.
- Home-Run Stadium
- Target Blast
- Smash Run map
- Master Fortress
- Credits - the place were the player controls a character and hit the credits to create an image.
- Configure Test - the stage on which custom settings are tested.
- Online Practice Stage - Only in the 3DS version, the Wii U version is Miiverse's Ω Form.
Non-playable stages
Some stages exist in the original Super Smash Bros. and Melee, but are non-playable; developers did not intended for them to be played in. Non-playable stages are accessible only through hacks and debug programs, such as Action Replay. Some, such as "Test", are assumed to have been used for testing during game development, while others, such as the "Tutorial stage", are used in the game but not for the purpose of gameplay.
In Super Smash Bros.
In Melee
In Brawl
- 1-Player Mode Credits - the file name of the single player mode credits is "STGCHARACROLL.pac" which technically defines it as a stage.
- Results Screen - the results screen that appears after a match is a stage, playable only through hacking.<ref>http://www.youtube.com/watch?v=HUCtkSWsFkY</ref>
References
- ↑ http://www.smashbros.com/en_us/items/item03.html
- ↑ Available in the game in version 1.1.1 onwards. It's considered a primary WiiU stage officially, as it came first for the WiiU version, then only afterwards ported to 3DS, as can be see in Ultimate Stage selection order.
- ↑ Available in the game in version 1.0.8 onwards
- ↑ Battlefield, Big Battlefield and Final Destination are taking in account, as every game debuted his own version of these stages.
- ↑ Of these new stages, 4 are in both versions. Duck Hunt came first at Wii U, then isn't considered a debuting stage on 3DS.
- ↑ Discounting all the stages that came first on 3DS, except for Duck Hunt which came in the Wii U version first. Also, each version has their own exclusive Battlefield and Final Destination.
- ↑ 7.0 7.1 At 2018-08-08.
| ||||||||
| ||||||||
| ||||||||||||||
| ||||||||||||||