m (Reverted edits by 64.231.248.202 (talk) to last version by Illyrias Acolyte.) |
m (Reverted edits by ClonedPickle (talk) to last version by 64.231.248.202.) |
||
| Line 115: | Line 115: | ||
==== Peach ==== |
==== Peach ==== |
||
| − | Peach has surprising range and power, so do NOT under any circumstances underestimate her. Her grab range is almost as large as Roy's, and can easily combo him after a grab. Her smashes and aerials are quite powerful. If there's one thing to say about her smashes, do not, whatever you do, crouch cancel her down smash. It is easily possible to get over 50% damage and be knocked off the stage from her fast down smash if you CC it, so avoid crouch cancelling when Peach is nearby. |
+ | Peach has surprising range and power, so do NOT under any circumstances underestimate her. Her grab range is almost as large as Roy's, and can easily combo him after a grab. Her smashes and aerials are quite powerful. If there's one thing to say about her smashes, do not, whatever you do, crouch cancel her down smash. It is easily possible to get over 50% damage and be knocked off the stage from her fast down smash if you CC it, so avoid crouch cancelling when Peach is nearby. Watch out for her vegetables, luckily you can shield them or catch them and throw them back at her. This makes approaching her a hassle though. You can easily tell how potent a vegetable is by looking at the face. The less happier or more disgusted the face looks, the more powerful it is, with a sick-faced or a stitch-faced one being the most dangerous. Regardless, keep this battle a ground-based one as much as you can, as Peach reigns supreme in the air against Roy. It is imperative to space properly in this matchup if you don't want to die early due to a smash. Luckily, Peach is only a middleweight so if you hit her well with a smash or a well-charged flare blade when she's at 100%, chances are she's not coming back or you have the time to edgeguard/edgehog her. Still one of Roy's harder matchups though, due to her great recovery. |
==== Captain Falcon ==== |
==== Captain Falcon ==== |
||
Revision as of 00:23, 15 September 2009
- This article is about Roy's appearance in Super Smash Bros. Melee. For other uses, see Roy. Also, for information about the character of whom Roy is a clone, see Marth (SSBM).
Roy (ロイ, Rōi) is a secret character in Super Smash Bros. Melee. Due to the vast amount of similarities between Roy and fellow Fire Emblem lord, Marth, Roy is considered to be a "clone" of Marth. He is a secret character, unlocked either by completing Classic Mode or Adventure Mode with Marth, or by playing 900 VS. mode matches. Roy's game, FE6, was not released at the time of SSBM, and he was only in Melee as a promotion.
Roy is from the sixth Fire Emblem game in its series titled Fire Emblem: The Binding Blade (Fuuin no Tsurugi), and was the last game in the series to be exclusive in Japan. He is the son of Eliwood, one of the three stars in Fire Emblem, Fire Emblem's first game to be released internationally. (subtitled "Rekka no Ken" in Japan which translates to "Blazing Sword"). Roy also makes a cameo in Rekka no Ken in the end cutscene-as a little boy.
In the Fire Emblem series, Roy is considered one of the weaker Lords (the character class for the main characters) due to his late promotion. In Fire Emblem: The Binding Blade, Roy is a mid tier character, having no particular flaws apart from his late promotion. After promotion however, he is considered to be one of the game's strongest characters.
Attributes
Overall, Roy is a strong, fast character with great range (including his grab range). However, he is over-reliant on his side smash to score KOs. Roy's fast falling speed makes him difficult to be KOd off the top, but easy to combo (especially since he suffers long periods of hitstun). Roy has many spikes (such as a tipped Up Smash), but they are all hard to use effectively. Roy's counter is the most powerful in the game (it multiplies damage and knockback by 1.5). On the downside, it is harder to time than Marth's counter and leaves Roy vulnerable if it misses. Roy's down tilt is good combo starter, but Roy still has trouble comboing opponents due to his attacks having low hitstun. Some of his moves have more knockback when tipped (e.g. flare blade), but the best of his damage infliction requires a sweetspot. Roy can chain grab some characters using his up and forward throws, and he has a fast, long dash-dance. However, he lacks a projectile, and his recovery can be difficult to time.
Special Moves
Comparison to Marth
The comparison of Marth and Roy had a significant impact on the Smash community in 2003 and 2004 during the "tier wars" at GameFAQs, where they were a major flashpoint of the debate over the existence of tiers. The "pro-tiers" who tried to prove the existence of tiers to the "anti-tiers" compared many of Marth and Roy's statistics, from running speed to power, to reach the conclusion that Marth is the better character. They argued that Marth was faster, heavier, stronger, and better at recovering than Roy. The anti-tiers responded by trying to refute the point that Marth was stronger, stating that the size of Roy's sweet spot makes up for Marth's added strength at the tip of his blade.
Eventually, the pro-tiers won the argument and many people agreed that Marth is a superior fighter to Roy. Nowadays, however, it is known that many of these comparisons were either false or insignificant, due to poor analysis; for instance, Marth's extra weight is negligible, and may even be interpreted as a disadvantage, considering Marth (with his extra weight) is susceptible to Fox's shine combos and Roy (being lighter) is not. More importantly, a common assumption, that Marth is faster than Roy, is up to question considering that Roy's SHFFL is faster than Marth's due to his falling speed and lower short hop.
Despite lapses in the original analysis, however, players still agree that Marth is an overall better character, for reasons better supported with modern knowledge than those proposed in the past. The principle reason is precisely the one that anti-tiers tried to refute - that Roy has too much trouble trying to kill his opponents, being effectively weaker, and that Marth, with his superior combos and killers, can kill much more easily.
Trophy Descriptions
In addition to the normal trophy about Roy as a character, there are two trophies about him as a fighter, unlocked by completing the Adventure and All-Star modes respectively with Roy on any difficulty:
- (Smash Red)
- While Roy's moves are well balanced, he's a little on the slow side, and doesn't excel at midair combat. His blade, the Sword of Seals, gives him excellent reach, and makes his Double-Edge Dance slightly different than Marth's Dancing Blade. When it's fully charged, Roy's destructive Flare Blade delivers an instant KO.
- B: Flare Blade
- Smash B: Double-Edge Dance
- (Smash Blue)
- Roy's blade is different than Marth's; he does the most damage hitting with the center of his sword. So, a fearless advance into the arms of his foe is Roy's best bet. Blazer is a bit slower than Marth's Dolphin Slash, but it's still a mighty attack that sets anyone it strikes aflame. Roy's attack after using Counter differs slightly from Marth's.
- Up & B: Blazer
- Down & B: Counter
Home Run Contest
Roy is considered to have an easier Homerun Contest strategy for beginners.
Beginners Tactic:
Don't grab the bat, dash to the Sandbag and Up Smash. While Sandbag's flying charge up Up Smash again and release once he's on top of Roy. Repeat until there are 5 seconds left on the clock then move backwards a little (to be in front of the Sandbag when he comes down) and start charging B. If done correctly, He will finish the Flare Blade, and send the Sandbag really far.
Novice tactic
Grab bat
U-smash until time runs out.
Home-run Sandbag.
Break the Targets
Use A+up to destroy target 1. Then run off the ledge to the right, use Roy's Blazer (B+up) to destroy the target 2. The momentum should bring you up on the box, jump onto the next box, and use sword slashes to rid yourself of targets 3 and 4.
From the second box, use double jump and Blazer to reach the high platform. Go down onto the slightly lower one, and swing at target 5 when it comes up to greet you. Jump onto the left platform, and the jump again and swing at target 6 to destroy it.
Now comes the tricky part. Run off the ledge using B+left moves to hit targets 7 and 8, or sword slashes as necessary. Jump to gain extra height, and try to land on the ledge at the far left. If you get in trouble, try to hit the flippers, they'll send you somewhere fast, hopefully to one of the platforms. If you don't destroy both targets at the first attempt, try to land on the start platform, and go round again. Should you manage to get to the far left platform, use a sword-slash on destroy target 9, and then A+down to destroy target 10.
Glitch
Using Roy's Counter on a smash attack will send an enemy into the air where they will be redirected (bounce)down creating a 90° angle from their start position. This works better when the enemy has higher damage.
DED
Roy's Over B is one of his most used moves, with good reason. It is fast, can combo with itself, variable, and has decent knockback on the third hit, and good knockback on the fourth.
Generally the DED is used out of a dash dance, and is therefore increased in usefulness by Roy's great dash dance.
Good ideas with DED include only using the first hit to knock people out of the air; since it is disjointed, Roy can (relatively easily) stop approachers.
Against CCers or SG's, >B >B VB puts most characters out of range of the shield grab, and knocks crouch cancellers over.
Roy can combo FFers into the third strong hit at higher percents (and others at lower %'s) by using >B ΛB >B. This is useful when having trouble landing a forward smash.
>B (>B/ΛB) ΛB will meteor smash the opponent. It can be used in attempt to meteor smash someone off the level, or to set up for a tech chase. Neither work very often.
If the player is committed to using the 4th hit of the DED, which shouldn't be very often, typically ΛB is the way to go. It has as much knockback as the last >B, and WILL shield poke if the opponent's head is sticking above his shield just a little.
VB and >B as the fourth hits are useful against CCers who want to take all the damage and if a little extra range is needed-respectively.
The >B, >B, ΛB, VB combo will almost always hit the opponent, first by slamming him down with the ΛB then following up with the VB's multiple hits. The whole combo may deal at least 40% of damage with the option and possibility of finishing off with a down smash resulting in more damage.
General Gameplay
As with all low tiers, Roy's gameplay emphasizes his strengths and attempts to make his weaknesses as unnoticeable as possible. This means a heavy reliance on his DED, grab, down tilt and forward smash.
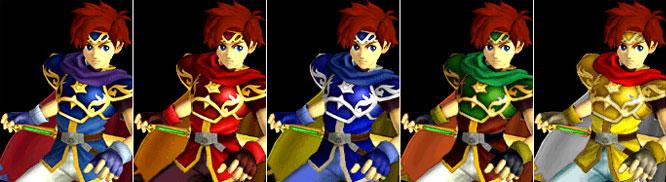
Costume Gallery
Character Specific Strategies
This list is organized in order of the most recent NTSC tier list positions for Melee released by the Smash Back Room on Smashboards, with the exception of Fox/Falco, Mario/Dr. Mario, Pikachu/Pichu, and Link/Young Link, since their gameplay is very similar or have similar characteristics.
Fox/Falco
Roy can chain grab space animals with up-throw. If the opponent DIs, generally this can be ended with a forward smash. Also Roy's DED is especially effective against these fast fallers. Roy's D-tilt leads to many possibilities against fast fallers, such as D-tilt to F-smash or D-tilt to DED. Roy can easily edgeguard Fox's and Falco's side-B recoveries with D-tilt to F-smash or DED at higher damages, and he can use his counter to edgeguard non-sweetspotted up-Bs. Flare Blade also works in this situation if your opponent has high damage, since they usually won't be coming back. Alternatively, he can edgehog their recoveries. Roy is a bit outclassed by the Star Fox characters' speed, but only slightly, as Roy still has decent speed and mobility. Their respective blasters are a nuisance, since Roy has no really effective way of dealing with projectiles. Their aerials have some edgeguarding power, so counter if you see one coming, especially Falco's dair spike, which is very potent. Beware their smashes and the dreaded Reflector. As mentioned in the stages section, Final Destination is Roy's counterpick against these two.
Marth
This fellow FE swordsman may be Roy's toughest matchup, as he is speedier, his attack rate is higher than Roy's, Marth's aerials are incredible, the power of his sweetspot is dangerous, and he doesn't have to get as close as Roy does to deal good damage and knockback. Avoid an aerial battle as much as you can, or else you will be spiked by Marth's down aerial. Marth's attacks may be more powerful, but this offers up a good time for Roy to use his superior counter, as Roy's counter is potentially more damaging than Marth's, although of course use it carefully as Marth can easily grab and combo Roy. Look for openings, and inflict whatever damage you can using tilts, DED and SHFFL'd aerials, as Roy's faster falling speed and lower short hop make Roy's SHFFL superior to Marth's. If you want to grab Marth, wait for an opening to then throw him, preferably with forward throw as Roy can potentially chain him, much like how Marth can chain other Marths. Marth has an easier time edgeguarding Roy than vice versa, although their recoveries are balanced out rather nicely: Marth's Up-B is faster than Roy's Up-B, but Roy's Up-B can go more horizontally. Roy's DED is laggier than Marth's, making it better for planning recovery, but is balanced out by Roy's faster falling speed. Both of their recoveries are fairly predictable though, so use down tilt, DED and forward smash to edgeguard Marth, or use counter if you can tell Marth's Dolphin Slash will hit you and he will still be in the counter's range. Avoid using the Flare Blade for edgeguarding. Alternatively, you can edgehog Marth if he is approaching from below. Marth can use his aerials to edgeguard better than Roy, so be aware of this. Use Roy's Blazer from below to clear some space for you to grab the edge and get back on the stage. It is recommended to pick a stage with platforms, with the Battlefield arrangement as Roy has a decent Up smash and up tilt to use while avoiding Marth's deadly down aerial, thanks to the platforms. Use your wits, cunning and mindgames to avoid a premature death at the hands of the Falchion.
Peach
Peach has surprising range and power, so do NOT under any circumstances underestimate her. Her grab range is almost as large as Roy's, and can easily combo him after a grab. Her smashes and aerials are quite powerful. If there's one thing to say about her smashes, do not, whatever you do, crouch cancel her down smash. It is easily possible to get over 50% damage and be knocked off the stage from her fast down smash if you CC it, so avoid crouch cancelling when Peach is nearby. Watch out for her vegetables, luckily you can shield them or catch them and throw them back at her. This makes approaching her a hassle though. You can easily tell how potent a vegetable is by looking at the face. The less happier or more disgusted the face looks, the more powerful it is, with a sick-faced or a stitch-faced one being the most dangerous. Regardless, keep this battle a ground-based one as much as you can, as Peach reigns supreme in the air against Roy. It is imperative to space properly in this matchup if you don't want to die early due to a smash. Luckily, Peach is only a middleweight so if you hit her well with a smash or a well-charged flare blade when she's at 100%, chances are she's not coming back or you have the time to edgeguard/edgehog her. Still one of Roy's harder matchups though, due to her great recovery.
Captain Falcon
Captain Falcon has a great amount of combos because of his amazing follow-up ability, but he is slightly lacking in range compared to Roy. His grab is especially short compared to Roy, and Captain Falcon has a bit of tough time approaching Roy due to the Counter and the DED and tilts to knock Falcon out of the air. Nevertheless, both characters are relatively speedy to get many solid hits on each other, so be aware of this. At higher damages, both characters may have a chaingrab on the other with up throw (and Falcon can chain Roy at lower percents with forward throw) due to their falling speed, another thing to be aware of. Falcon has a good aerial game, so it is recommended to keep the battle a ground-based one. Both characters can SHFFL pretty well, so be prepared for aerials from nearly anywhere. Falcon is a bit of a heavyweight, so it may be a bit difficult to get him offstage, but once off, he doesn't have a too impressive recovery, as his third jump can't do anything to edgehoggers and only does damage if he is close enough to grab you, which is not often likely. Roy won't have any problems edgehogging or edgeguarding Falcon Dive, so go nuts. As well, if Falcon uses an aerial Raptor Boost and it connects on a grounded Roy while he's offstage, he's done for because of the lag on a successful Raptor Boost, meaning he can't grab the edge in time. An interesting matchup for sure.
Jigglypuff
Roy has the advantage in range, but Jigglypuff's range and strength can be surprising. Make sure you are not provoked into fighting in the air, as Jigglypuff has the advantage there, and beware of its smashes and grabs. Use Roy's tilts, DED and up smash when he can do so safely and when he gets Jigglypuff's damage above about 50%, Roy can start chaingrabbing it with his forward throw. Once you get it to the edge, start edgeguarding it with the Flare Blade, down tilt, forward throw and forward smash and once it is at a high percentage, finish it with a smash attack. N.B. Avoid being the victim of Rest or the Wall of Pain at all costs. An additional, but highly situational strategy is to use a somewhat-charged Flare Blade on a shielding Jigglypuff. As the Flare Blade has some shield-breaker properties once it's been charged to a certain point, using it on Jigglypuff's shield can break it, causing it to self-destruct, as whenever its shield breaks, instead of merely stunning it, it is sent flying vertically past the top KO boundary. This is known as the shield jump.
Ice Climbers
The most important point to remember about the ICs is their diverse chaingrabs. Roy's range is helpful in avoiding the grab, as it has a very short range. Nonetheless, do not grab them unless there is only one left, as the partner will break the other out of a grab, and can even counter with their own chaingrab, which can easily result in a forward smash killing Roy early. This is more of a personal choice, but you may target one partner at a time, as it is much harder to knock them off the stage when both Popo and Nana are together. Keep an eye on the other if you choose to go after one, as they can easily doubleteam on Roy using one as bait or a distraction. There is no need to worry about their projectile, so advance within a decent range and use Roy's tilts and SHFFL'd aerials, as their aerials are not as good. Avoid the DED if both are together as they will knock into each other, reducing the move's effectiveness. Edgeguarding them is relatively easy, as they only have two true recovery moves, Squall Hammer and Belay. You can easily edgehog them if they are well below the stage, as at least one of the partners will die if they are too far below since they can't land properly on the stage. As well, Belay can sometimes act as a tether recovery so you can avoid this by edgehogging. A lone ice climber will definitely use Squall Hammer, and usually when they are above the stage, which can be easily intercepted with counter or aerials from above or below.
Samus
Her grabs, aerials and up and down tilt are dangerous. Dodge or roll around her grab and use tilts and SHFFL'd aerials to keep her off balance. Use Roy's DED, tilts, Flare Blade and forward smash to edgeguard her if you force her off the stage near the edge. If you knock her far away, try to edgehog her to keep her from using her grapple effectively. If she repeatedly bombjumps, use aerials to keep her at bay if she approaches the edge.
Ganondorf
Ganondorf for the most part is a slower, heavier and stronger version of Captain Falcon, with a few things to note. Instead of the knee smash, his forward aerial is a swinging punch downwards with horizontal knockback that is almost as powerful, and his down aerial is even more powerful than Falcon's. His side smash for some odd reason has only vertical knockback, his Gerudo Dragon forces opponents up and behind him diagonally, and his neutral A is a single electrified punch instead of the turbopunch natural combo. Ganondorf has pretty good mobility being a clone of C. Falcon, especially in his rolls, side-B move and Wizard's Foot. He has one or two chaingrabs on Roy, and has the same recovery as Falcon. These are all things to take into caution However, as Ganondorf is a clone of C. Falcon, he also has some of the disadvantages passed along, especially his inferior range compared to Roy and the ease of edgeguarding/edgehogging him. As well, Ganondorf ranks among characters highly susceptible to a countered attack, especially when the attack countered was a Warlock Punch or a down aerial among others. Edgeguard Ganondorf the same way you would Captain Falcon. Always beware of the aerial edgeguard, so it is mandatory to counter an aerial if you can as it could mean death to Roy. It is better to risk a fall and add to Ganondorf's damage than be knocked into a blastline by a powerful aerial unless you can get around it. This matchup ranks among the easier ones for Roy, while still giving a decent amount of challenge, due to Ganondorf's sheer strength and decent speed and mobility.
Luigi
Luigi has almost maddeningly high speed and priority, contrary to any preconceived notions you may have of him. His ground game is really fast, especially in his AAA combo and smashes. His air game is really floaty though, so try to keep him off balance by juggling him. Abusing Roy's range in this matchup is imperative, as the Fire Jump Punch is quite powerful when Luigi hits close. Due to the lack of knockback on Roy's aerials, Roy should be able to juggle Luigi rather easily. Due to his floatiness, Roy may able to chaingrab with forward throw, much like Jigglypuff. Beware Luigi's potential chaingrab and chance of misfiring on his side special, the Green Missile, as it can be very deadly near high percentages. Counter when the opportunity strikes. Edgeguards on Luigi's part mostly consist of fireballs, aerials and edgehogging, so that shouldn't be too much of a problem, but obviously plan your recovery well. Edgeguarding Luigi on Roy's part should mostly consist of edgehogging, and the down tilt to smash or DED. Luigi's recovery is better than Mario and Dr. Mario, but not by too much. One of Roy's more annoying matchups for sure.
Mario/Dr. Mario
Mario, and by extension his clone, is one of Roy's easier matchups. Roy has a decent advantage due to his range, beating out most of Mario's attacks with the obvious exception of the fireball or megavitamin. The cape can be a tad bothersome, but Roy can easily use his DED to great effect, as well as his tilts and SHFFL'd aerials. They have a decent chaingrab, so maintaining some space is key. They also combo rather well with tilts and aerials, finishing with a f-air, but is useless if they can't land a solid hit on Roy. Roy can chain Dr. Mario with down throw if the opponent DIs incorrectly (less so with Mario) and their relatively short recoveries do hinder them as well, although they have better horizontal recovery than Roy and large edge sweetspots. Edgeguarding them should be a relatively easy task, as they are easily edgehogged and their Up-B is easy enough to counter or use down tilt against them, comboing into a forward smash or the DED. A main issue is to avoid being forced offstage, as they are powerful edgeguarders thanks to the f-air, b-air and cape, although they are usually to slow to counter Roy's Blazer. Caution notwithstanding, Mario and Dr. Mario are easier for Roy than certain other characters.
Donkey Kong
A large heavyweight, DK is easy to land hits on but harder to kill than most other characters due to his weight and long horizontal recovery. Spinning Kong is easy to counter though, so use that instead of another move to edgeguard it. Edgehogging him is easy if he's far away so that helps. If you somehow manage to force him below the stage with the DED, Up smash or down aerial (or even perhaps a glitched counter) he probably won't be coming back. Donkey Kong is pretty fast, has strong, decently ranged attacks all around (although his aerial meteor smashes are a bit laggy) and a highly abusable grab, so spacing is vital. Grabbing Donkey Kong has some combo potential so use it when you can. Counter his Giant Punch if you see it coming. DK has a relatively small shield, so shield-stabbing is a valid strategy. Still a challenging matchup but not as insane as a Peach matchup for example.
Link/Young Link
The projectiles shouldn't be too bothersome, but the reach of the Master Sword rivals that of that Sword of Seals, so Roy loses his advantage in range. The Master sword and Kokiri sword are more powerful at the tip than Roy's sword, which is a challenge to deal with. Like Samus, they also have a decent range in their tether grab, so Roy loses his advantage in his grab. Their aerials are also powerful, so keep the battle on the ground if you can, unless Roy uses SHFFL'd aerials. Keep your distance, and peck out whatever damage you can with Roy's tilts, aerials and DED (with caution). As Link's and Young Link's moves are fairly predictable, Roy can use his counter to some extent, but don't abuse it, as Roy is very vulnerable to grabbing during a mistimed or early counter. Link's hookshot is longer than Y. Link's, making it more troublesome to deal with. Edgeguarding them is easy though, which redeems the matchup. As their recovery is very predictable, edgehog them or counter their Up-B spin attack, which should make them fall to their death. In general, just keep on your toes and strike when the opportunity arises.
Pikachu/Pichu
Pikachu's and Pichu's electricity isn't much to worry about unless you're in high percents. Luckily, their most dangerous attacks, Thunder, their up smash and forward smashes all have little horizontal range. Pikachu/Pichu can use its up smash you to thunder you, but only if the ceiling doesn't obstruct the thunder, which is good if you pick a stage with several platforms such as Battlefield or Yoshi's Story (the one that resembles Battlefield). Roy's tilts, DED and SHFFL'd aerials are great at keeping Pikachu/Pichu at bay, as they are pretty light (Pichu being the absolute lightest character in Melee). Actually killing the mice or edgeguarding them is a much greater chore, as they are speedy enough to relatively easily avoid Roy's forward smash, so it is difficult to actually force them offstage and their great recovery almost guarantees they cannot be intercepted or edgeguarded. The electric rats' sizes may also be something to contend with. As Pichu damages itself when it uses its electricity, this is a boon for Roy as Pikachu's pre-evolution is fragile enough already.
Roy
The obligatory, if somewhat unlikely mirror matchup. Roy may be able to chaingrab his doppelganger with forward throw or up throw at higher percentages, so keep this in mind. Roy has a relatively short recovery, so it is pretty easy to edge guard and edgehog him. Always be on your toes looking for an opportunity to strike and keep your opponent off-balance until you can smash him. This matchup is basically a test of skill, speed and stamina.
Mr. Game & Watch
He is a very powerful character all-around, if a bit sluggish and choppy. His moves are fairly predictable. His manhole attack, forward and back aerials and his side smash (the torch) are his most troublesome to deal with. All of the mentioned attacks except the side smash come out really fast, and manhole is easily spammed. His side smash also has a long-lasting hitbox, so be aware of this. He is light, so Roy shouldn't have too much trouble getting him offstage, where he is at his weakest, as his recovery is only a trampoline launch. Edgeguard him much as you would Jigglypuff, although Roy may be able to counter his Up-B like with Link and Y. Link. Generally, Roy outranges Mr. G & W, so Roy should capitalize on this, especially because Roy can be potentially chaingrabbed.
Ness
Surprisingly, Ness is similar to Mewtwo in many respects, such as having at least one decent projectile, great throws and long recovery. Ness is a bit smaller and tougher than Mewtwo though, as PK Fire gets annoying really fast and is an easily spammable projectile. One thing about PK Fire is that is travels diagonally downward when Ness is in the air, making it a great edgeguard within a certain range, as well as PK Thunder. Due to the properties of PK Fire, if Roy gets hit by it when he's off-stage, the fire will drag Roy down, so he may not be able to recover unless he was or is already close to the stage. To counter these two projectiles, it is recommended to use Counter if you see it coming your way, as Counter slows down Roy's falling by half and you won't be helpless (which is not the case with airdodging). Roy won't have to worry about PK Flash as much as it's too slow except to take out a stunned opponent or somebody who doesn't realize its power. Therefore even if Roy is offstage, he can easily avoid PK Flash, if it even is used. Ness' aerials are powerful, he has strong throws as finishers but a short grab range to compensate. Nevertheless, if you DI incorrectly from PK fire, you may unwittingly get grabbed by Ness for a painful throw or smashed by his bat, which is his most powerful smash indeed. Due to the inferior grab range of Ness compared to Roy, he may able to grab Ness a few times as long as Roy spaces himself a slight distance away from Ness. Roy is faster than Ness, Ness's ground game isn't as fast as his aerial game, and he doesn't fare too well when he's overwhelmed, so Roy should make sure to keep Ness off balance on the ground with DED, tilts and SHFFLed aerials. An advantage to using SHFFLed aerials is that you can avoid PK Fire often as it is a ground hugging projectile, and SHFFLed aerials are usually too fast for the windup of Ness's bat, his natural combo or his forward tilt. It is usually only possible to counter the bat if you put it up at the same time as Ness is winding up, so unless you have good enough reflexes it is recommended to avoid countering his bat and Crouch canceling or shielding it. Edguarding Ness is easy, even with his high midair jump, as PK Thunder 2 is slow to execute and doesn't have the best range. It is best to either hit him out of PK Thunder 2 with a strong aerial, such as Roy's neutral or forward aerial, or to edgehog him. If you don't mind the extra damage, you can also intercept and get hit by PK Thunder before it hits Ness if he is trying to recover, as Ness can only use it once in midair before he goes helpless, and PK Thunder disappears once it hits a target or obstacle. Really easy counterpick stages against Ness include Fourside, Jungle Japes or any other stage that has narrow holes or walls and ceilings that do not allow Ness to recover easily if trapped by such obstacles. Stages with hard-to-sweetspot ledges such as Battlefield and Final Destination may also work to Roy's advantage, as it is a bit hard to control PK Thunder and aim PK Thunder 2 to reach the ledge, especially if Ness isn't a proper height to recover easily.
Yoshi
The eggs can be annoying, Yoshi has a tether grab, and he's considered a heavyweight (albeit one of the lighter heavyweights). Nevertheless, Yoshi's lack of a third jump hinders both his recovery and his offstage edgeguarding skills (although Yoshi's side-B can be used to recover from above), so Roy is in luck. His Egg Toss can be a devastating edgeguard tool but only if Yoshi aims the egg correctly, and his down tilt can lead to a forward smash, so Yoshi is a good onstage edgeguarder. Egg toss can be countered or alternately in certain situations Roy can make it work for him. If Roy uses his blazer and he gets hit by an egg after or during his third jump, he can use the blazer again. Of course this is all highly based on timing and luck but something to consider. Egg Roll can be easily attacked out of or countered, which is good for Roy as well. His aerials are pretty good and he has good airspeed, so try to keep it a ground-based battle. Yoshi has some invulnerability during his midair jump, but he still takes damage. Just use whatever feels natural to rack up his damage, to kill him or to edgeguard him.
Bowser
As you may expect, Bowser is heavy and slow and a bit lacking in range in the killing department, but has strong attacks, the complete antithesis of Roy. A deadly move is the Bowser Bomb at even mid-high percents on Roy, but it can't go through platforms so always be aware of the platforms and the gaps between on a stage. He also has a bit of ending lag. As it doesn't damage until he starts falling though, one can easily Counter it if they have trained reflexes. This holds water against some of his other main killers as well, namely his smashes, which don't have the best range as well. But Bowser is similar to Ganondorf: when he hits, it adds up quickly. His forward tilt can even be a killer at high percents, and it is relatively fast. Essentially, abuse SHFFL'd aerials and tilts, as Roy outranges Bowser on most occasions. His aerials are a bit slow, laggy on landing and not as powerful as his ground attacks, so he's not a good off-stage edgeguarder or aerialist, so his SHFFL effectiveness is rather low, compounded by his slow short hop and jump, making Roy's SHFFL highly superior. This also affects his wavedash, making it nearly useless. As an onstage edgeguarder though, his fire breath is super effective: It has decent duration, has range well covering the edge, and can even stop any recoveries from below in their tracks. Once you're far enough away, Bowser will then edgehog for the kill. Also, the forward smash and his grab/Koopa Klaw serve as decent edgeguarding tools. Therefore, it is imperative to approach from above and/or be as unpredictable as you can in your recovery. Edgeguarding Bowser is quite easy: His only real recovery consists of his low double jump (if just knocked offstage) and either a Whirling Fortress or a Bowser Bomb to sweetspot the ledge and possibly counter a potential edgehog if Roy's ledge invincibility wears off or Roy is too far away to edgehog, although the second option is only possible if Bowser is approaching from above the stage and the stage actually has a ledge. This can be easily edgehogged as well if you trick Bowser and/or are quick enough; alternatively, if Roy is near the edge, Bowser is facing out from the stage and he uses Bowser Bomb, he can slide off the stage and into the OB if you shield his descent. Whirling Fortress is essentially a faster version of DK's Spinning Kong that has a bit more vertical distance. To deal with it, edgehog if he is far away, use a forward smash, down smash, flare blade or counter or use down tilt into a forward smash, down smash or DED to keep him offstage or to kill him.
Mewtwo
Don't underestimate Mewtwo. However, this should be a relatively easy matchup for Roy, as Roy outranges Mewtwo (except with his projectile, Shadow Ball and Mewtwo's grab). Mewtwo has a decent grab range, so avoid getting too close to Mewtwo, as he can chain Roy with down throw potentially and Mewtwo's back throw and up throw are good finishers. Mewtwo is light, floaty and doesn't have great defensive or evasive ability outside of his rolls, so Roy can throw almost anything against the Pokemon, notably his DED, tilts, up smash, and aerials. Edgeguarding Mewtwo can be a slight challenge, as he has a high midair jump, and his airdodge and Teleport make him invisible, although they are all fairly predictable, unlike Pikachu's and Pichu's shared recovery. Again, edgeguard Mewtwo much the same way as Jigglypuff if you can, notably avoid edgehogging unless you're certain he's too far away to land on the actual stage.
Kirby
Possibly Roy's easiest matchup. Kirby will focus on damaging Roy and then inhaling or grabbing him for an attempted Kirbycide, so keep toward the center of the stage. Aerials, tilts and Roy's DED are all great for inflicting damage on the puffball and then smashing him for the kill. As for edgeguarding, Kirby's recovery is great but relatively predictable. Edgehog him if he's about to use Final Cutter, or counter it if it reaches high enough, but avoid being inhaled or grabbed, as Kirbyciding is a very diverse technique. If Roy is caught in a forward or backward throw, he may be lucky enough to escape it, but not with the up throw. If Roy is swallowed, avoid button mashing as mashing will force Roy below Kirby, where not even his Blazer may be able to help in reaching the stage. With Kirby being a lightweight floater, Roy will have an easier time against him than some others.
Roy's Stages
Final Destination
This stage is generally considered Roy's counterpick, especially against fast fallers.
Hyrule Temple
The Temple is the stage that Roy is first unlocked. The Fire Emblem theme song also plays on the Temple.
| ||||||||
| Characters | Marth (Melee · Brawl · 3DS/Wii U · Ultimate) Roy (Melee · 3DS/Wii U · Ultimate) Ike (Brawl · 3DS/Wii U · Ultimate) Robin (3DS/Wii U · Ultimate) Lucina (3DS/Wii U · Ultimate) Corrin (3DS/Wii U · Ultimate) Chrom (Ultimate) Byleth (Ultimate) | |
|---|---|---|
| Side Characters | Assist Trophies | Lyn · Black Knight · Tiki |
| Mii Fighter Costumes | Chrom · Black Knight | |
| Background characters | Claude von Riegan · Dimitri Alexandre Blaiddyd · Edelgard von Hresvelg · Rhea | |
| Others | Anna · Sothis | |
| Stages | Castle Siege · Arena Ferox · Coliseum · Garreg Mach Monastery | |
| Item | Killing Edge | |
| Music | List of Music (Fire Emblem series) | |
| Collectibles | Trophies | Melee Trophies · Brawl Trophies · 3DS Trophies · Wii U Trophies |
| Stickers | List of Stickers (Fire Emblem series) | |
| Spirits | List of spirits (Fire Emblem series) | |
| Masterpieces | Fire Emblem: Shadow Dragon and the Blade of Light · Fire Emblem: Mystery of the Emblem | |