(Edited description of trophies) Tag: Visual edit |
(Replaced) Tag: Source edit |
||
| (61 intermediate revisions by 11 users not shown) | |||
| Line 3: | Line 3: | ||
| '''Name''' || '''How to Unlock''' ||'''Picture'''||'''Description''' |
| '''Name''' || '''How to Unlock''' ||'''Picture'''||'''Description''' |
||
|- |
|- |
||
| − | |[[Mii Brawler]] ||[[Classic Mode]]||[[File:SSB3DSTrophyMiiBrawler.png]]||This fighter is based on a player's Mii. It excels at fighting with punches and kicks. This type of Mii is very |
+ | |[[Mii Brawler]] ||[[Classic Mode]]||[[File:SSB3DSTrophyMiiBrawler.png]]||[[File:Flag of North America.png|25px]] This fighter is based on a player's Mii. It excels at fighting with punches and kicks. This type of Mii is very agile, blending attacks with movement to get the battle flowing. It has superior dash and jump compared to other types. Stay close and keep whaling on foes—you'll KO them in no time!<br>[[File:Flag of Europe.png|25px]] A fighter based on your Mii! Brawlers focus on kicks and punches, and a lot of their specials send them hurtling towards opponents. They're better at dashing and jumping than other types of Mii Fighter, and their speedy attacks really pile on the pressure at close range. And, just for good measure, they can also lob shot-puts! |
|- |
|- |
||
| + | |[[Mii Brawler (SSBWU/3DS)|Mii Brawler]] (Alt.) ||[[All-Star]]||[[File:SSB3DSTrophyMiiBrawlerEX.png]]||[[File:Flag of North America.png|25px]] Shot Put is the only projectile attack a Mii Brawler can have. It drops quickly and only bounces a tiny bit. Try using it on foes hanging off an edge to knock them off. The down special Head-On Assault can bury enemies in the ground. It also sends the Mii Brawler downward—don't KO yourself, too!<br>[[File:Flag of Europe.png|25px]] Shot-Put is the only projectile attack a Mii Brawler can have. It drops quickly and only bounces a tiny bit. Try using it on foes hanging from the stage to knock them off. The down special Head-On Assault can bury enemies in the ground. It's also a kind of meteor smash, but if you use it while off the stage, you'll probably KO yourself, too. |
||
| − | |[[Mii Brawler (SSBWU/3DS)|Mii Brawler]] (Alt.) ||[[All-Star]]||[[File:SSB3DSTrophyMiiBrawlerEX.png]]||TBA |
||
|- |
|- |
||
| − | |[[Mii Swordfighter]] ||Classic Mode||[[File:SSB3DSTrophyMiiSwordfighter.png]]||This fighter is based on a player's Mii and favors a sword in battle. Enjoy the extra reach the sword offers, but remember that it takes a bit longer for strikes to reach your opponent as a result. Customize your Mii with chargeable moves, counters, or projectile attacks. |
+ | |[[File:Flag of North America.png|25px]] [[Mii Swordfighter]]<br>[[File:Flag of Europe.png|25px]] Mii Sword Fighter||Classic Mode||[[File:SSB3DSTrophyMiiSwordfighter.png]]||[[File:Flag of North America.png|25px]] This fighter is based on a player's Mii and favors a sword in battle. Enjoy the extra reach the sword offers, but remember that it takes a bit longer for strikes to reach your opponent as a result. Customize your Mii with chargeable moves, counters, or projectile attacks.<br>[[File:Flag of Europe.png|25px]] A fighter based on your Mii! The main draw of Sword Fighters is the extra reach they get thanks to their swords. On top of that, they have a lot of varied moves to choose from. Unfortunately, a lot of sword attacks have a bit of delay between pressing the button and landing the attack, so you'll need to be very careful not to leave yourself open! |
|- |
|- |
||
| + | |[[File:Flag of North America.png|25px]] [[Mii Swordfighter (SSBWU/3DS)|Mii Swordfighter]] (Alt.)<br>[[File:Flag of Europe.png|25px]] Mii Sword Fighter (Alt.)||All-Star||[[File:SSB3DSTrophyMiiSwordfighterEX.png]]||[[File:Flag of North America.png|25px]] One of the Mii Swordfighter side specials actually uses a throwing disc called a chakram! How quickly you press your desired direction controls how fast and far the chakram flies and how much damage it does. Several other moves, like Skyward Slash Dash, also work in this manner.<br>[[File:Flag of Europe.png|25px]] One of the Mii Sword Fighter side specials actually uses a throwing disc called a chakram! How quickly you choose a direction controls how far and fast the chakram flies, as well as the kind of damage it does. This kind of quick-aiming action also applies to other special moves, like Super Slash Dash. |
||
| − | |[[Mii Swordfighter (SSBWU/3DS)|Mii Swordfighter]] (Alt.)||All-Star||[[File:SSB3DSTrophyMiiSwordfighterEX.png]]||TBA |
||
|- |
|- |
||
| + | |[[Mii Gunner]]||Classic Mode||[[File:SSB3DSTrophyMiiGunner.png]]||[[File:Flag of North America.png|25px]] A Mii sporting a blaster arm, this fighter is a great choice for those who prefer to fight the battle from a distance. The Mii Gunner has a lot of special projectile moves available, so pick your favorites and use them when needed. Don't forget about standard and smash attacks!<br>[[File:Flag of Europe.png|25px]] A fighter based on your Mii! Gunners are all about the guns, of course. No matter how you set up your specials, you'll end up with a powerful arsenal. And it's not just their special moves that have excellent range – they have standard and smash attacks that can really go the distance too. Use them to dominate the battle from afar. |
||
| − | |[[Mii Gunner]] ||Classic Mode||[[File:SSB3DSTrophyMiiGunner.png]]||TBA |
||
|- |
|- |
||
| + | |[[Mii Gunner (SSBWU/3DS)|Mii Gunner]] (Alt.)||All-Star||[[File:SSB3DSTrophyMiiGunnerEX.png]]||[[File:Flag of North America.png|25px]] One of the Mii Gunner's side specials is Stealth Burst. The missile blends in, making it tough to see. Plus, you can control when it explodes, so it's handy for surprise attacks! You could also use Absorbing Vortex to absorb damage done to you by energy weapons. This is one fighter with a lot of tricks up its sleeve!<br>[[File:Flag of Europe.png|25px]] One of the Mii Gunner's side specials is Stealth Burst. The burst blends in, making it tough to see. Plus, you can control when it explodes, so it's handy for surprise attacks! You could also use Absorbing Vortex to absorb damage done to you by energy weapons. This is one fighter with a lot of tricks up its sleeve! |
||
| − | |[[Mii Gunner (SSBWU/3DS)|Mii Gunner]] (Alt.) ||All-Star||[[File:SSB3DSTrophyMiiGunnerEX.png]]||TBA |
||
|- |
|- |
||
| + | |[[Smash Ball]]||TBA||[[File:SSB3DSTrophySmashBall.png]]||[[File:Flag of North America.png|25px]] This item can truly turn the tide of battle. Once broken open, a character's Final Smash will be unlocked. If your opponent collects this, you'd better brace yourself for a powerful special move. This item is pretty durable and floats around the stage, so timing and positioning are key.<br>[[File:Flag of Europe.png|25px]] A special item that lets one lucky fighter unleash their Final Smash, a secret move unique to them. Though it's a one-off opportunity that won't come around very often, this ultra-powerful attack could prove the key to victory! Smash Balls take a few hits to crack, so good timing and placement are absolutely essential. |
||
| − | |[[Smash Ball]]||TBA||[[File:SSB3DSTrophySmashBall.png]]||TBA |
||
|- |
|- |
||
| − | |[[Assist Trophy]]||TBA||[[File:SSB3DSTrophyAssistTrophy.png]]||This strange capsule contains a guest character who will aid you in your battle. Who will emerge? Grab it to find out! Maybe it'll be a famous character from a popular game, or perhaps a goofy sidekick here to prove his or her worth. Too bad you can't choose who shows up or control them... |
+ | |[[Assist Trophy]]||TBA||[[File:SSB3DSTrophyAssistTrophy.png]]||[[File:Flag of North America.png|25px]] This strange capsule contains a guest character who will aid you in your battle. Who will emerge? Grab it to find out! Maybe it'll be a famous character from a popular game, or perhaps a goofy sidekick here to prove his or her worth. Too bad you can't choose who shows up or control them...<br>[[File:Flag of Europe.png|25px]] A mystery capsule containing a guest character who'll stand by you in battle. You won't know who's in it till you open it! It could be almost anyone from all sorts of games - a famed warrior or a slightly loopy sidekick! Whoever it is, you can't control them, so you'll just have to trust them. |
|- |
|- |
||
| + | |[[Crates]]||TBA||[[File:SSB3DSTrophyCrates.png]]||[[File:Flag of North America.png|25px]] Throw or attack this crate to bust it open and get the goodies hidden inside. The crate may look different based on the stage you're battling on, but the items inside won't change. Sometimes these things can explode, however, so it's best to be very crateful around them...<br>[[File:Flag of Europe.png|25px]] Just throw or attack crates to get at the goodies inside! Their appearance changes depending on the stage, so maybe you'll get a wooden crate, or...maybe you won't. That doesn't change how it is on the inside, though, which is a good life lesson. Also, it may just explode if you attack it – another important life lesson from us to you. |
||
| − | |[[Crates]]||TBA||[[File:SSB3DSTrophyCrates.png]]||TBA |
||
|- |
|- |
||
| + | |[[Rolling Crates]]||TBA||[[File:Smash_crate.png]]||[[File:Flag of North America.png|25px]] A normal-looking box, this one actually has wheels on the bottom. Just give the box a little nudge—its own weight will turn it into a rolling weapon. It's possible to ride on top of it, but you certainly aren't traveling in style. Be sure to stop the box or jump off before it hits something!<br>[[File:Flag of Europe.png|25px]] These boxes look perfectly normal until you notice the wheels underneath. Or until you put one on a slope and watch it roll away! You can attack a rolling crate for the items inside, or send it hurtling towards your enemies. You can even jump on top and go for a ride – just make sure you get off again before you hit something! |
||
| − | |[[Rolling Crates]]||TBA||[[File:Smash_crate.png]]||TBA |
||
|- |
|- |
||
| + | |[[Barrel]]s||TBA||[[File:SSB3DSTrophyBarrels.png]]||[[File:Flag of North America.png|25px]] These barrels are crammed full of items, but they're also incredibly tough to break. No baby hits here—attacking too lightly will just send the barrel rolling away, making it a dangerous obstacle for both you and your foes. And if others break the barrel, they'll get the items you wanted!<br>[[File:Flag of Europe.png|25px]] Barrels have all sorts of items inside, but they're tough! Hitting them lightly or throwing them might not be enough to get these things open. In fact, you might just end up sending them rolling, and just so you know, rolling barrels are a force to be reckoned with! They can send you flying right off the stage! |
||
| − | |[[Barrel]]s||TBA||[[File:SSB3DSTrophyBarrels.png]]||TBA |
||
|- |
|- |
||
| ⚫ | |[[Capsule]]||TBA||[[File:Smash_caplise.png]]||[[File:Flag of North America.png|25px]] This tiny capsule can hold one item inside it, no matter how massive that one item may be. How does it do that? No idea! But all you have to do to get the prize is break the capsule. It's possible for these things to explode, so it's best to break it against walls or opponents. They won't be upset. Maybe.<br>[[File:Flag of Europe.png|25px]] These little capsules are only big enough to hold one item (regardless of how large that item turns out to be...), and to get at it, just break it open! One thing to keep in mind, though, is that capsules sometimes explode when you throw them. Dangerous, right? So, to make sure you stay safe, just throw them at your enemies! |
||
| − | |[[Blast Box]]||TBA||[[File:SSB3DSTrophyBlastBox.png]]||A dangerous box that has been packed full of gunpowder. The player who sets off the box, either by hitting it or throwing it, will get points for any KOs. Setting off the box will result in a massive explosion, and you've only yourself to blame if you blow yourself up. It says DANGER right on the front. |
||
|- |
|- |
||
| ⚫ | |[[Party Ball]]||TBA||[[File:SSB3DSTrophyPartyBall.png]]||[[File:Flag of North America.png|25px]] A celebratory ball, filled with irresistible treasures just begging to be released. Once thrown, it floats into the air and releases its prizes. It could be a variety of awesome items, but you should be careful—sometimes the Party Ball is stuffed full of Bob-ombs! How rude!<br>[[File:Flag of Europe.png|25px]] These balls are just bursting with items! Hit or throw one, and it'll start to float up. And then...POP! Streams of confetti and goodies galore! Keep in mind, though, that there are actually two types of party ball – the other one is packed with Bob-ombs! ...What do you call a group of those things, anyway? A kaboom of Bob-ombs? |
||
| ⚫ | |[[Capsule]]||TBA||[[File:Smash_caplise.png]]||This tiny capsule can |
||
|- |
|- |
||
| + | |[[Blast Box]]||Score 100,000 points or more in [[Target Blast]]||[[File:SSB3DSTrophyBlastBox.png]]||[[File:Flag of North America.png|25px]] A highly flammable box packed full of gunpowder. The player who last threw the box will get credit for any KOs it causes. Setting off the box will result in a massive explosion, and you've only yourself to blame if you blow yourself up. It says DANGER right on the front.<br>[[File:Flag of Europe.png|25px]] A dangerous box packed full of exceedingly flammable gunpowder. Fire and strong attacks will set it off, and the explosion will be massive, so keep your distance! By the way, any points for the KOs caused by the blast go to the person who last threw the box. If no one threw the box, nobody gets the points! |
||
| ⚫ | |[[Party Ball]]||TBA||[[File:SSB3DSTrophyPartyBall.png]]||A celebratory ball, filled with irresistible treasures just begging to be released. Once thrown, it floats into the air and releases its prizes. It could be a variety of awesome items, but you should be |
||
|- |
|- |
||
| − | |[[Sandbag]]|| |
+ | |[[Sandbag]]||Reach a total of 49,212 ft. in the [[Home-Run Contest]] between all fighters' high scores.||[[File:SSB3DSTrophySandbag.png]]||[[File:Flag of North America.png|25px]] This little guy is great for getting in some practice against. In Home-Run Contest you'll send it flying, and in normal battles it has a habit of dropping items when you lay into it. Sandbag seems pretty content with being your punching bag, so it'd almost be mean not to go all out on it.<br>[[File:Flag of Europe.png|25px]] This little guy is pretty good to practise with! In the Home-Run Contest, the goal is to attack Sandbag and then whack him as hard as you can to send him flying! He even appears in normal matches, where you can hit him to get lots of food and items. Don't worry, though – he loves to help out. It doesn't even hurt him at all! |
|- |
|- |
||
| − | |[[Food]]||TBA||[[File:SSB3DSTrophyFood.png]]||Pick up food and eat it to restore health. There are 28 kinds of food in all, including bread, which heals 10 damage, roast chicken, which heals 15, and so on. The fancier the food, the more damage |
+ | |[[Food]]||TBA||[[File:SSB3DSTrophyFood.png]]||[[File:Flag of North America.png|25px]] Pick up food and eat it to restore health. There are 28 kinds of food in all, including bread, which heals 10 damage, roast chicken, which heals 15, and so on. The fancier the food, the more damage it will heal. Keep an eye out for Party Balls—they may drop a whole buffet for you to nom!<br>[[File:Flag of Europe.png|25px]] Pick up food and eat it to restore health. There are 28 kinds of food in all, including bread, which heals 10 damage, roast chicken, which heals 15, and so on. The fancier the food, the more it heals you! Party Balls normally have a lot of food inside, so try to scoff it all up yourself! |
|- |
|- |
||
| + | |[[Timer]]||TBA||[[File:SSB3DSTrophyTimer.png]]||[[File:Flag of North America.png|25px]] Grabbing this will make time flow at a different pace around you. Everyone else will slow down, letting you grab all the items and get in some blows. Sometimes, though, this item backfires and slows you down too. Worst case, it may actually slow ONLY you. That's not so great...<br>[[File:Flag of Europe.png|25px]] Pick this up to make time move slowly for everyone but you! With the timer in hand, grabbing items and attacking gets much easier, so if someone else gets it, start defending yourself. Timers can be a little hit or miss, though. It might slow time down for everyone, or maybe just for you! |
||
| − | |[[Timer]]||TBA||[[File:SSB3DSTrophyTimer.png]]||TBA |
||
|- |
|- |
||
| + | |[[Beam Sword]]||TBA||[[File:SSB3DSTrophyBeamSword.png]]||[[File:Flag of North America.png|25px]] A powerful sword with a blade of pure energy. It isn't the strongest weapon to land on the battlefield, but its shape can change based on how it is used to attack. A forward smash will make the blade especially long. Lash out at your foes from a distance—they can't hit back!<br>[[File:Flag of Europe.png|25px]] The blade of this sword is made of pure light energy. It's not very powerful, but depending on your attack, it can have a pretty long reach! Just wait till you use it for a side smash! You can make the most of its power by attacking enemies as they're falling, or when you're too far away for them to counter-attack. |
||
| − | |[[Beam Sword]]||TBA||[[File:SSB3DSTrophyBeamSword.png]]||TBA |
||
|- |
|- |
||
| − | |[[Home-run Bat]]||Play [[Home-Run Contest]] for the first time on the 3DS||[[File:Smash_bat.png]]||Combine this black bat with a forward smash to try for a home run, using |
+ | |[[Home-run Bat]]||Play [[Home-Run Contest]] for the first time on the 3DS||[[File:Smash_bat.png]]||[[File:Flag of North America.png|25px]] Combine this black bat with a forward smash to try for a home run, using an opponent as the ball! Unfortunately, the reach on the bat is not all that impressive, so it takes some real skill to line up a hit. Keep your chin up, though—the loud "KREEENG" of a hit makes it all worthwhile.<br>[[File:Flag of Europe.png|25px]] Batter up! (That's what they say, right?) Get a home run by side-smashing an enemy right off the stage! Enemies are more difficult to send flying than baseballs, though – or so we're told – and this bat doesn't exactly have a long reach, so if you want to hear the satisfying sound of your foe flying off-screen, you'll have to work for it! |
|- |
|- |
||
| + | |[[Ray Gun]]||TBA||[[File:SSB3DSTrophyRayGun.png]]||[[File:Flag of North America.png|25px]] Grab one of these to instantly feel like you're fighting the battles of the future! With the right timing, the rapid-fire green lasers can juggle fighters in the air, and they have the range to push foes off the stage. Unfortunately, even future weapons only have so much ammo. Make each shot count!<br>[[File:Flag of Europe.png|25px]] Grab one of these to instantly feel like you could be fighting the battles of the future! The rapid-fire green lasers can be used to juggle fighters in the air if you've got good enough timing, and they've also got the range to push fighters off the stage from a distance. You get limited shots, though, so don't get too carried away by the future! |
||
| − | |[[Ray Gun]]||TBA||[[File:SSB3DSTrophyRayGun.png]]||TBA |
||
|- |
|- |
||
| + | |[[Drill Arm|Drill]]||TBA||[[File:SSB3DSTrophyDrillArm.png]]||[[File:Flag of North America.png|25px]] This may look like a handy hand-to-hand weapon, but the steel bit actually fires like a bullet. You only get one shot, but if that shot hits enemies, it will drill into them, doing continuous damage and carrying them back. Don't forget to throw the base at them afterward, adding insult to injury!<br>[[File:Flag of Europe.png|25px]] The drill may look like a blunt tool, but it is actually a single-use ballistic weapon that uses the drill bit as a bullet! Shoot the drill into an opponent and its point will fly straight and true, inflicting continuous damage and eventually knocking them over. Then, just to add insult to injury, throw the drill base at them. |
||
| − | |[[Drill Arm]]||TBA||[[File:SSB3DSTrophyDrillArm.png]]||TBA |
||
|- |
|- |
||
| + | |[[Motion-Sensor Bomb]]||TBA||[[File:SSB3DSTrophyMotionSensorBomb.png]]||[[File:Flag of North America.png|25px]] A tiny bomb that explodes in a big blast when it detects movement. Stick it to the walls, floor, or ceiling, and wait for it to arm. Long-range weapons can destroy it, but only if your opponents remember it's there. Don't forget yourself, though, or it'll be you caught in the explosion!<br>[[File:Flag of Europe.png|25px]] This little bomb might not look like much, but it's primed to explode when it detects movement, and it packs a serious punch! You can stick it on walls and ceilings, and it can be detonated by long-range attacks. With just a little bit of strategy, you can do a LOT of damage! |
||
| − | |[[Motion-Sensor Bomb]]||TBA||[[File:SSB3DSTrophyMotionSensorBomb.png]]||TBA |
||
|- |
|- |
||
| − | |[[Gooey Bomb]]||TBA||[[File:Smash_bros_gooey_bomb.png]]||This one is incredibly sticky, clinging to anyone or anything it touches before exploding. If you happen |
+ | |[[Gooey Bomb]]||TBA||[[File:Smash_bros_gooey_bomb.png]]||[[File:Flag of North America.png|25px]] This one is incredibly sticky, clinging to anyone or anything it touches before exploding. If you happen to be the "anyone," you can hand it off by passing or touching one of your foes—time to get real friendly! If there isn't anyone around, you'd better spend the next few seconds wisely...<br>[[File:Flag of Europe.png|25px]] This bomb will stick like glue to anything it lands on, moving or not, and then after a short while...BOOM! Don't worry if you get one stuck to you, though – just brush it off onto one of your opponents. Go on! Don't be shy! Just be sure to get out of the way quickly afterwards or you'll get caught up in the backlash! |
|- |
|- |
||
| + | |[[Smoke Ball]]||TBA||[[File:SSB3DSTrophySmokeBall.png]]||[[File:Flag of North America.png|25px]] Ack! It's hard to see through all the smoke this ball lets off. You can throw this around a stage, obscuring the view, or stick it to opponents and really annoy them. The smoke itself doesn't do any damage, but there's definitely an advantage to concealing the battlefield.<br>[[File:Flag of Europe.png|25px]] A pesky little item that produces a thick cloud of smoke wherever it's thrown, making it impossible to see properly. You can pick it up and throw it again as often as you like. Try hitting an opponent with it – it might stick to them! The smoke itself is harmless, but it's great for ambushing! |
||
| − | |[[Smoke Ball]]||TBA||[[File:SSB3DSTrophySmokeBall.png]]||TBA |
||
|- |
|- |
||
| − | |[[Bumper]]||TBA||[[File:Bumper_3ds.png]]||Ah, pinball... What a fun game. And with this item, you can add a bit of pinball wham to the battlefield. Once thrown, this item will bounce anything that comes near it violently away. Just don't get careless and walk into a deployed one yourself, or you'll get bounced too! |
+ | |[[Bumper]]||TBA||[[File:Bumper_3ds.png]]||[[File:Flag of North America.png|25px]] Ah, pinball... What a fun game. And with this item, you can add a bit of pinball wham to the battlefield. Once thrown, this item will bounce anything that comes near it violently away. Just don't get careless and walk into a deployed one yourself, or you'll get bounced too!<br>[[File:Flag of Europe.png|25px]] You might recognise this from a pinball machine. Just like the metal balls do, touch one of these and you'll go flying! You can throw them, but we'd suggest affixing them strategically so that they hit just the right people and send them soaring into the distance. Job done. |
|- |
|- |
||
| + | |[[Team Healer]]||TBA||[[File:SSB3DSTrophyTeamHealer.png]]||[[File:Flag of North America.png|25px]] An item exclusive to team battles. If you throw it at injured teammates, it will reduce the damage they've taken so far. It can be used against your foes as well, dealing a little bit of damage, but it can sometimes heal them, too. That's the last thing you want!<br>[[File:Flag of Europe.png|25px]] This item only appears in Team Battles. Throw it to a teammate to reduce their accumulated damage. Alternatively, you can throw it at an opponent. But since it only does a small amount of damage and there's a chance it'll actually heal them instead, why would you bother doing a thing like that...? |
||
| − | |[[Team Healer]]||TBA||[[File:SSB3DSTrophyTeamHealer.png]]||TBA |
||
|- |
|- |
||
| + | |[[Smash Run Power-ups]]||TBA||[[File:Smash_run_powers.png]]||[[File:Flag of North America.png|25px]] Stat boosts are items that appear when you defeat enemies during Smash Run. You can also just find them lying around or hidden in treasure chests. There are six types of stat boosts that each affect a different stat, and the bigger the icon, the bigger the boost. Look for the star-shaped stat boosts, too—they boost all your stats at once!<br>[[File:Flag of Europe.png|25px]] Stat boosts are items that appear when you defeat enemies during Smash Run. You can also just find them lying around or hidden in treasure chests. There are six types of stat boost that each upgrade a different stat, and the bigger the stat boost appears, the bigger the upgrade. Look for the star-shaped ones, too - they boost all your stats at once! |
||
| − | |[[Smash Run Power-ups]]||TBA||[[File:Smash_run_powers.png]]||TBA |
||
|- |
|- |
||
| − | |[[Powers]]||TBA||[[File:SSB3DSTrophyPowers.png]]||In Smash Run, you'll sometimes see a yellow bag emblazoned with a question mark. Enemies occasionally drop them when defeated, or you can pick them up in treasure chests. Inside you'll find custom goodies, but you'll have to wait until the end of the run to find out what you've picked up! |
+ | |[[Powers]]||TBA||[[File:SSB3DSTrophyPowers.png]]||[[File:Flag of North America.png|25px]] In Smash Run, you'll sometimes see a yellow bag emblazoned with a question mark. Enemies occasionally drop them when defeated, or you can pick them up in treasure chests. Inside you'll find custom goodies, but you'll have to wait until the end of the run to find out what you've picked up!<br>[[File:Flag of Europe.png|25px]] In Smash Run, you'll often see yellow bags emblazoned with a question mark. Enemies sometimes drop them when you defeat them, or you can pick them up in treasure chests. There are special Powers inside that you can use in Smash Run later, but you'll have to wait until you clear the current game to find out what you've picked up! |
|- |
|- |
||
| − | |[[ |
+ | |[[Custom Part]]||TBA||[[File:SSB3DSTrophyCustomizations.png]]||[[File:Flag of North America.png|25px]] The white bags with the little wrenches on the front contain custom items you can use to give your fighters that extra "oomph." Maybe you'll find a new special move inside for one of the fighters, or a hat or outfit for your Mii Fighter. Either way, open all the treasure chests you see and defeat lots of enemies in Smash Run to get them!<br>[[File:Flag of Europe.png|25px]] The white bags with the little wrenches on the front contain custom parts you can use to give your fighters that little more "oomph". Maybe you'll find a custom special inside for one of the characters, or a hat or outfit for your own Mii Fighter. Either way, open all the treasure chests you see and defeat lots of enemies in Smash Run to get them! |
|- |
|- |
||
| − | |[[Smash Coins|Gold (Smash Run)]]||TBA||[[File:Smash_coins.png]]||In Smash Run, defeating an enemy or opening a treasure chest might net you some gold. The coins come in three varieties: gold |
+ | |[[Smash Coins|Gold (Smash Run)]]||TBA||[[File:Smash_coins.png]]||[[File:Flag of North America.png|25px]] In Smash Run, defeating an enemy or opening a treasure chest might net you some gold. The coins come in three varieties: gold—the most valuable—then silver, then bronze. You can use them in the game for things like buying trophies or placing bets in Spectator mode. Just choose your bets wisely!<br>[[File:Flag of Europe.png|25px]] In Smash Run, defeating an enemy or opening a treasure chest might net you some gold. The coins come in three varieties: gold, which is worth the most, then silver, then bronze. You can use them in the game for things like buying trophies or putting on bets in Spectator mode. Just choose your bets wisely! |
|- |
|- |
||
| − | |[[Coins and Bills|Gold (Classic)]]||TBA||[[File:SSB3DSTrophyCoins.png]]||You'll find these coins as you move through Classic mode. As you might guess, the most valuable of the three types are the gold ones. Your opponents gain strength as you progress, but stronger opponents also drop more gold. You can then use gold to up the intensity, giving you even stronger foes! It's a wonderful golden cycle! |
+ | |[[Coins and Bills|Gold (Classic)]]||TBA||[[File:SSB3DSTrophyCoins.png]]||[[File:Flag of North America.png|25px]] You'll find these coins as you move through Classic mode. As you might guess, the most valuable of the three types are the gold ones. Your opponents gain strength as you progress, but stronger opponents also drop more gold. You can then use gold to up the intensity, giving you even stronger foes! It's a wonderful golden cycle!<br>[[File:Flag of Europe.png|25px]] You'll find these coins as you move through Classic mode. As you might guess, the most valuable of the three types are the gold ones. As you progress along the route, the opponents get stronger, and stronger opponents drop more gold. You can then use gold to up the intensity, giving you even stronger opponents! It all works out. |
|- |
|- |
||
| − | |[[Glire]]||TBA||[[File:SSB3DSTrophyGlire.png]]||This rotating enemy will follow the terrain. The red one is called Glire. Should a fighter come too close, a blast of fire will erupt from Glire, damaging nearby foes. Glire has high stamina compared to Glice and Glunder, but it's very slow. It's especially |
+ | |[[Glire]]||TBA||[[File:SSB3DSTrophyGlire.png]]||[[File:Flag of North America.png|25px]] This rotating enemy will follow the terrain. The red one is called Glire. Should a fighter come too close, a blast of fire will erupt from Glire, damaging nearby foes. Glire has high stamina compared to Glice and Glunder, but it's very slow. It's especially vulnerable to ice attacks!<br>[[File:Flag of Europe.png|25px]] If you get too close to a Glire, it'll stop, open its shell and unleash a fire attack. They deal more damage than Glunders and Glices, but they're also slower. You won't get a lot of stat boosts for defeating one, so just make life easy for yourself and exploit their weakness to ice attacks when you're taking them on. |
|- |
|- |
||
| − | |[[Glice]]||TBA||[[File:SSB3DSTrophyGlice.png]]||A rotating enemy that likes to follow the terrain. The blue one is called |
+ | |[[Glice]]||TBA||[[File:SSB3DSTrophyGlice.png]]||[[File:Flag of North America.png|25px]] A rotating enemy that likes to follow the terrain. The blue one is called Glice. It'll release a blast of icy damage if fighters wander too close, freezing them if they are caught in it. Quickly wiggle around to break free. Use fire attacks against it—it has a weakness to them!<br>[[File:Flag of Europe.png|25px]] Glices will hit you with an ice attack if you get too close. What they lack in attack range, they make up for in speed, so watch out or you'll end up frozen solid! If that happens, do some wiggling around to recover. Glices are weak against fire, so if you can, hit them with something hot. |
|- |
|- |
||
| − | |[[Glunder]]||TBA||[[File:SSB3DSTrophyGlunder.png]]||This rotating enemy likes to follow the terrain. The yellow one is called Glunder. Whenever a fighter gets too close, it'll release a blast of lightning. One hit isn't too bad, but taking several will really leave you hurting. Best to try to take this thing out from a safe distance. |
+ | |[[Glunder]]||TBA||[[File:SSB3DSTrophyGlunder.png]]||[[File:Flag of North America.png|25px]] This rotating enemy likes to follow the terrain. The yellow one is called Glunder. Whenever a fighter gets too close, it'll release a blast of lightning. One hit isn't too bad, but taking several will really leave you hurting. Best to try to take this thing out from a safe distance.<br>[[File:Flag of Europe.png|25px]] If one of these rolling enemies gets close to you, it'll stop, open its outer shell and zap you. Individual shocks don't hurt much, but they add up. Glunders also have a wider attack range than Glices and Glires, making them very dangerous. Since they don't have any elemental weaknesses, just stand back and hit them with any old projectile. |
|- |
|- |
||
| + | |[[Poppant]]||TBA||[[File:SSB3DS Poppant trophy.png]]||[[File:Flag of North America.png|25px]] These enemies first appeared as part of the Subspace Army in Super Smash Bros. Brawl. They're known for storing a lot of items and food. They're also painfully shy, fleeing the moment they see a fighter, dropping items as they go. Catch them quick for some serious rewards!<br>[[File:Flag of Europe.png|25px]] These rare enemies first appeared in the Subspace Army in Super Smash Bros. Brawl. Their bucket-shaped trousers are packed with food and items. They're not keen on sharing, though, so as soon as they see you, they'll bolt, carelessly dropping items as they run. Chase after them for custom parts and other goodies! |
||
| − | |[[Poppant]]||TBA||[[File:PoppantTrophySSBWU.png]]||TBA |
||
|- |
|- |
||
| − | |[[Roturret]]||TBA||[[File:SSB3DSTrophyRoturret.png]]||This enemy from the Subspace Army in Super Smash Bros. Brawl hangs in the air and fires at fighters with its two cannons. The last of the three pairs of shots it fires has much higher launching |
+ | |[[Roturret]]||TBA||[[File:SSB3DSTrophyRoturret.png]]||[[File:Flag of North America.png|25px]] This enemy from the Subspace Army in Super Smash Bros. Brawl hangs in the air and fires at fighters with its two cannons. The last of the three pairs of shots it fires has much higher launching capabilities, so watch out! Hitting it between the two cannons can disrupt its firing—or even completely destroy it!<br>[[File:Flag of Europe.png|25px]] This enemy from the Subspace Army in Super Smash Bros. Brawl hangs in the air and fires at fighters with its two cannons. The last of the three pairs of shots it fires has much higher launching capabilities, so watch out! Try hitting it between the two cannons to incapacitate it or even destroy it completely. |
|- |
|- |
||
| − | |[[Mites]]||TBA||[[File:SSB3DSTrophyMite.png]]||These foes are part of the Subspace Army from Super Smash Bros. Brawl. They're paper thin and can easily escape a fighter's grasp. If you get too close, they'll jump-kick, but by themselves they don't pose much of a threat. Getting caught by a group of them, though, can mean some serious pain. |
+ | |[[Mites]]||TBA||[[File:SSB3DSTrophyMite.png]]||[[File:Flag of North America.png|25px]] These foes are part of the Subspace Army from Super Smash Bros. Brawl. They're paper thin and can easily escape a fighter's grasp. If you get too close, they'll jump-kick, but by themselves they don't pose much of a threat. Getting caught by a group of them, though, can mean some serious pain.<br>[[File:Flag of Europe.png|25px]] These stick-figure foes' heads are the symbol of the Subspace Army from Super Smash Bros. Brawl. When one gets near you, it'll leap up from aaall the way down there and do a flying kick. On their own, they're easy to handle, but groups can be overwhelming. Their sleek form also lets them slip free easily when you grab them. |
|- |
|- |
||
| + | |[[Subspace Generator|Generator]]||TBA||[[File:SSB3DSTrophyGenerator.png]]||[[File:Flag of North America.png|25px]] This mysterious, formless entity appears only as a strange spiral in the air, spitting out enemies—mostly mites—and making life difficult for any fighters unlucky enough to deal with them! The faster you defeat them, the more stat boosts they're likely to drop, so hurry up!<br>[[File:Flag of Europe.png|25px]] This mysterious, formless entity appears only as a strange spiral in the air, spitting out enemies (mostly mites) and making life difficult for any fighters unlucky enough to have to deal with them! The faster you defeat them, the more stat boosts they're likely to drop, so hurry up about it! |
||
| − | |[[Subspace Generator]]||TBA||[[File:SSB3DSTrophyGenerator.png]]||TBA |
||
|- |
|- |
||
| − | |[[Fighting Mii Team]]||TBA||[[File:SSB3DSTrophyFightingMiiTeam.png]]||These weak fighters show up in droves in Multi-Man Smash. |
+ | |[[Fighting Mii Team]]||TBA||[[File:SSB3DSTrophyFightingMiiTeam.png]]||[[File:Flag of North America.png|25px]] These weak fighters show up in droves in Multi-Man Smash. There are Brawler, Swordfighter, and Gunner types. Since they're based on the Mii characters saved on your Nintendo 3DS system or Wii U console, you could end up battling friends and family! Don't get soft—just take them out! Almost any attack does the trick.<br>[[File:Flag of Europe.png|25px]] These weak fighters show up in droves in Multi-Man Smash. There are Brawler, Sword Fighter and Gunner types. Since they're based on the Mii characters saved on your Nintendo 3DS system or Wii U console, you could end up battling friends and family! But forget that – just take them out! Any strong-ish attack does the trick. |
|- |
|- |
||
| − | |[[Master Hand]]||Clear [[Classic Mode]] with five characters||[[File:SSB3DSTrophyMasterHand.png]]||The mysterious Master Hand is the source of creation in the Smash Bros. universe. He appears in Final Destination when all other rivals are defeated. He fights with a diverse move set and only grows stronger if you make him angry. If you know when to fight and when to dodge, you'll take him down! |
+ | |[[Master Hand]]||Clear [[Classic Mode]] with five characters||[[File:SSB3DSTrophyMasterHand.png]]||[[File:Flag of North America.png|25px]] The mysterious Master Hand is the source of creation in the Smash Bros. universe. He appears in Final Destination when all other rivals are defeated. He fights with a diverse move set and only grows stronger if you make him angry. If you know when to fight and when to dodge, you'll take him down!<br>[[File:Flag of Europe.png|25px]] Master Hand personifies creation in the Smash Bros. universe. After defeating all your rivals, you face him in Final Destination. He forms various shapes to unleash a wide range of attacks, and on high intensities he'll become speedier, deal more damage and launch you further. To beat him, you'll need to know when to attack and when to hold back. |
|- |
|- |
||
| + | |[[Crazy Hand]]||Clear [[Classic Mode]] with all fighters.||[[File:SSB3DSTrophyCrazyHand.png]]||[[File:Flag of North America.png|25px]] The erratic Crazy Hand embodies destruction in the Smash Bros. universe. You can see madness in the way he moves and the attacks he unleashes. Pairing up with Master Hand makes him an especially dangerous foe. Be ready for an intense battle when their laughter fills the air.<br>[[File:Flag of Europe.png|25px]] The personification of destruction in the Smash Bros. universe. There's madness in every move he makes. He'll drop bombs on you, squeeze you and squash you into the ground. When Master Hand and Crazy Hand pair up, they're incredibly dangerous. Prepare yourself for an intense battle when their laughter fills the air. |
||
| − | |[[Crazy Hand]]||TBA||[[File:SSB3DSTrophyCrazyHand.png]]||TBA |
||
|- |
|- |
||
| + | |[[Master Core]]||TBA||[[File:SSB3DSTrophyMasterCore.png]]||[[File:Flag of North America.png|25px]] This sinister being will appear from Master Hand. A bunch of black objects, called "Swarm," will gather and mimic a variety of shapes, changing its attack pattern with each new form. After taking enough damage, it will reveal even more forms. Defeat the Swarm's forms to reveal its true core.<br>[[File:Flag of Europe.png|25px]] This fearsome being is what master hand becomes when he transforms. The black mass around it, known as the "swarm", mimics the shape of beasts, blades and more, and changes its attack pattern with each transformation. At higher intensity levels, it'll take on even more forms. Defeat the swarm to reveal the true core. |
||
| − | |[[Master Core]]||TBA||[[File:SSB3DSTrophyMasterCore.png]]||TBA |
||
|- |
|- |
||
| − | |[[Bytan]]||TBA||[[File:SSB3DSTrophyBytan.png]]||These spherical enemies made their first |
+ | |[[File:Flag of North America.png|25px]] [[Bytan]]<br>[[File:Flag of Europe.png|25px]] Bytans||TBA||[[File:SSB3DSTrophyBytan.png]]||[[File:Flag of North America.png|25px]] These spherical enemies made their first appearance in Super Smash Bros. Brawl. They have a white portion underneath with sharklike teeth and an upper portion with a giant red eye. They attack by rolling straight into you. Try not to leave them alone for too long—they multiply by popping more Bytans out of their eyes!<br>[[File:Flag of Europe.png|25px]] These spherical enemies made their first appearance in Super Smash Bros. Brawl. They have a white portion underneath with shark-like teeth, and an upper portion with a giant red eye. They attack by rolling straight into you. Try not to leave them alone for too long, because they multiply by popping more Bytans out of their eyes! |
|- |
|- |
||
| − | |[[Gamyga]]||TBA||[[File:SSB3DSTrophyGamyga.png]]||These tall, tower-like things first showed up as enemies in Super Smash Bros. Brawl. The head is really the main part of its body, with the other four components acting as bases. You could always take the head out first, but if you are height challenged, you can attack the bases first. |
+ | |[[Gamyga]]||TBA||[[File:SSB3DSTrophyGamyga.png]]||[[File:Flag of North America.png|25px]] These tall, tower-like things first showed up as enemies in Super Smash Bros. Brawl. The head is really the main part of its body, with the other four components acting as bases. You could always take the head out first, but if you are height challenged, you can attack the bases first.<br>[[File:Flag of Europe.png|25px]] These tall, tower-like things first showed up as enemies in Super Smash Bros. Brawl. The head is really the main part of its body, with the other four components acting as bases. You could always take the head out quickly, but if you're too short (and you probably are), you can cut it down to size by chopping away at the bases first. |
|} |
|} |
||
| + | |||
| + | ==Notes== |
||
| + | *The sprite version of the Glice trophy contains a rendering error. The trophy seen in the Gallery uses additive transparency to make the icy mist appear lighter than its background; as this typically isn't possible in sprites, the mist appears as large black blobs. |
||
| + | |||
[[Category:Trophies (SSB3DS/WU)]] |
[[Category:Trophies (SSB3DS/WU)]] |
||
[[Category:Super Smash Bros. universe]] |
[[Category:Super Smash Bros. universe]] |
||
[[Category:Super Smash Bros. 3DS/Wii U]] |
[[Category:Super Smash Bros. 3DS/Wii U]] |
||
| + | [[Category:Lists]] |
||
Latest revision as of 16:53, 21 March 2024
The following is a list of the trophies from the Super Smash Bros. series that appear in the 3DS. There are 44 trophies in total.
| Name | How to Unlock | Picture | Description |
| Mii Brawler | Classic Mode |  |
|
| Mii Brawler (Alt.) | All-Star | 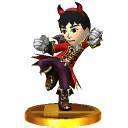 |
|
| Classic Mode | 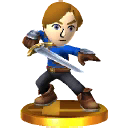 |
||
| All-Star | 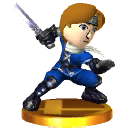 |
||
| Mii Gunner | Classic Mode | 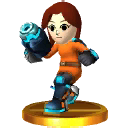 |
|
| Mii Gunner (Alt.) | All-Star |  |
|
| Smash Ball | TBA |  |
|
| Assist Trophy | TBA |  |
|
| Crates | TBA |  |
|
| Rolling Crates | TBA |  |
|
| Barrels | TBA |  |
|
| Capsule | TBA | 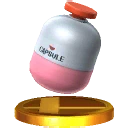 |
|
| Party Ball | TBA | 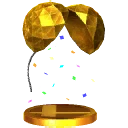 |
|
| Blast Box | Score 100,000 points or more in Target Blast |  |
|
| Sandbag | Reach a total of 49,212 ft. in the Home-Run Contest between all fighters' high scores. |  |
|
| Food | TBA | 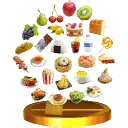 |
|
| Timer | TBA | 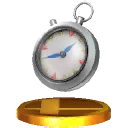 |
|
| Beam Sword | TBA | 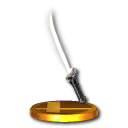 |
|
| Home-run Bat | Play Home-Run Contest for the first time on the 3DS |  |
|
| Ray Gun | TBA |  |
|
| Drill | TBA |  |
|
| Motion-Sensor Bomb | TBA |  |
|
| Gooey Bomb | TBA |  |
|
| Smoke Ball | TBA |  |
|
| Bumper | TBA | 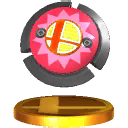 |
|
| Team Healer | TBA | 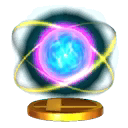 |
|
| Smash Run Power-ups | TBA |  |
|
| Powers | TBA | 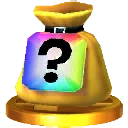 |
|
| Custom Part | TBA | 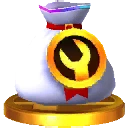 |
|
| Gold (Smash Run) | TBA | 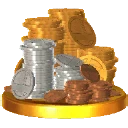 |
|
| Gold (Classic) | TBA | 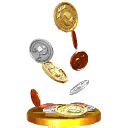 |
|
| Glire | TBA | 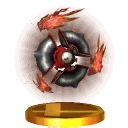 |
|
| Glice | TBA | 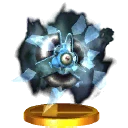 |
|
| Glunder | TBA |  |
|
| Poppant | TBA | 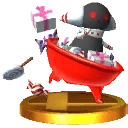 |
|
| Roturret | TBA | 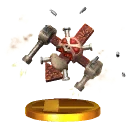 |
|
| Mites | TBA |  |
|
| Generator | TBA | 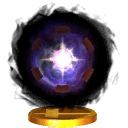 |
|
| Fighting Mii Team | TBA |  |
|
| Master Hand | Clear Classic Mode with five characters | 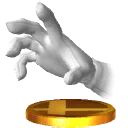 |
|
| Crazy Hand | Clear Classic Mode with all fighters. | 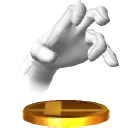 |
|
| Master Core | TBA |  |
|
| TBA |  |
||
| Gamyga | TBA | 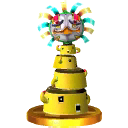 |
Notes
- The sprite version of the Glice trophy contains a rendering error. The trophy seen in the Gallery uses additive transparency to make the icy mist appear lighter than its background; as this typically isn't possible in sprites, the mist appears as large black blobs.